SP - Creating a survey
- Iryna Ihnatiuk
This day has come! We are happy to announce v4.0 of Surveys for Jira – the most configurable and powerful survey app on the market – and it is stronger than ever.
This page describes how you can create a survey for versions 4.0 and above. The concepts and logic are similar to the previous versions but for your convenience we have kept documentation for the previous versions here.
Prerequisites
- Ensure that your user has Admin permissions in the Jira project where you want to create a survey
- Ensure that you have Surveys for Jira installed and configured
- Ensure that you have the necessary project(s) selected for the surveys
Creating a survey
The quickest you can create a survey is with just one click so you can start on your survey journey in less than a minute. Click Create 1 Click Survey and that's it. It's created using the most standard settings like a 5-star rating scale and all other fields pre-filled already. Just activate it in the survey table and you are ready to go!
But you are probably here for configurability and freedom. Here's how you create a survey with all that:
- In the Jira project where you want to create a survey, go to the project settings.
- In the SURVEYS FOR JIRA section on the left panel, click Surveys, which will open the Project Surveys page.
- Click Add New Survey.
- Go through the survey wizard and fill out the necessary fields as shown in the sections below.
- Click Save.
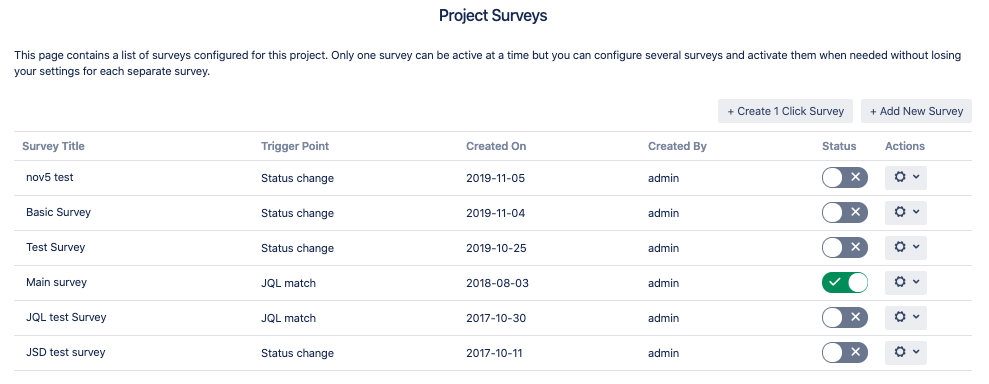
- After you finish configuring survey settings, make sure you activate this survey in the list of surveys for this project.
- There can be only one active survey per Jira project. Thus, when you activate a survey, another survey that is active at the moment gets deactivated.
Survey tabs
The Email tab is used for specifying details on how a survey email will look and which content it will have.
| Field | Description | |||||||||||||||||
|---|---|---|---|---|---|---|---|---|---|---|---|---|---|---|---|---|---|---|
| Survey Title | Deprecated in v4.0.0. In the new versions of Surveys for Jira you can edit the name for your surveys right in the surveys table, no need to go to the settings of each individual survey. Just click the name of the survey in the table and enter a new one. This will help you differentiate between your surveys. For instance, "Christmas branded survey", "Default survey", "Test survey on September 15" will instantly help you find the necessary one. | |||||||||||||||||
| Email Subject | Enter an email subject that you want your end users to see in the survey email. | |||||||||||||||||
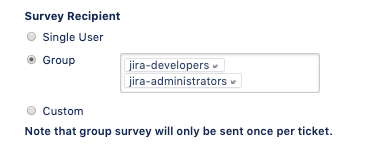
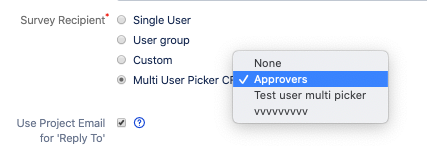
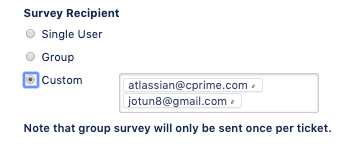
| Survey Recipient | In most cases, survey recipient would be the reporter of the ticket. In addition to that, our users also found it to be convenient to be able to select a different user or even send surveys to several recipients. Group survey feature is available starting with v4.0.0 of the app. You can send surveys to:
| |||||||||||||||||
| Use project email for 'Reply To' | By default, the surveys are sent from Jira service account, and people cannot reply to the survey emails. You can opt to select the email from the project settings as a reply-to email for the surveys. | |||||||||||||||||
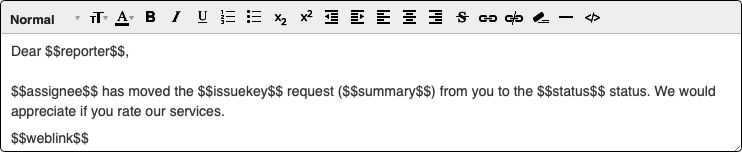
| Email Body | Here you can design a body of your survey that the end user will receive. You can use the placeholder variables in order to personalize your email template. To add a placeholder variable just click it in a list of placeholders. The placeholder values wrapped by "$$" signs will be populated by the information submitted in the ticket that triggers the survey. The following placeholder variables are available:
Important This is critically important to insert the $$weblink$$ placeholder because it generates the URL to your survey. Preview button Click this button to get a sense how your survey email might look like for a survey recipient. | |||||||||||||||||
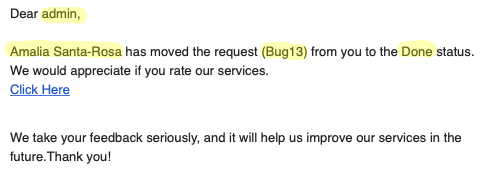
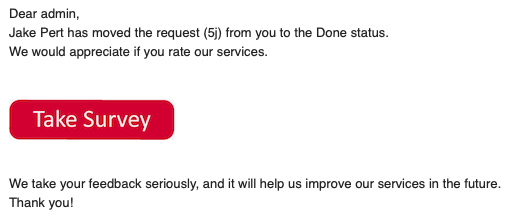
| Survey Email Include | You can customize your survey emails to include either a survey rating scale or to display a link to your survey form that you can also further customize. You can change the text for the link or show it as an image instead. For example, you can display the link to the survey as a button in your survey email. Use Upload resources to add a custom image, then edit the weblink and use the Insert resources button to use your visual assets.
| |||||||||||||||||
| Work With | Depending on how you want to shape your surveys you can choose to work with star rating or specify a yes/no question as the main survey question for the users. | |||||||||||||||||
| Rating Elements | Some companies find it useful to work with a number scale as an alternative to a star scale. This is just a matter of preference but we made sure that you can use both a star system (like Amazon or Google) or a number system (like Booking). For the number scale we have also implemented an option to include a zero rating as some companies find it useful in their surveying processes. | |||||||||||||||||
| Rates Count | You can choose to have a default 5 rating scale or decide to simplify it to less rating elements (3 - Good, 2 - Medium, 1 - Bad for instance) or have more granularity and change the rates count up till 10 for more sophisticated surveys. We highly recommend that you reset your survey statistics before changing your rating scale. Otherwise you risk to receive confusing data in your survey reports. For example, you had a 5 star survey and moved to the 10 star one. All positive feedback with 5 stars that meant happy and satisfied users would no longer look as such on a 10 star scale. |
Form
Your users are notified about the surveys via email and then can open a survey form by clicking a rating scale or a link embedded in the email. Use the Form tab to configure your surveys once the users open a survey form from the email. This is the essence of the survey where you put all your survey questions.
| Field | Description |
|---|---|
| 'Form' section | |
| Here you specify the introductory text for your survey form and define general survey form settings. | |
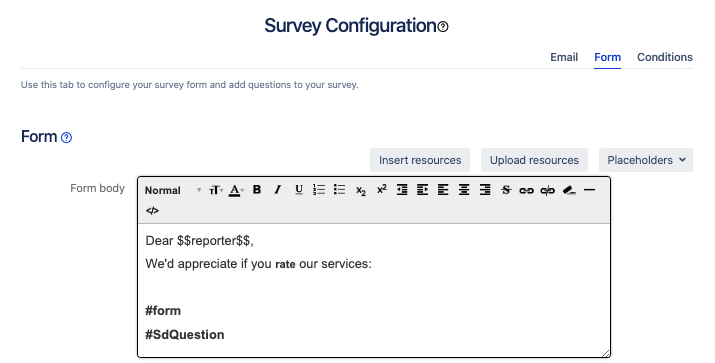
| Form body | Enter an introductory text for your survey. Use a WYSIWYG editor to build your own template. You have to include #form and #SdQuestion in the end. This shows the form with questions that you set up in the survey. You can use CSS to give a branded look to your surveys - pumpkin rates for the Halloween time surveys, smileys for April 1, company logo or corporate background are just among the few ideas of what's possible. Click the </> button to upload your coded template. If you want to upload and reference images, use the Upload Resources and Insert Resources buttons.
|
| Ask user for a comment | If you would like your users to submit a comment along with their star rating, select "Yes" for this option. You can set up your surveys to ask for the comment only if a negative rating is given. |
| Thank you message | Appreciate feedback your users provide with this message. It's shown to the user after they submit survey answers. Alternatively, you can select not to notify a user. |
| URL for expired surveys | If for some reason, a user opens the survey which has already expired, they can be redirected to your Service Desk portal or any other URL that you specify in this field. For you to have accurate data there is no possibility to answer the survey again if it was answered already. If a person submits their feedback, goes to the email and tries to enter a survey again, they will be presented with a message and a link where they can submit more feedback or raise another ticket. Usually companies like to enter a URL for their Service Desk portal so that there is still connection with the users. |
| 'Questions' section | |
| Here you can add various types of questions to your survey, define their order, and define other question related settings. | |
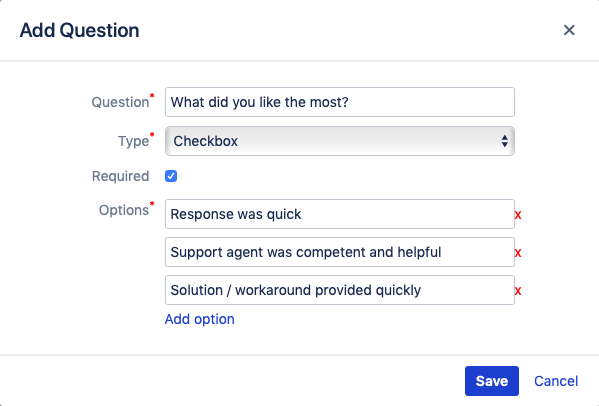
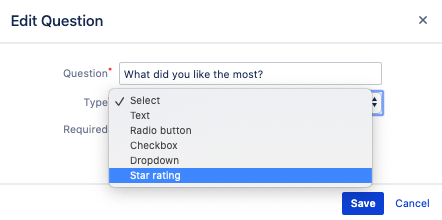
| Question dialog | Click Add Question to start adding custom questions to your survey. Once you do, the question dialog opens where you can specify the question text, whether a question is required to answer, add answer options for the single and multiple choice questions.
Starting with 4.0.3 version you can select Star Rating as an option for your Questions ranking.
|
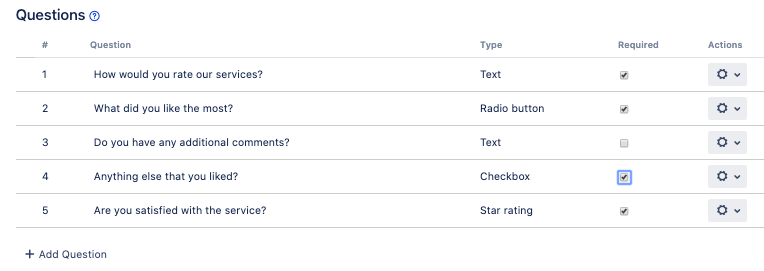
| Questions table | As you add questions to your survey they are displayed in the Questions table.
In the table you can perform the following actions with the survey questions:
|
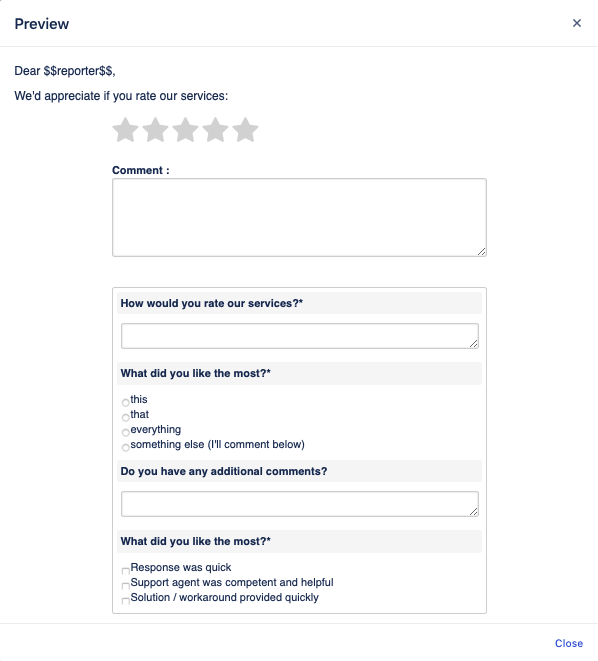
| Preview | Once you specify the form settings and add the necessary questions to your survey, it's time to save your changes. Once you do that, click the Preview button. It opens a dialog where you can see how your survey will look like for your users. This will not trigger any surveys and is a convenient way to do a quick health check without emailing anyone.
If you actually want to send a test survey, we recommend that you use the Test survey button. |
Conditions
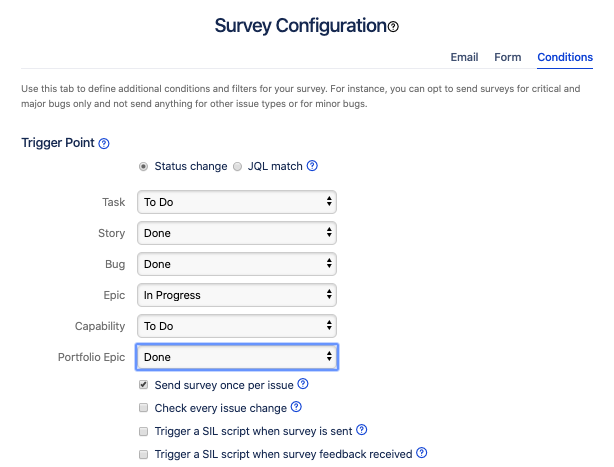
On the Conditions tab you define how your surveys should be sent, whether they should be filtered, and what actions should be done based on survey activity.
| Field | Description |
|---|---|
| 'Trigger Point' section | |
| Use this section to define whether to send survey for all tickets meeting trigger point conditions or only certain ones. | |
| Status change | Select the status that will trigger a survey. You can set different issue types separately. For instance, you can opt to only send surveys for the "Bug" issue type.
|
| JQL match | You can create a custom JQL query to serve as a trigger point for the survey. Then you can just select your saved filter for this option. For example, you can survey on the tickets that belong to a certain product component or filter out requests of a certain type only. Make sure your filter is NOT private. The filter must be shared with other users, groups, or projects that have access to tickets. |
| Send survey once per issue | Sometimes it happens that a ticket is resolved, a recipient replies to the survey and then for some reason the ticket is reopened, someone works on it and resolves a ticket again. This might trigger a survey to be sent to a recipient again, and sometimes this is exactly what the companies want (survey on how the service was provided this time) but sometimes companies wish not to overwhelm and exhaust their recipients with too many surveys. You can opt to only send a survey once per issue. If a recipient answers a survey for the same ticket again, then the latest rating is shown in the ticket but you can see the history of the previous replies in the Survey Feedback tab and in the app reports. Note that group surveys - the ones that have multiple recipients – are only sent once per ticket. The results of a group survey are displayed as: the latest rating in the ticket, the average rating is shown in the Custom Table Report, and Survey Feedback tab and reports show answers from all recipients. |
| Check every issue change | Usually the survey triggers are checked when the ticket status changes but if you want you can run this check on every issue change. We recommend that you leave this checkbox clear unless you have a strong need for it. |
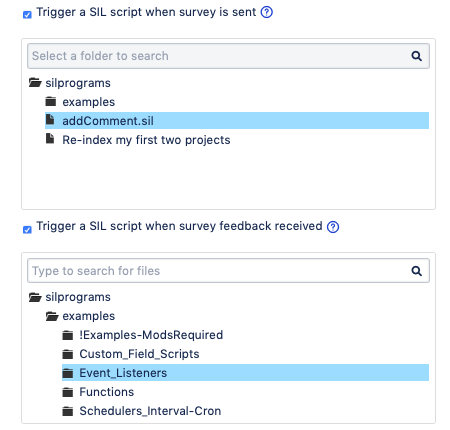
Trigger a SIL script when survey is sent Trigger a SIL script when survey feedback received | If you also use our other app Power Scripts, you can add automation to your surveys as well. Starting with v3.2.3 for Jira 7 and v3.3.3 for Jira 8, we have added the possibility for you to trigger other actions once the survey is sent or survey feedback is received. For instance, you can have an automatic comment posted in the ticket indicating that the survey was sent (as on the picture below) or change assignee, create another ticket, and so on. Now the endless possibilities of SIL are brought into Surveys for Jira.
|
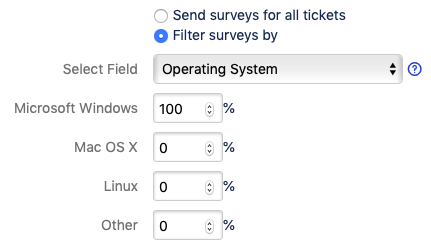
| 'Frequency' section | |
| You can further filter the surveys sent based on the values in the certain fields. For example, you can ask for feedback for every major bug but for the minor ones - send surveys for only 10% of those. | |
| Send surveys for all tickets | If you select this option, then surveys will be sent for all tickets in this project that meet the trigger conditions. |
| Filter surveys by | You can filter your surveys even further. By default, the app draws on the Priority field but you can select another single select custom field. Make sure your field is a single select type and has global context. Options for project-specific custom fields cannot be fetched. For example, you can:
|
Testing your surveys
You can send an actual survey to test the complete flow before you turn the survey functionality on for all your users. Once you click this button, a dialog form appears where you specify the following information:
- Send survey for – select a ticket for which you want to send a test survey. We recommend that you create a separate test ticket for that in order not to mix with your actual survey data.
- Test Recipient – even though you might have a different recipient in your survey settings, it's convenient to be able to just set your email manually so as not to spam the actual survey recipients and not to change any survey settings during testing.
That's it. Click Send, and the app will send a survey with all specified settings that you configured. That is you will be able to see how the email is shaped with the actual values instead of placeholders, how survey form looks like with all questions configured and whether the branded UI looks like you wanted to.
For testing purposes, ensure that the "Disable empty JQL queries" option in Jira settings (Administration![]() → System → General Configuration) is OFF.
→ System → General Configuration) is OFF.
You can answer the survey and then check how the rating and answers are displayed in the ticket, what data you receive in the reports.
Not that this button is only clickable when all conditions for sending an actual survey are met, that is all required fields are filled in and the Email body field contains the $$weblink$$ placeholder variable. This is to ensure that the app will be able to actually send a test survey.