Configuring settings in the Jira App is crucial to getting the most out of your Helpdesk+ application.
Accessing the app in Jira
Login into Jira
Select the more tab
Select Apps
Select the correct "Teams Helpdesk+ for Jira" application
Connection Status and Main Authorized User
You can view your connection status and change your Main Authorized User through the Jira App
You can disconnect your teams account by clicking the disconnect button. You can also add yourself as the main authorizer by clicking the Become main authorizer.
General Settings
Here you can configure your basic settings:
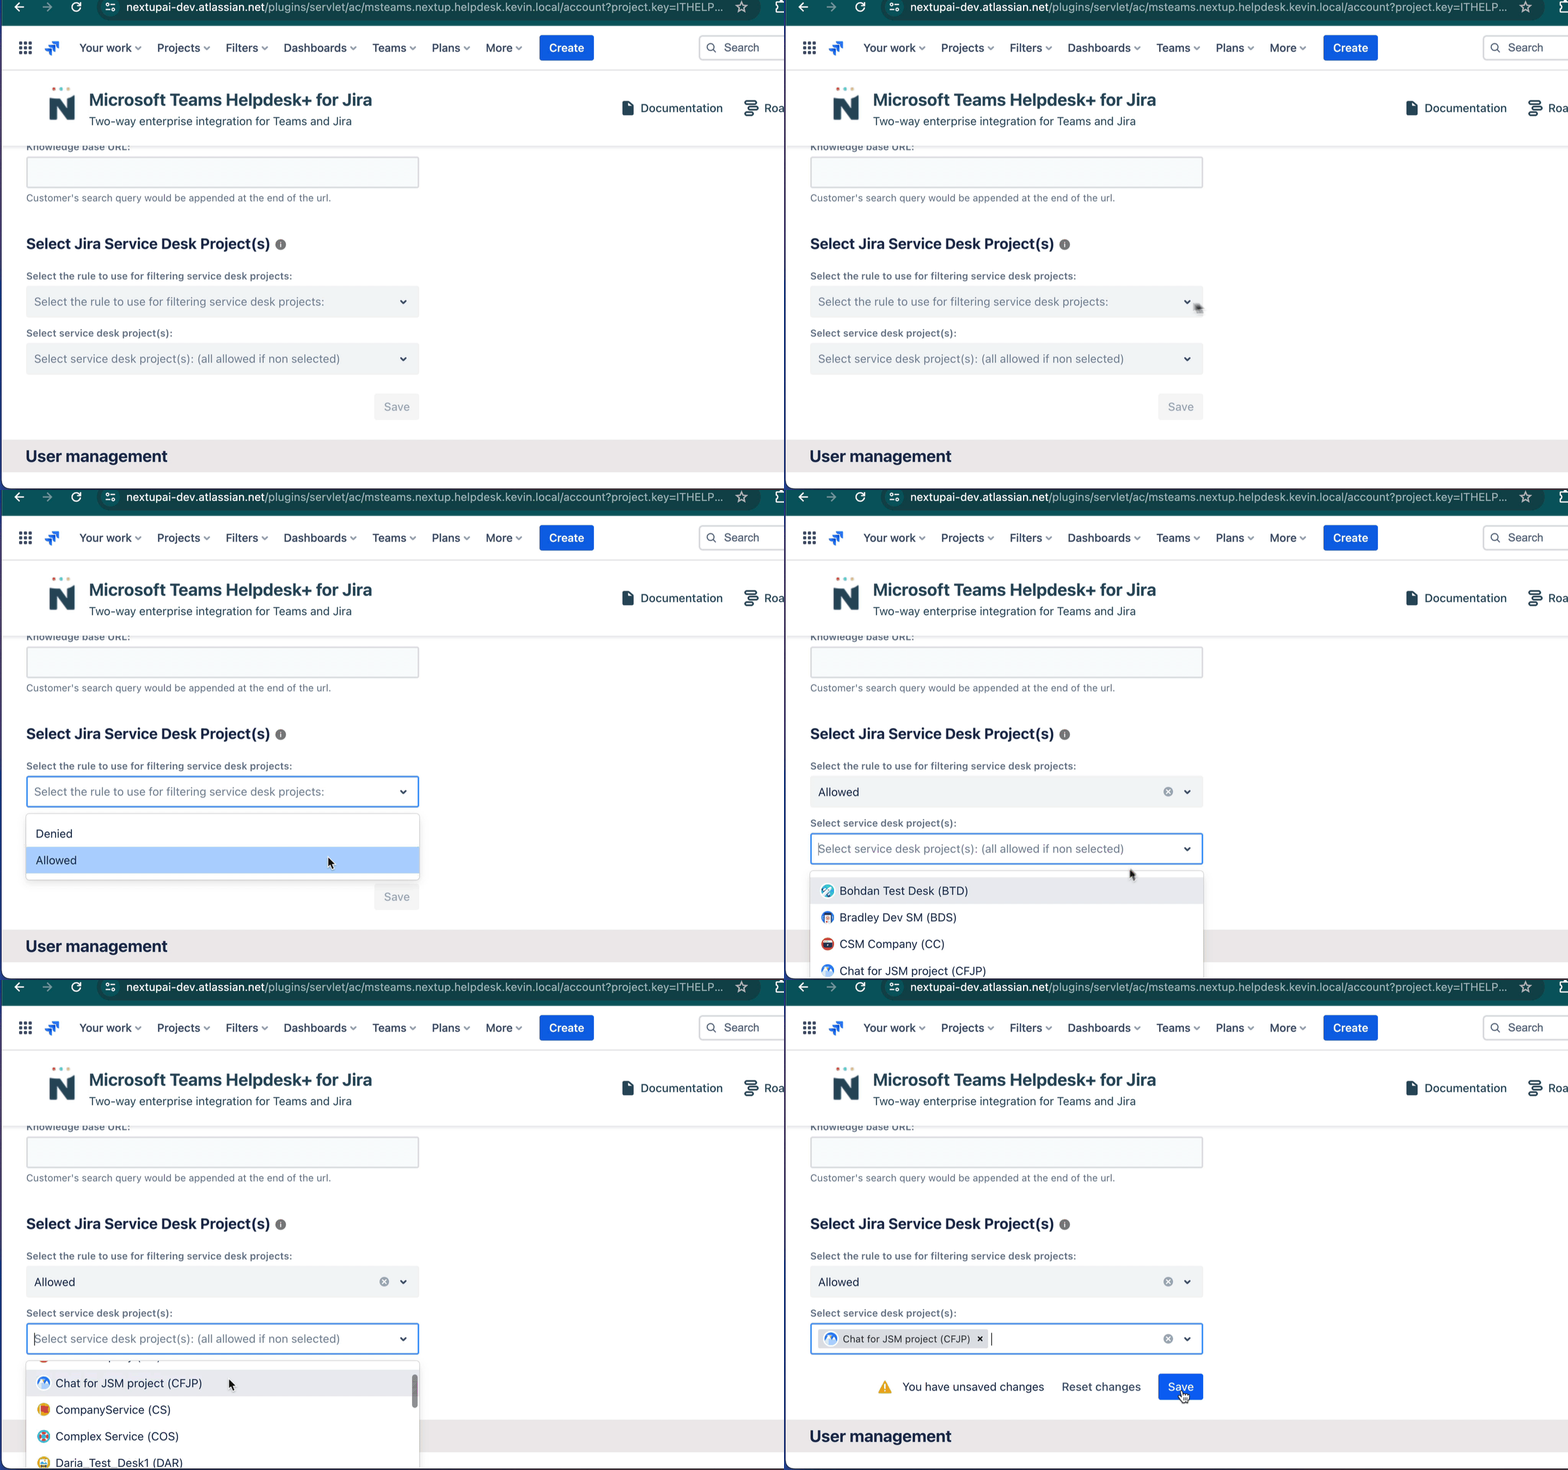
Select Jira Service Desk Project(s)
Open the Jira app and select the correct "Teams Helpdesk+ for Jira" application
Scroll down to "Select Jira Service Desk Project(s)"
Select the rule to use for filtering service desk projects:
Choose either "Allowed" or "Denied" to filter service desk projects.
Then, select the specific service desks to allow or deny for channel configuration.
Select Save


