GAIA - Creating a project
- Iryna Ihnatiuk
Analytics
This section explains how to to create a project using Gaia for Jira. Projects can be created in two flavours, with, or without a Confluence space.
Pre-requisites
This tutorial was written considering that :
- you have administrative rights to create projects in Jira;
- you have Confluence installed (optional).
Creating a project
Creating a project is a simple operation, although the steps may differ depending on the type of template you are using.
To create a project with Gaia for Jira, do the following:
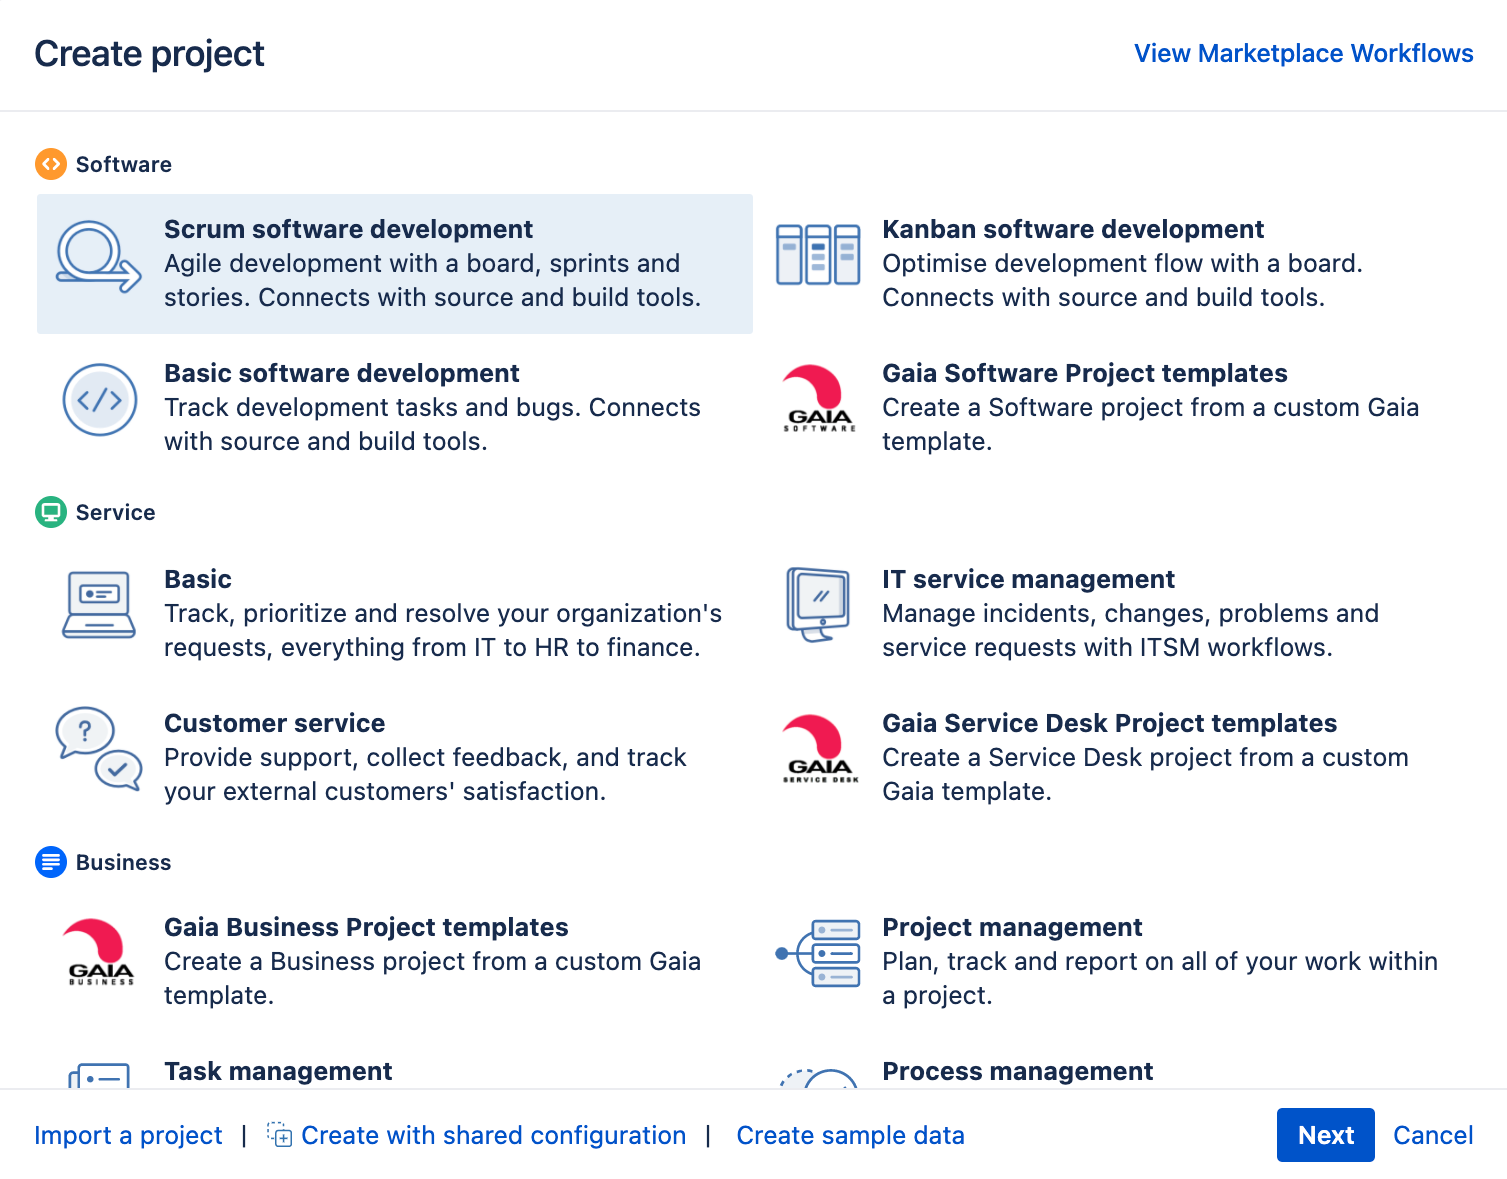
1.In Jira, locate the Projects from the top menu and select Create Project. In the dialog, select the "Gaia Project templates" in the necessary project type and click Next.
Creating projects requires being an administrator. Please contact your system administrator to create a new project.
2. Select a project template:
2.1. Project templates consist of a combination of predefined settings and Issues file (optional) that you want to import.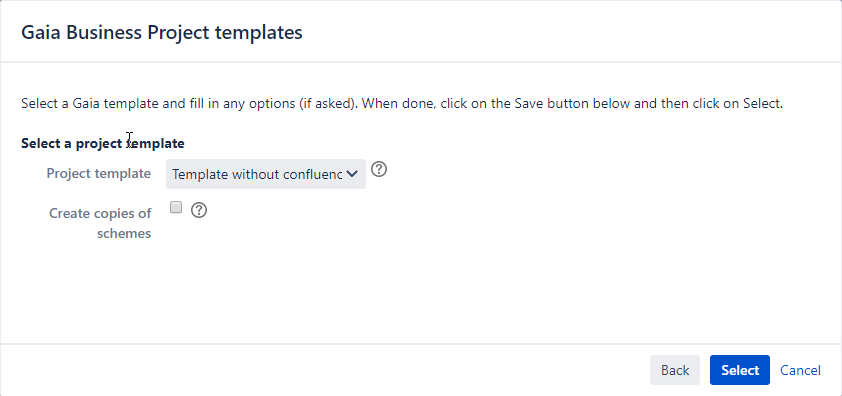
Check the "Create copies of schemes" option if you want to create a copy for each scheme of the Gaia template that was indicated as needed to be duplicated and assign those copies to the project.
2.2. If the selected project template consists of a predefined Confluence space, you will be asked to enter your Confluence credentials on the right side of the dialog.
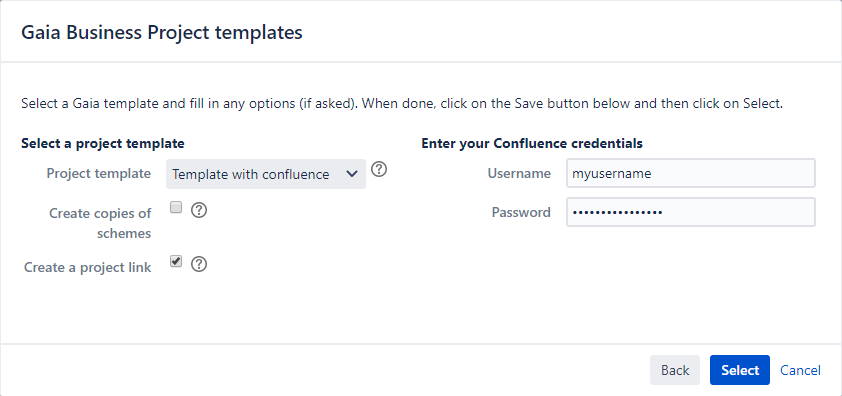
The "Create a project link" option, when checked, will create a link between the new Jira project and the new Confluence space. This link is needed if you are planning to use the Gaia Activity - Task Creation Automation app with the Page Tree Template app.
Note
Please note that the Confluence user MUST either be an administrator or have Space creation privileges on the Confluence instance you are using.
You must enter a valid username and password, and you must make sure that you have the permissions to create a Confluence space. Contact your system administrator if you don't have the proper access to create a Confluence Space.
2.3. Project template with Tempo Team's setting enabled. When selecting a template that includes an Issues file and the option to include Tempo Team's values from issues is enabled, you will be asked to check Create a Tempo link option and enter your Jira credentials on the right side of the dialog. This is needed to process the Tempo Team values contained in an Issues file.
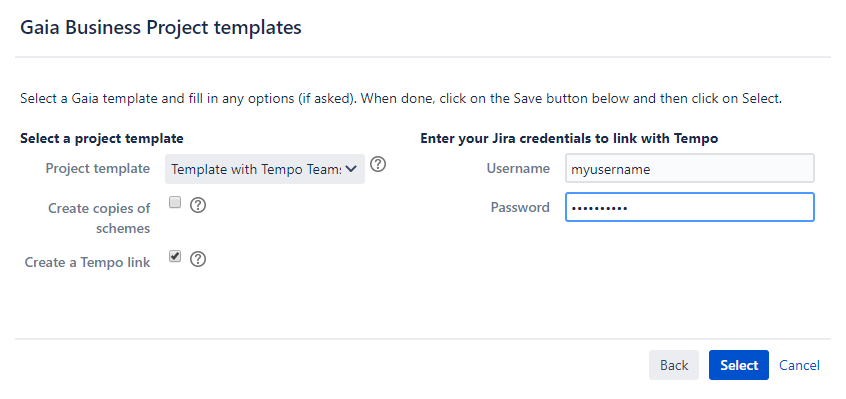
Tempo Team field
If you do not check the "Create a Tempo link" option or do not provide a valid Jira username and password, the Tempo Team field values contained in the Issues file will be simply omitted. The issues will be created but the Tempo Team fields will be empty.
In order for the Tempo Team's field values to be processed when importing an Issues file, 1) the Tempo plugin must be installed and enabled, 2) the template must have an Issues file associated with it and 3) the option to "include Tempo Team's values from the issues" must be enabled, 4) the option to "Create a Tempo link" must be checked and 5) a valid Jira username and password must be provided when creating the project.
3. Once the template is selected, you can click on the "Select" button to continue.
4. On the following screen, fill in the Project name and add a unique Project key. The same project key will be used for the Jira project and for the Confluence space. 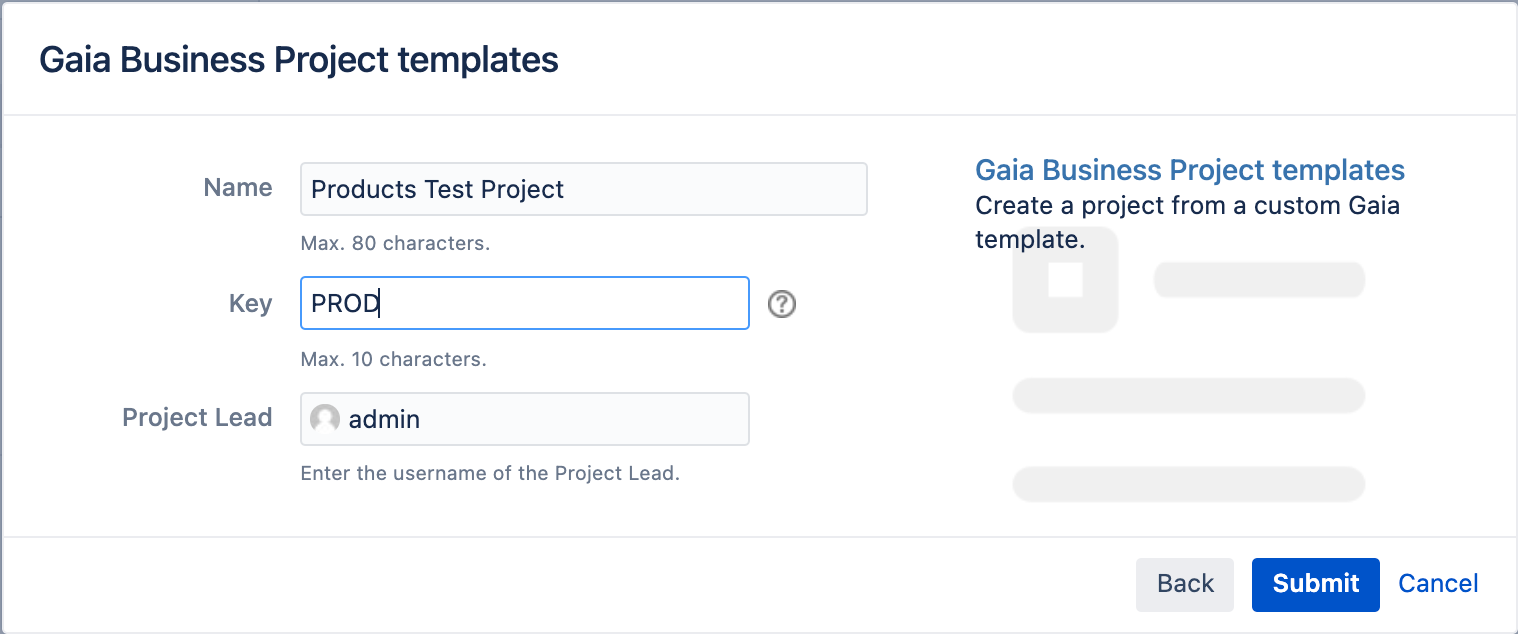
Please note that the project key will be used for Jira and Confluence. This means that it has to be unique on both Jira and Confluence.
5. When done, click the "Submit" button and go to your new project.
What's next
Now that you have a project, you can start working! Have fun.