User's guide
Customizer is available from the Bitbucket AddOns. Administrators are our users! Customizer allows an administrator to create their own links and content areas without writing any add-ons.
Table of Contents
Installation
Install
Simple go over to the Add-on Manager within your account on Bitbucket and find Customizer for Bitbucket.
Configuration
Once you've installed the add-on, you are ready to create links (web-items) and content areas (web-panels).
Getting there
Go to the Customizer Editor to begin. You'll find the link to the Customizer editor at the bottom of the left navigation of your account in Bitbucket.
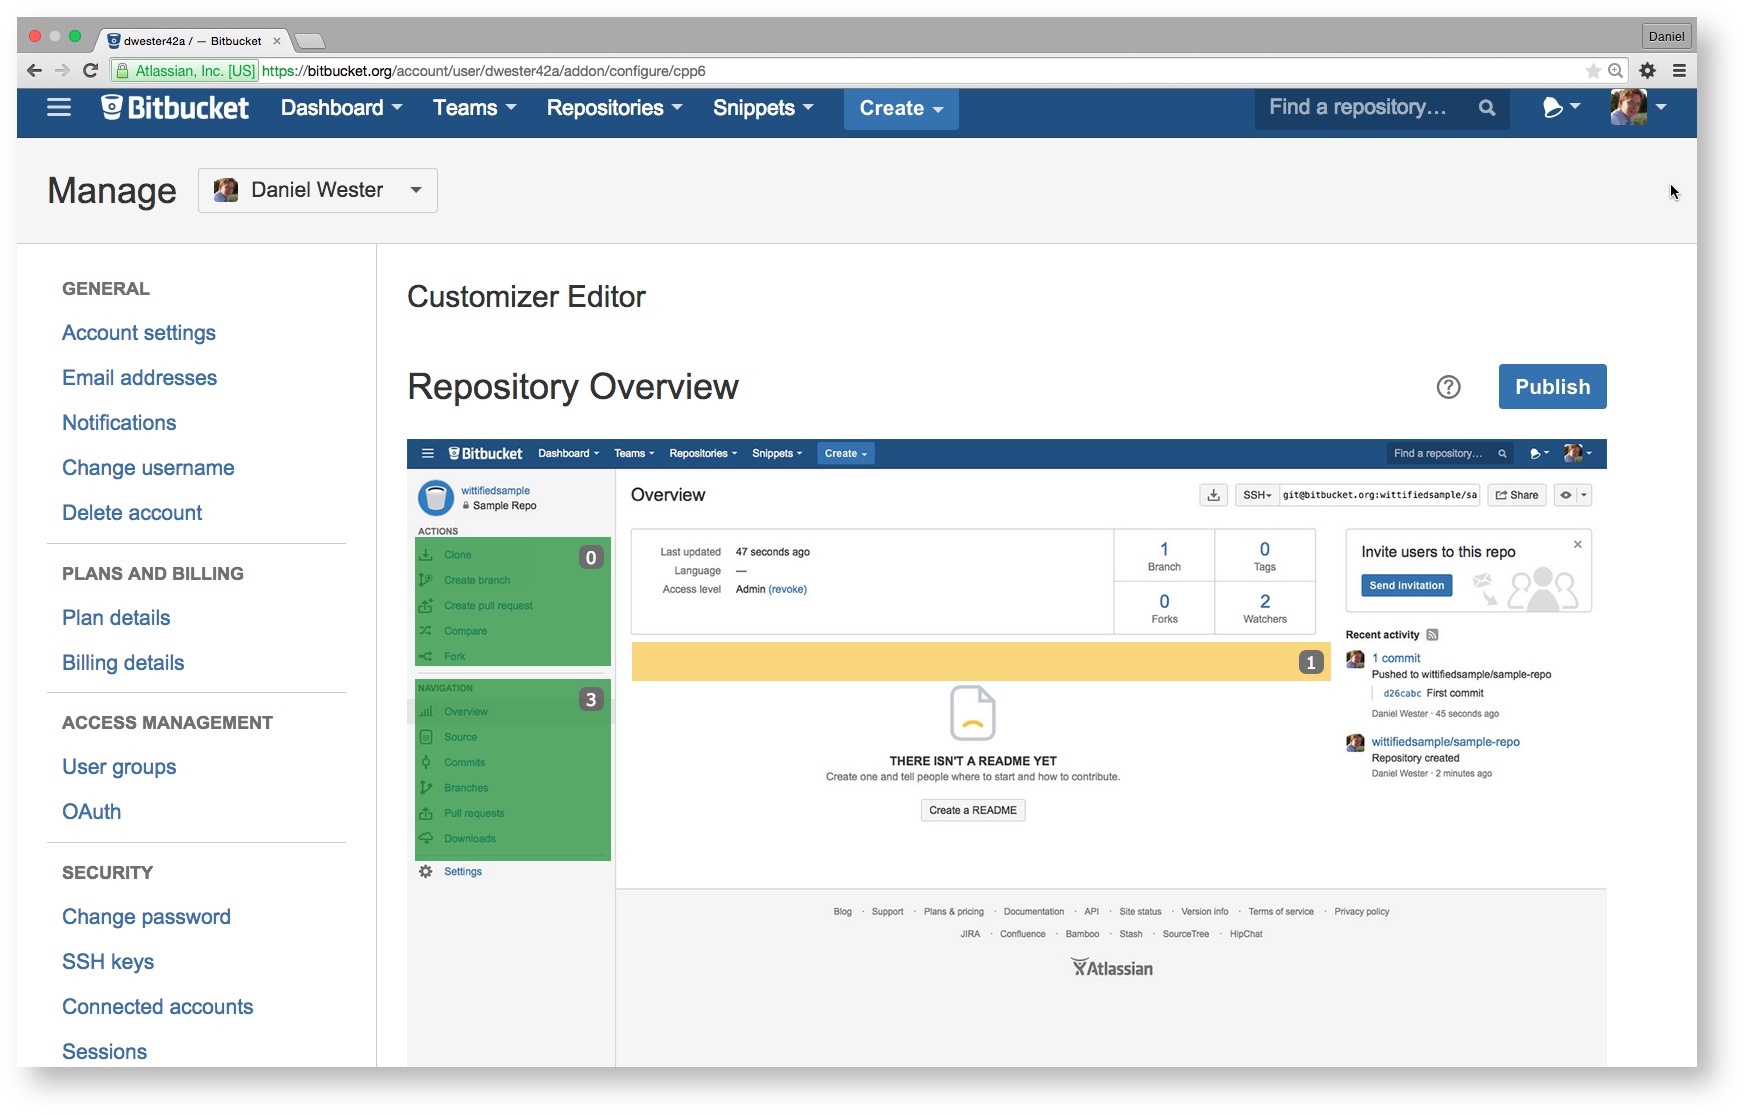
What you will see
- The editor will show you screengrabs of the places where you can add links (green areas) and where you can add content (yellow areas).
- It will also show you the number of items that have already been added in a particular area in a customizable area (see image to the right).
- If you have got unpublished changes, UPDATED will appear in the content area.
Adding a link (aka web-item)
To add a link, click on the green area for which you would like to add a link. This will open up a dialog box that presents you with a form to enter the relevant link information.
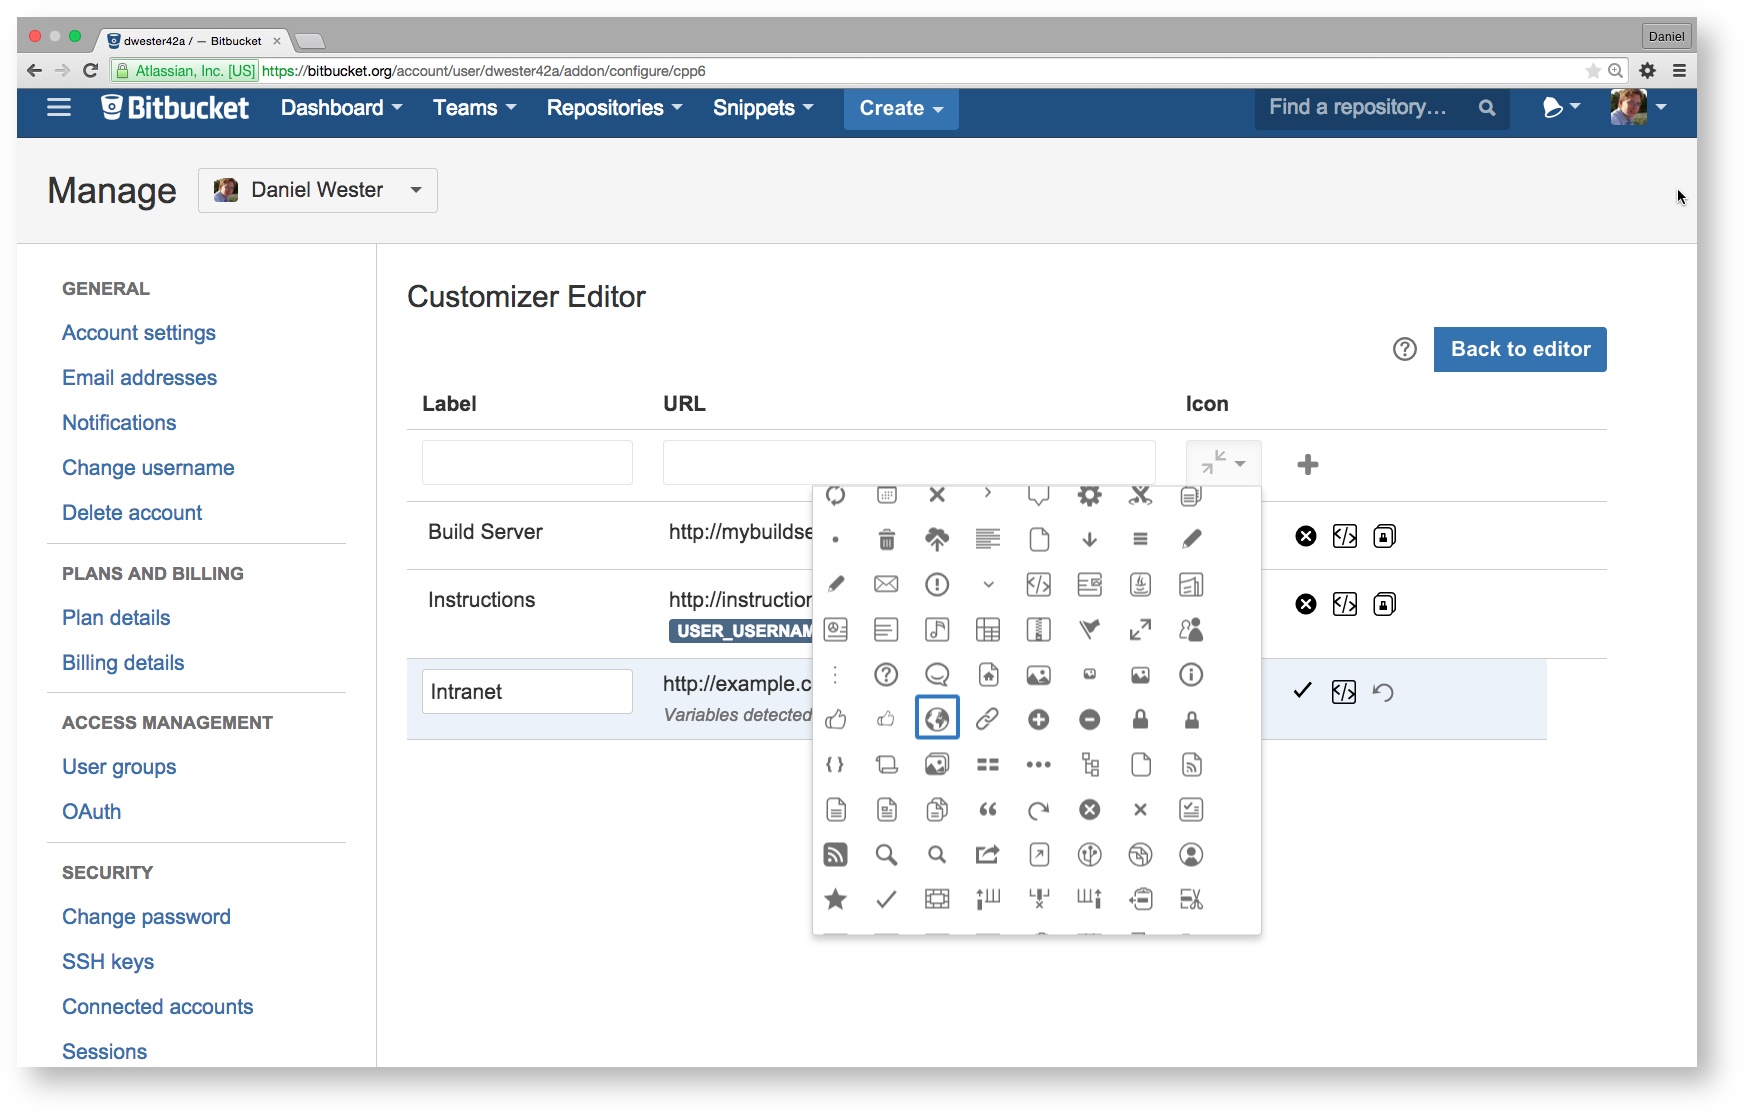
Basic links
To add a link, type in the link text (aka label) and the url then click the + (add) icon. Repeat as many links as you want.
Icons
When Bitbucket allows us to render icons alongside your links, we will allow you to select an icon when you create or edit the link.
Advanced editing
To add variables in the url, click on the icon. A new editor will open up allowing you to specify the variables to be used in that area when they are available.
In this editor, click on the item from the toolbar. That will place the variable into your content. You will not see a dynamic value at this point, that will be shown at the time of rendering.
Adding content to web-panels
To add content, click on the desired yellow area and a dialog will open up for you. Enter in a label, used for internal purposes only, and click on the edit () icon to enter in the html for the content. You're not limited to just HTML. You can now add css, javascript to the content area!
Using the Customizer JavaScript API, you can access the Bitbucket REST API (see http://restbrowser.bitbucket.org). In addition, Wittified maintains a page for snippets at Code snippets.
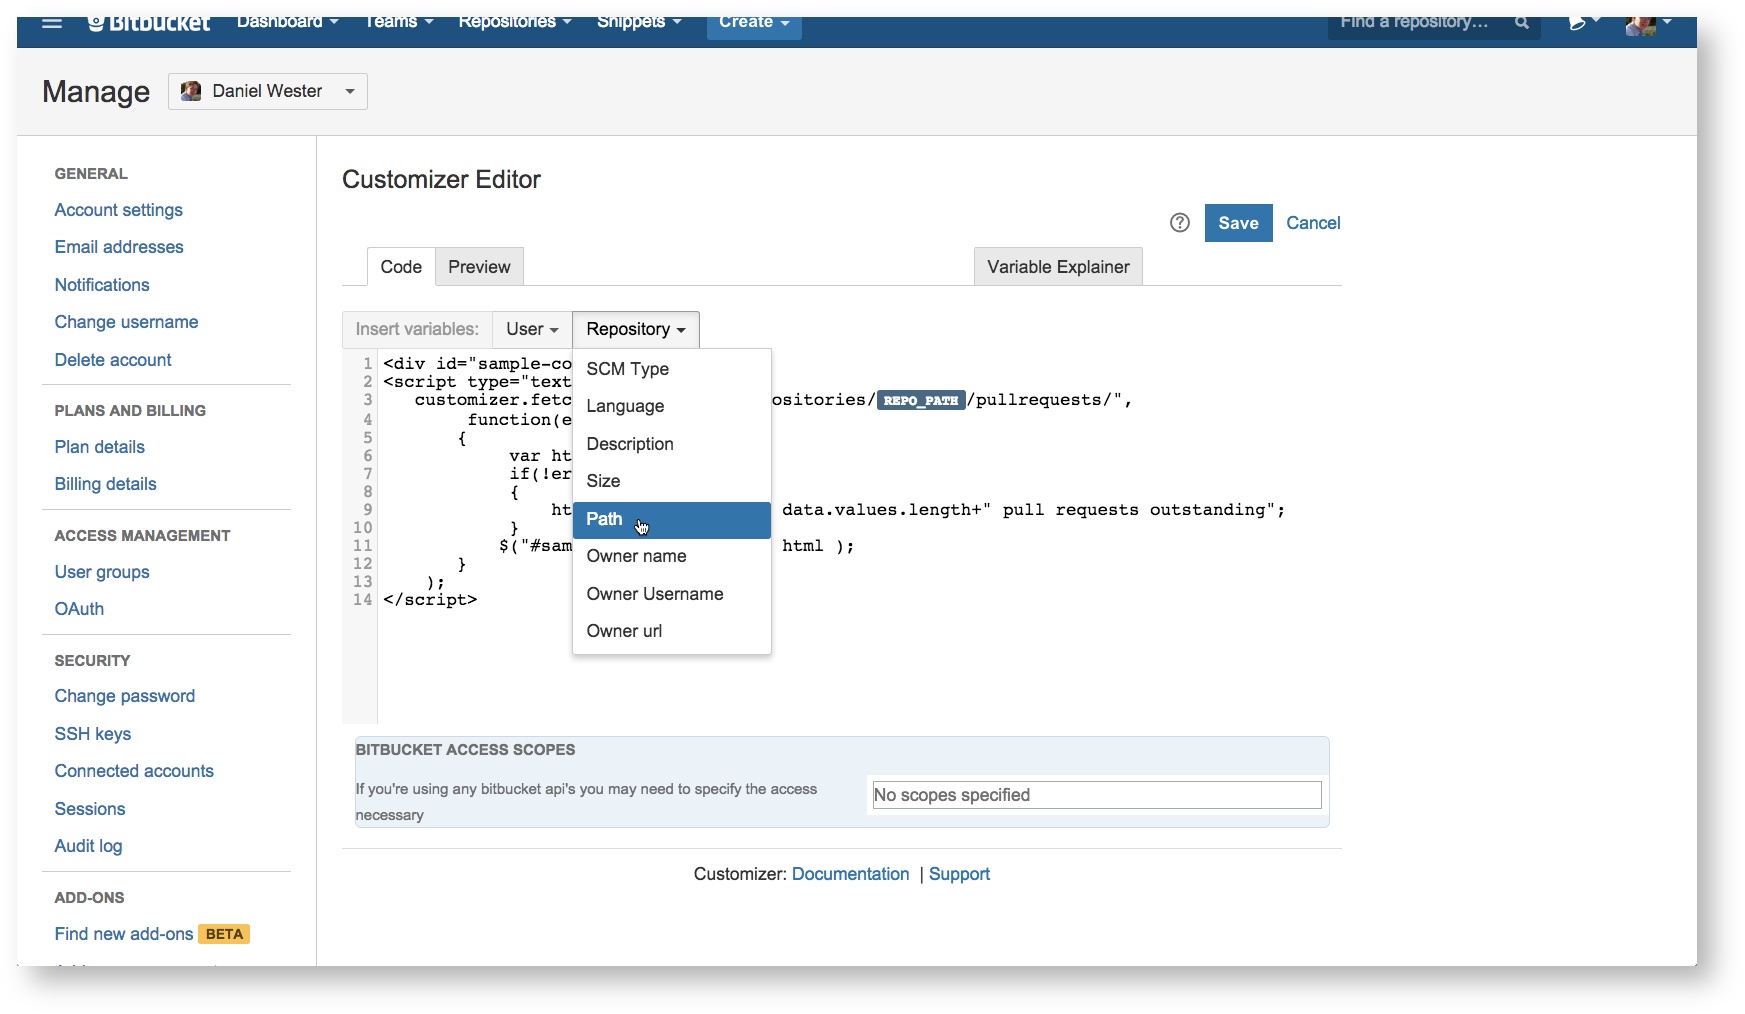
From the edit screen, you can add Bitbucket variables into your content by using the drop downs. You will not see a dynamic value at this point, that will be shown at the time of rendering. Click on the Variable Explainer tab to see sample content.
You can click on Preview to see a real time rendering of the content at any time.
Scopes
If you're using the Bitbucket REST API, you'll need to add the proper scopes to the add-on. For a description of the scopes see: https://developer.atlassian.com/static/bitbucket/concepts/bitbucket-rest-scopes.html . For more details about Bitbucket's rest api please see https://confluence.atlassian.com/display/BITBUCKET/Use+the+Bitbucket+REST+APIs or http://restbrowser.bitbucket.org.

Restricting view of links or content
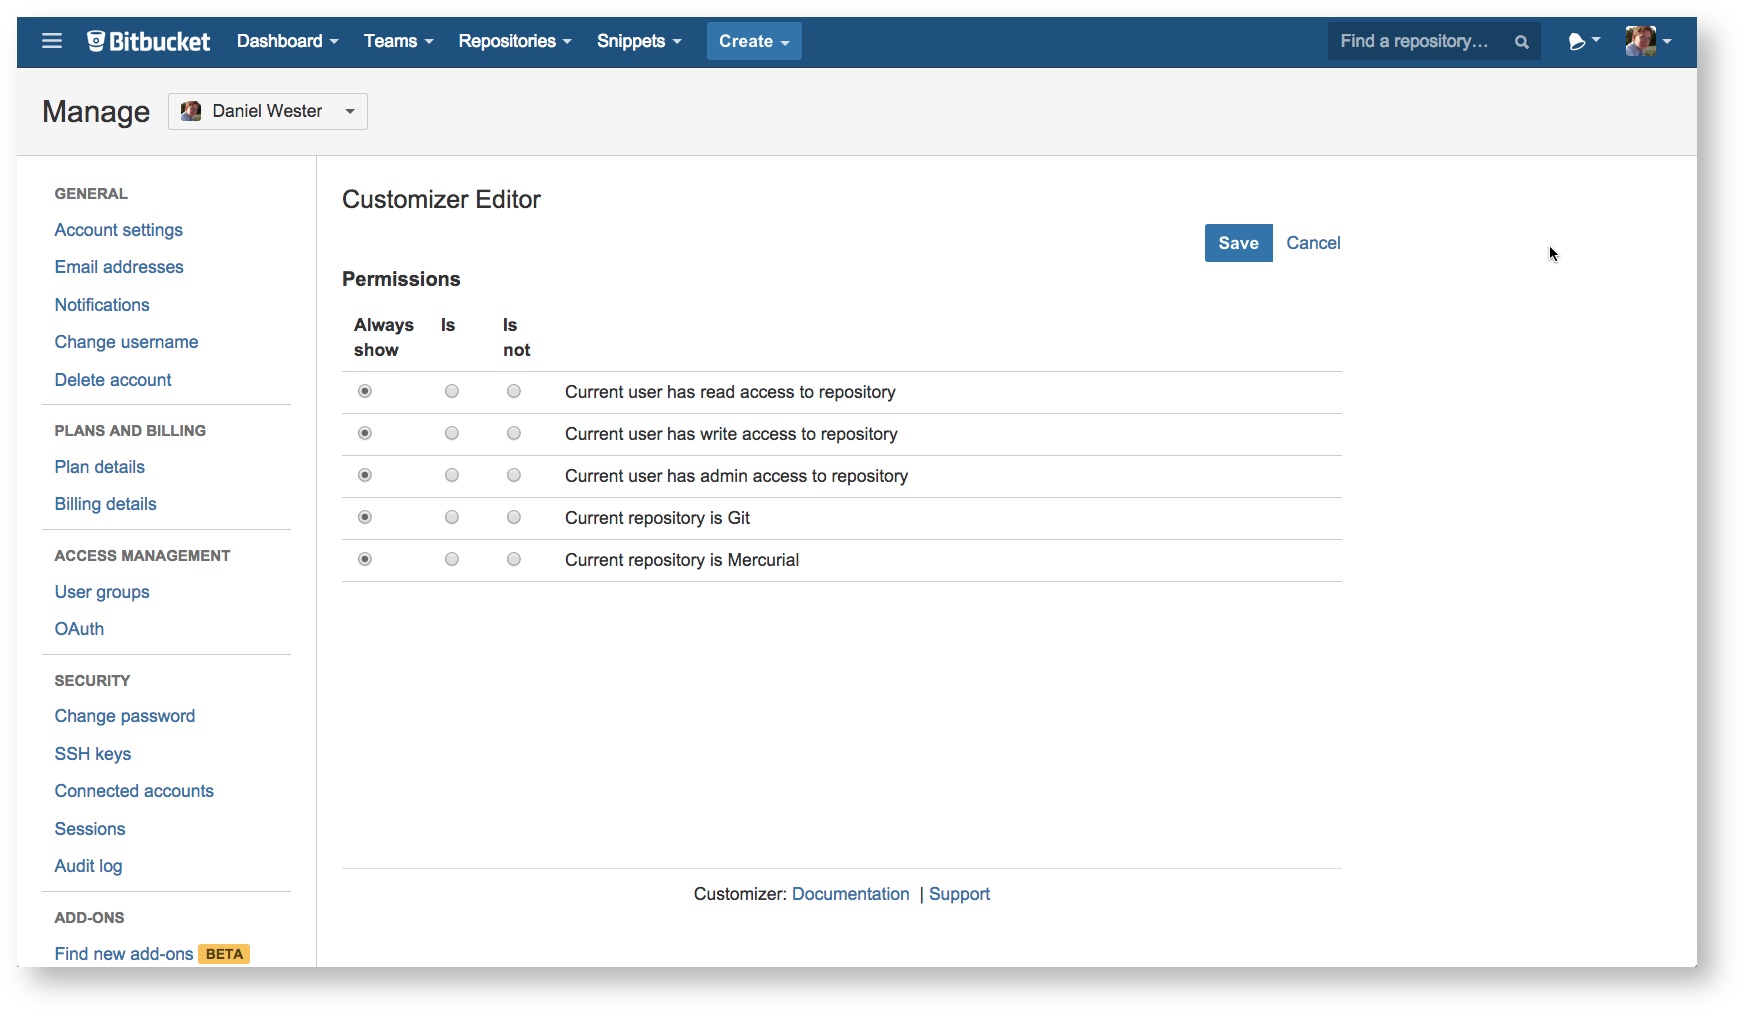
You can restrict the views on both links and content areas by clicking on the lock icon next to the link or web-panel in the list view. When you click on that link you get to the permissions screen (please see an image of this screen to the right).
The permissions screen gives you five scenarios in which you can set access restrictions:
- Current user has read access to repository
- Current user has write access to repository
- Current user has admin access to repository
- Current repository is Git
- Current repository is Mercurial
On each, you can choose from the following options:
| Option | Description |
|---|---|
| Doesn't matter | The add-on will not check restrictions for that line item. |
| Yes | The add-on will show the customization when this scenario proves true. |
| No | The add-on will show the customization when this scenario proves false. |
Publishing your changes
Once you've made all of your changes, just click "Publish." Customizer will generate the add-on and display a url for you to upload into the AddOn manager. If you've already uploaded the url once before, simply head on over to the AddOn manager and click update for your changes to be implemented immediately.
Limitations
In order to keep your add-on available for your and others to use, you must keep Customizer for Bitbucket installed on your instance. If you remove the Customizer for Bitbucket from your instance, any generated add-ons will be removed immediately.

Personal versus Account add-ons
Bitbucket recognizes two types of add-ons:
- Personal add-ons allow you to customize your own experience
- Account add-ons customizes the experience for other users visiting repositories owned by the account
Customizer for Bitbucket only supports account add-ons at this time. This may change in the future.
Need help?
If you need help while using Customizer for Bitbucket, click on the ![]() icon on any page.
icon on any page.