This page is about Canned Responses Pro Templates for Jira Cloud. Using Server or Data Center? Click here.
Each template can include an individually triggered sequence of actions that can be used in situations where you want to automate repetitive or routine tasks as well as enforce a consistent process for handling issues.
How to Trigger Jira Automation from a Template
How to Add Automated Actions
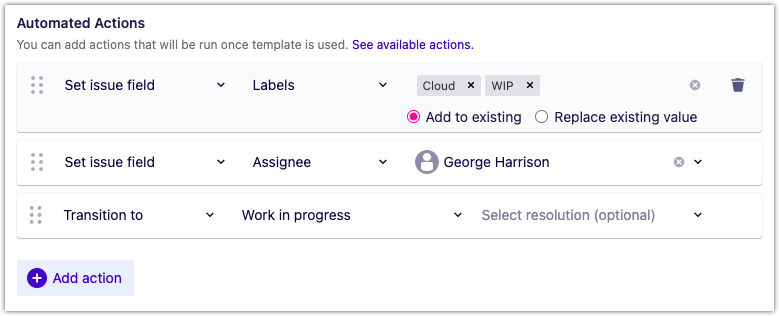
You can add actions while creating or editing a template. Automated actions can work without adding comments; if you want to, you can only use an automated action. Actions are run in sequential order, one after another, and you can change their order by dragging and dropping them. You have three options:
1) Set issue field
Using this, you can add or update a value in the custom fields automatically through the Canned Responses templates. The fields should be available on the proper screens.
Supported custom field types are:
Labels
Text Field (single line)
User Pickers
Resolution Field
Select List (single choice)
Select List (multiple choice)
Radio Button
2) Transition to
Using this, you can transition the issue from one status to another. In addition to status, you can set a value for the Resolution field if needed.
3) Trigger a web request
To external service
To trigger Jira Automation – The ability to trigger Jira Automation is flexible – you can basically do all the things that you can do with automation, including changing a specific issue (edit/append summary or description of the request, add comments, etc.), and changing, adding, etc. any other issues.
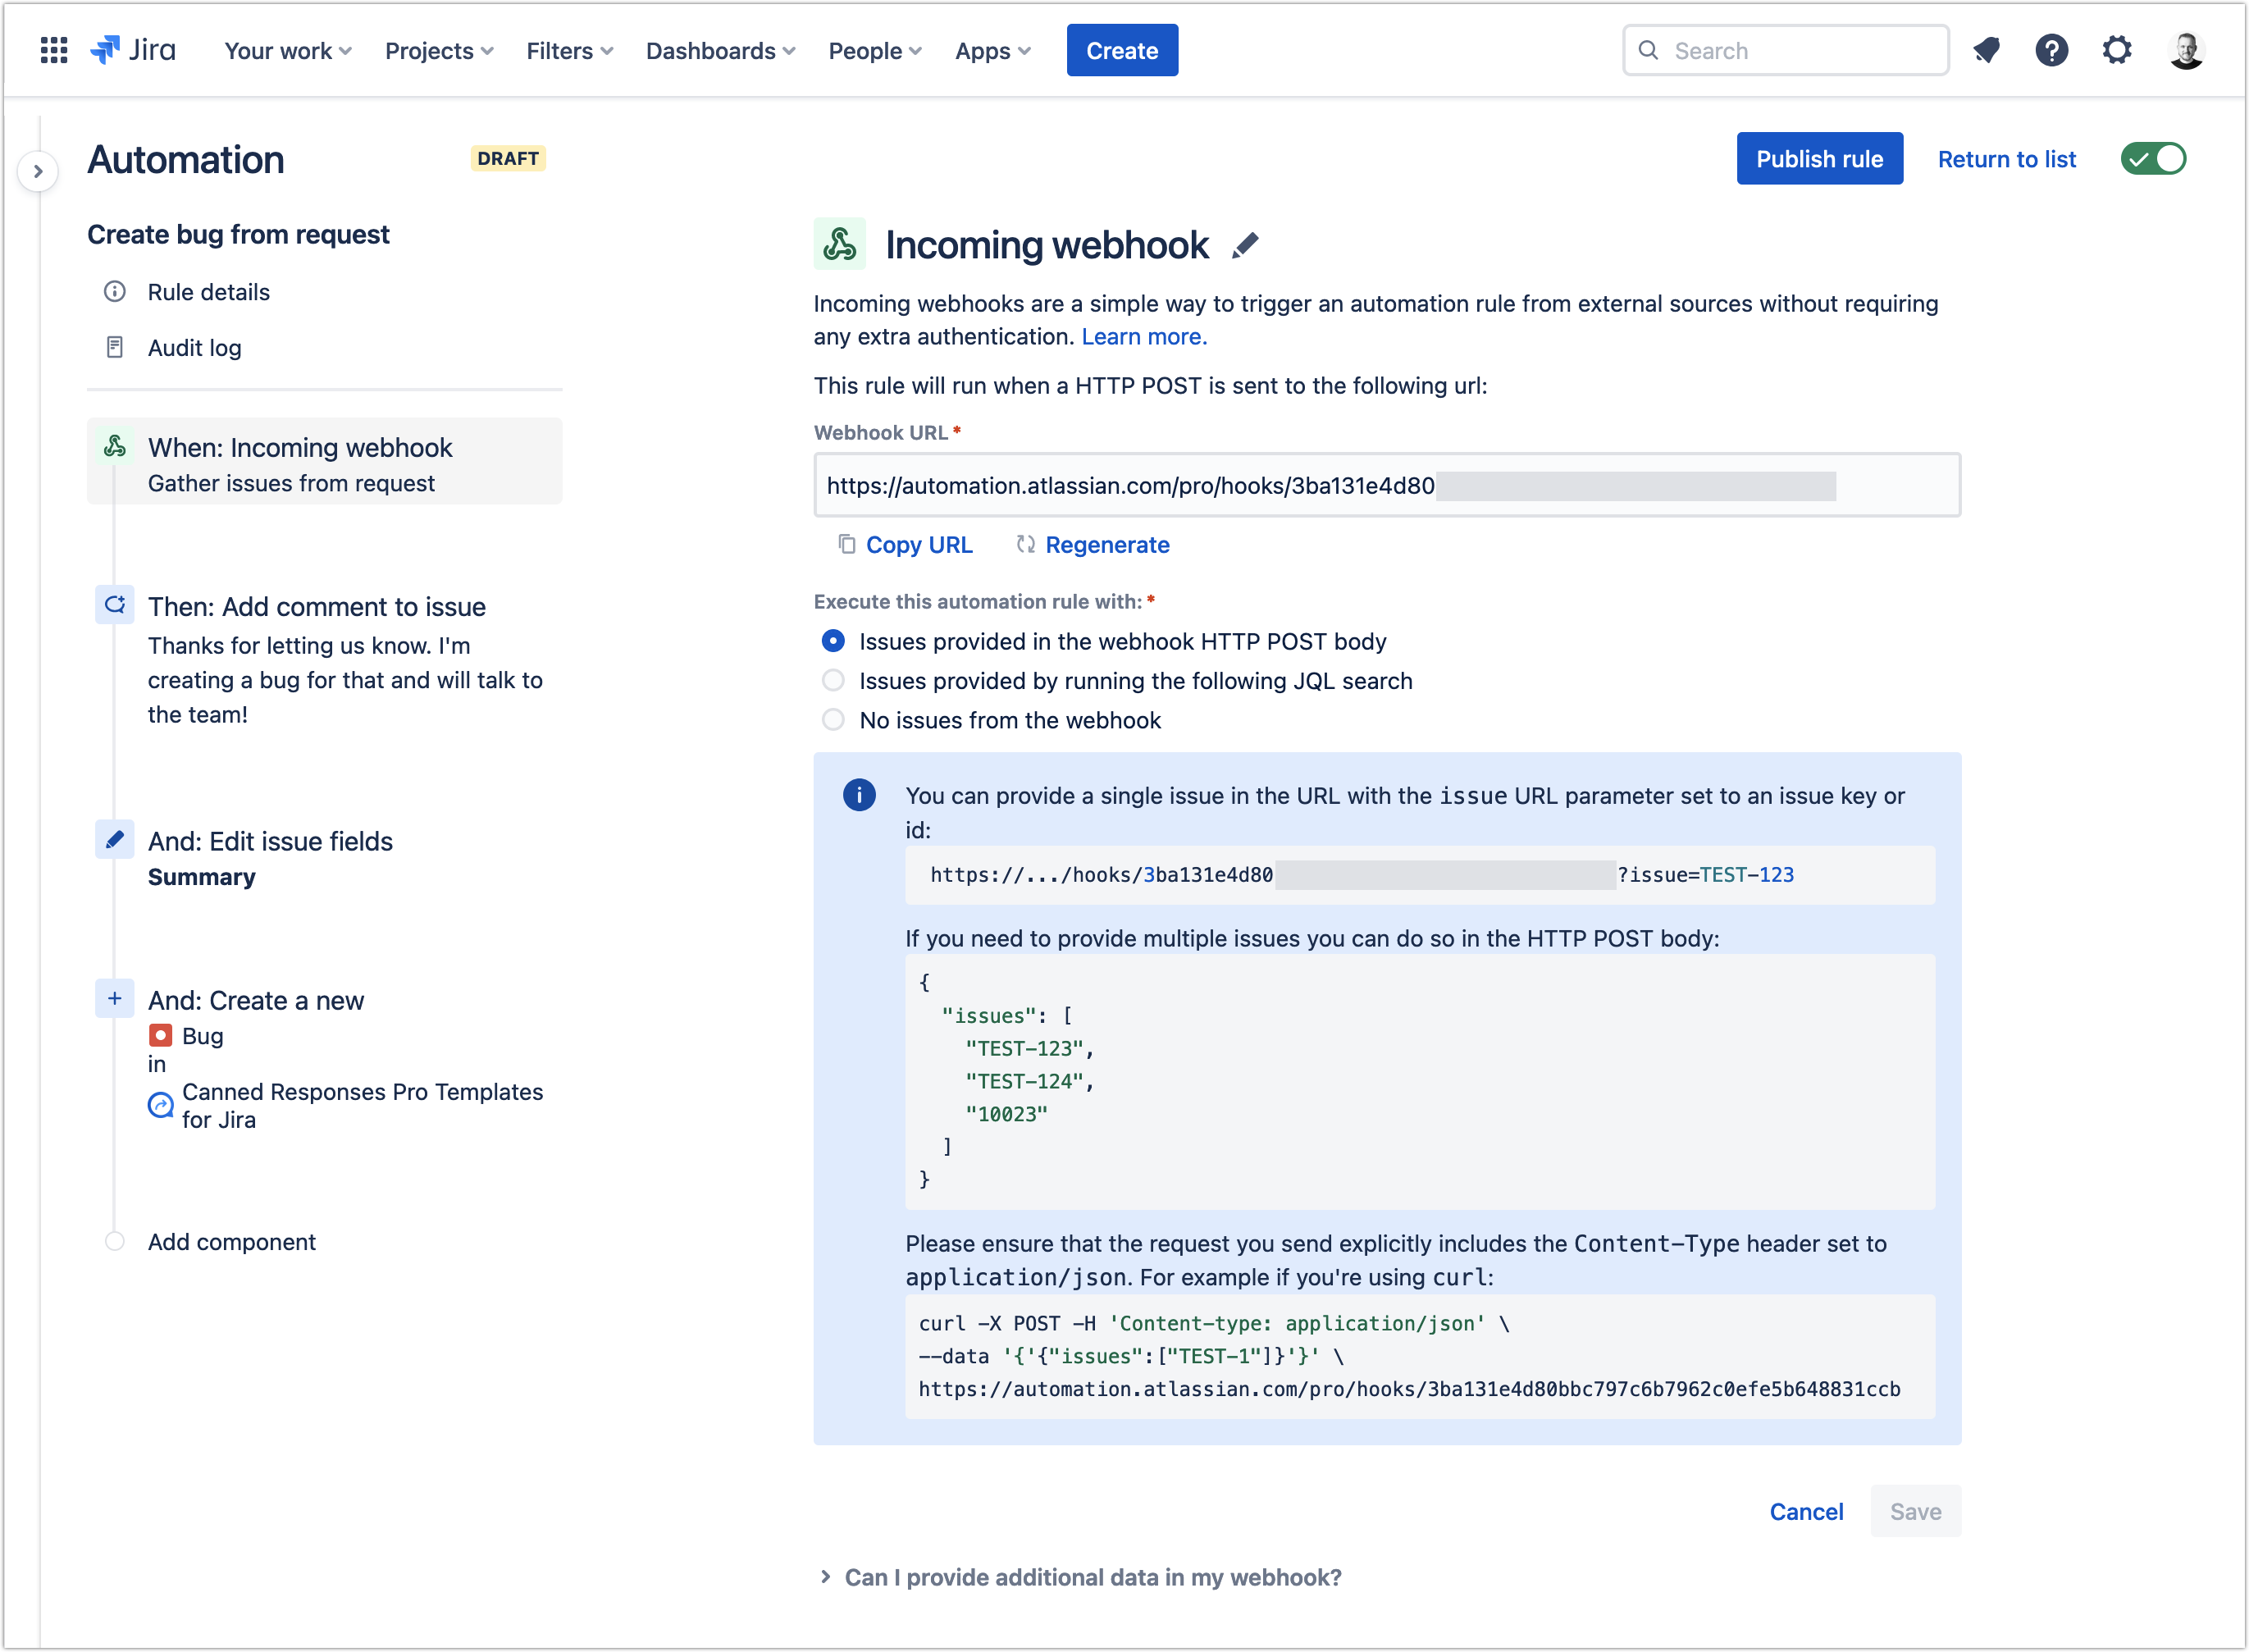
To Trigger Jira Automation from a Template:
I. In Jira, create an automation rule in Jira Automation.
Set its trigger to be Incoming webhook.
Copy the Webhook URL.
Finish the automation configuration.
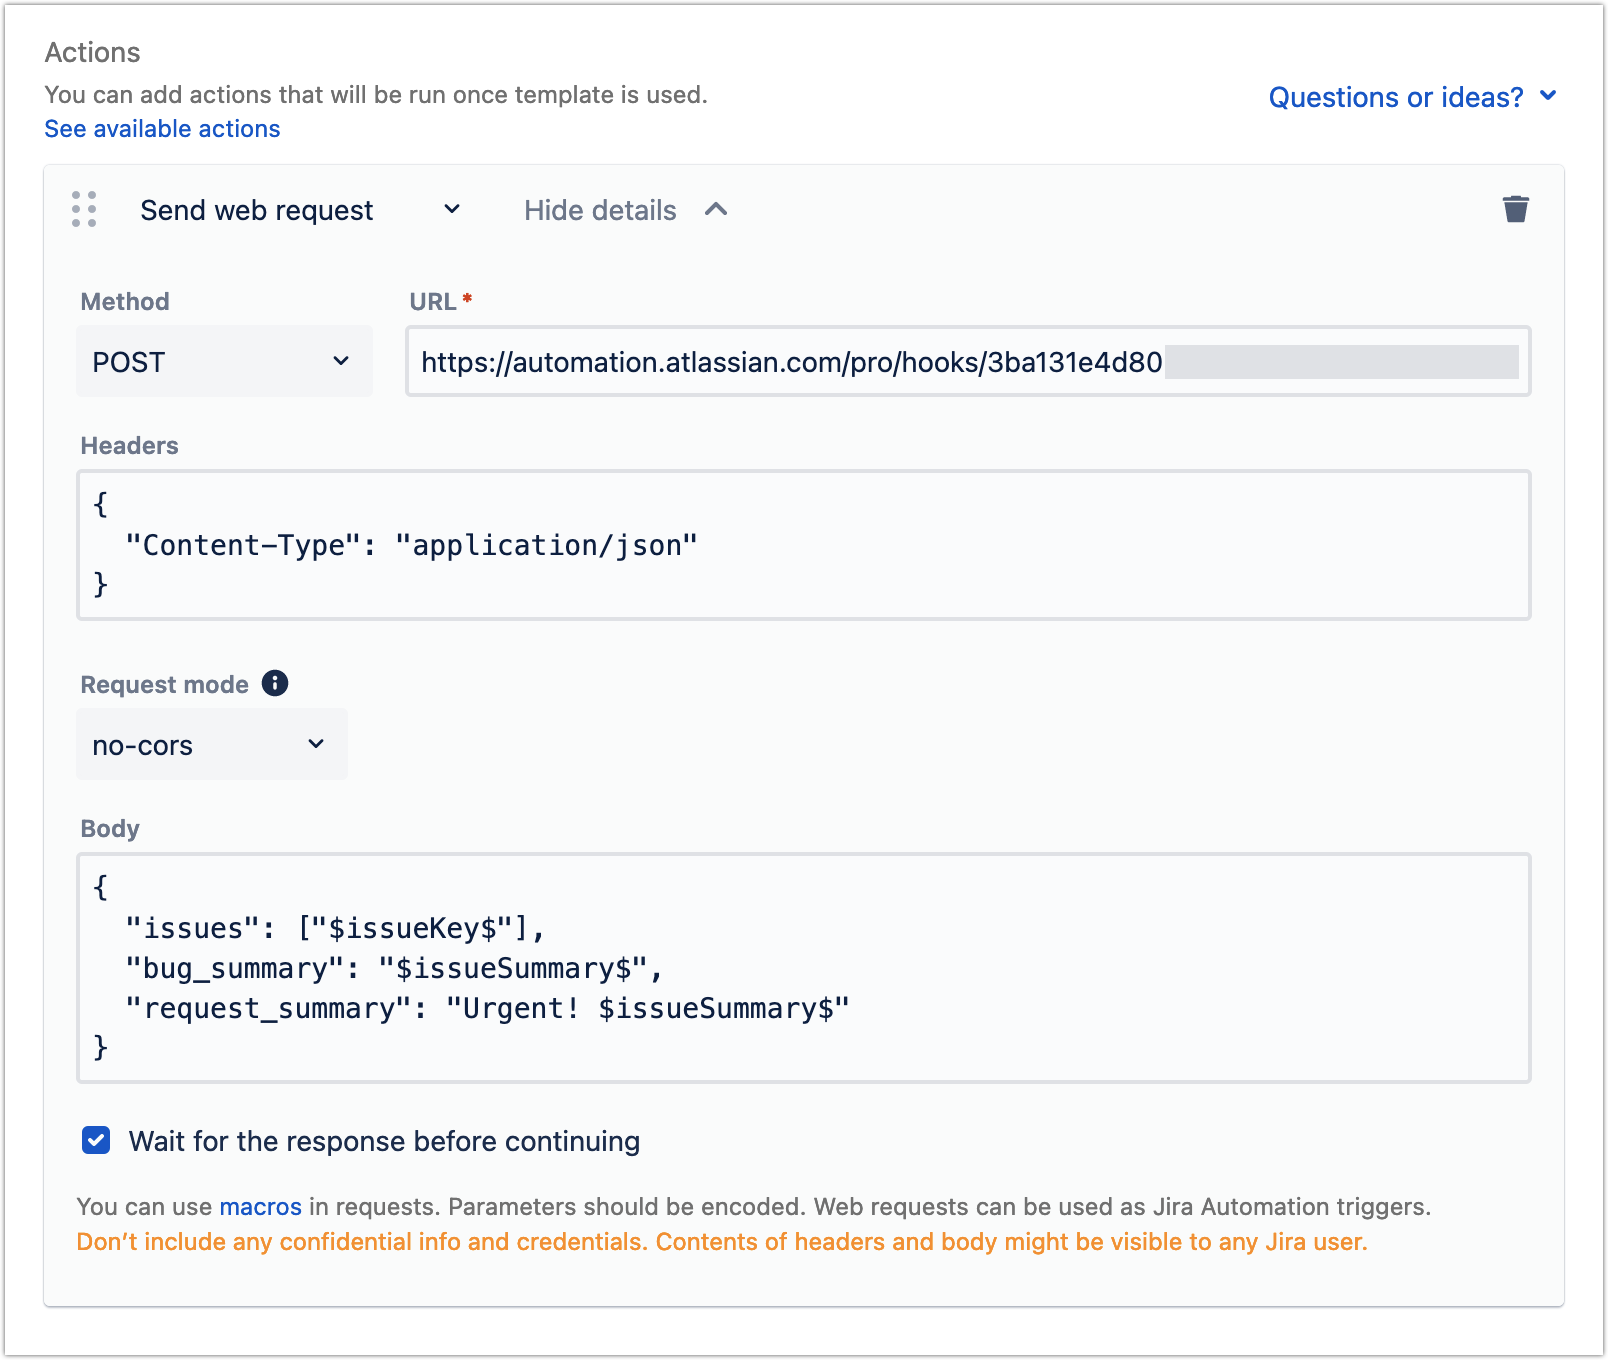
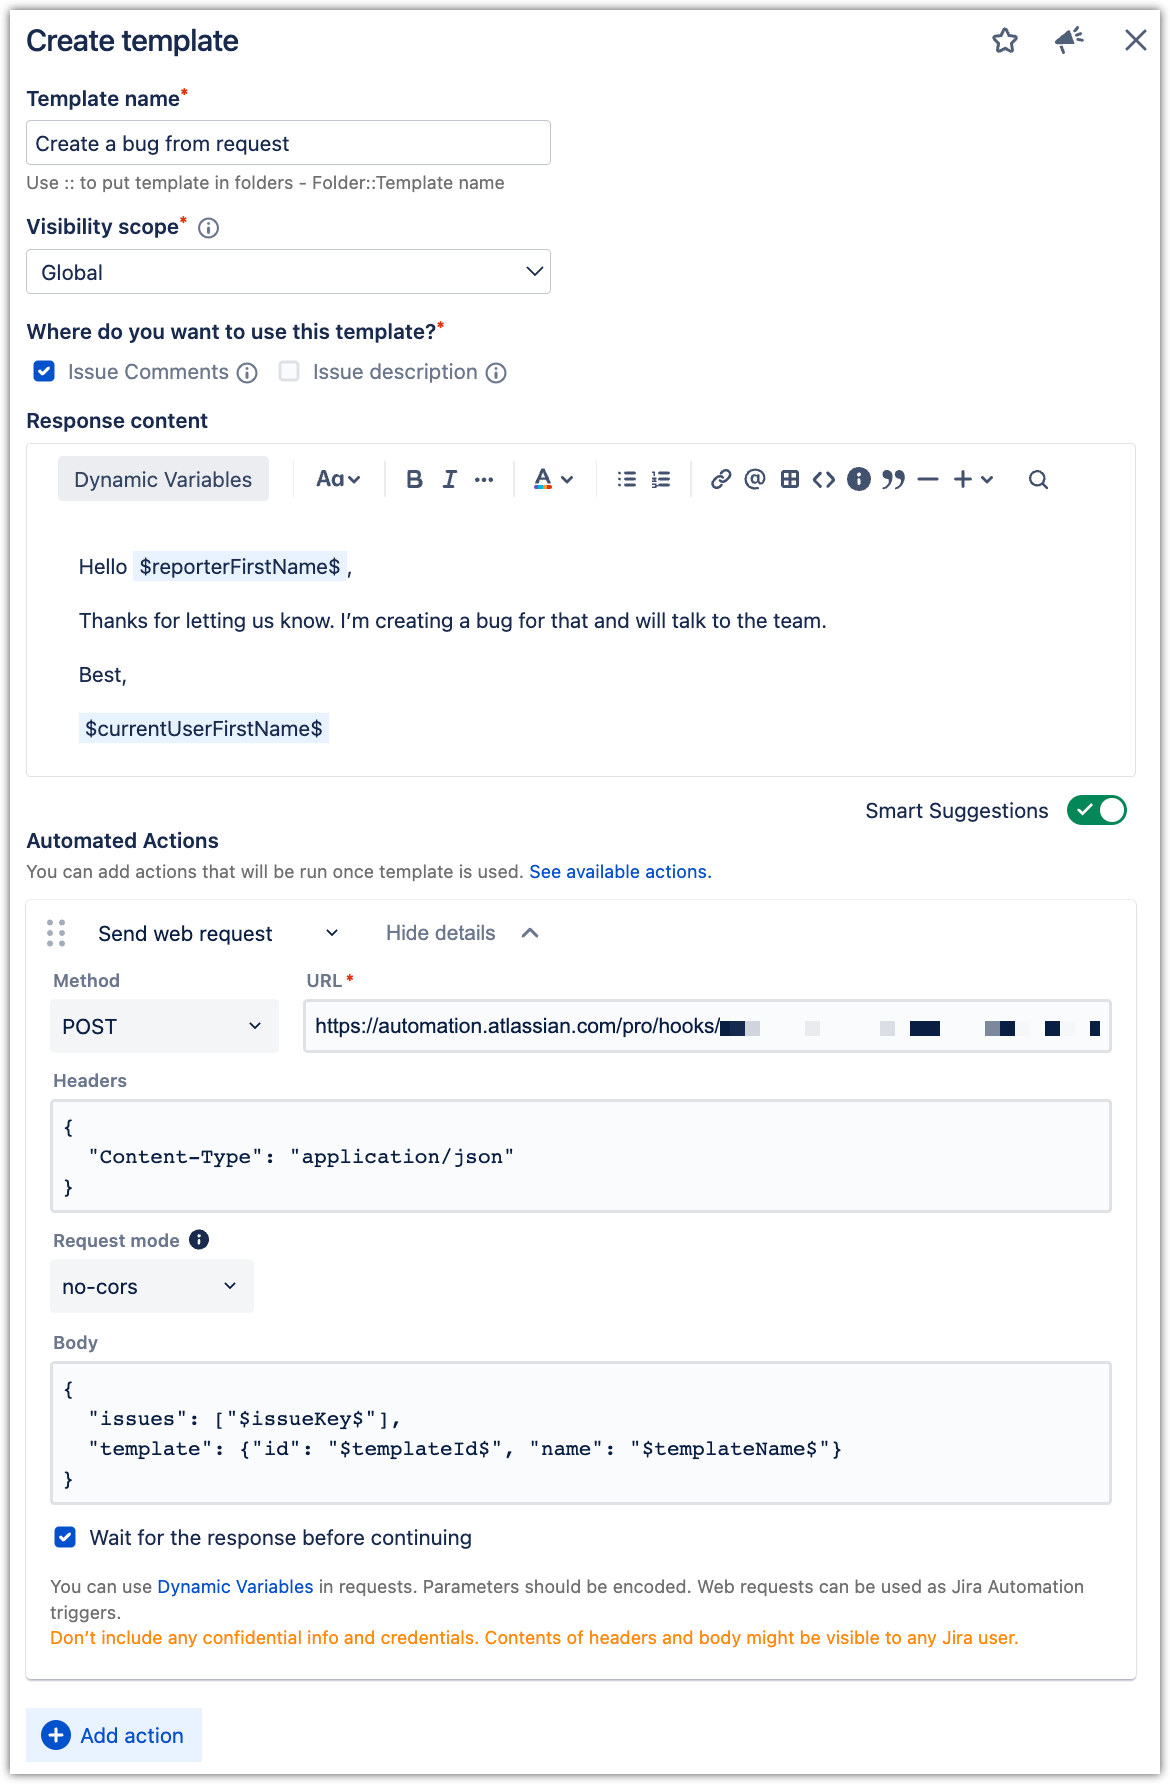
II. Create a new template
Add the Send web request action.
Select the POST method from the dropdown and the URL copied from Jira Automation.
Add optional parameters to the body of the request, for example, by using dynamic variables.
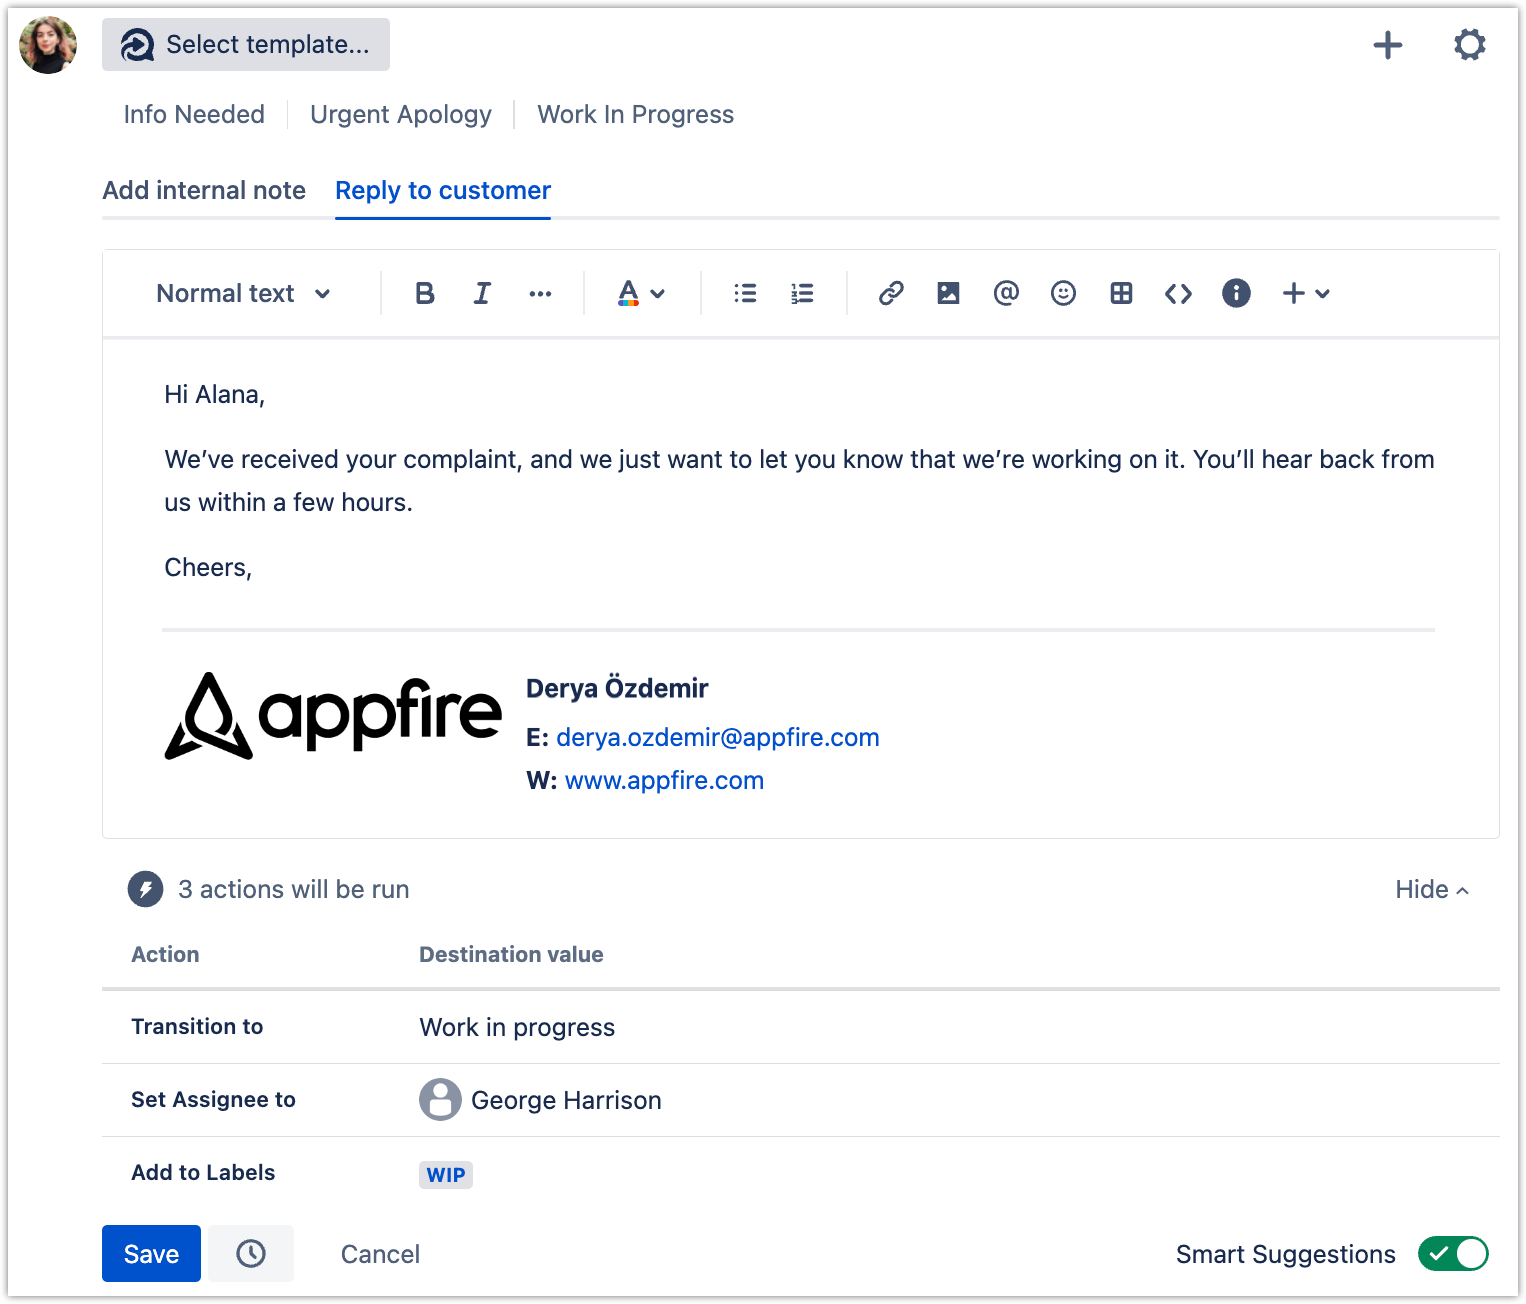
Using Templates with Automated Actions
When you insert a template with automated actions, they are scheduled to take place after the content (comment or issue description) is saved. If necessary, you can remove selected actions by clicking the trash icon next to them before saving and running actions. This will prevent them from running at that particular moment.
There is a sequence of execution for automated actions. If you utilize more than one template with actions while creating content, all of the actions will be queued and eventually run.
If an error occurs, the execution will be paused, and the following actions will not be executed until it is resumed. For example, if you have three automated actions and the first one fails, the following ones will be suspended and won’t be executed. To continue with the action, you’ll either need to click Resume, fix the issue for the first one, or delete the first one.
-20230509-114223.gif?version=1&modificationDate=1683632557296&cacheVersion=1&api=v2)
Use Cases
To suit your specific workflow and use case, you can mix and match and add multiple actions to the sequence for each template. You can check out some examples below.
Closing tickets – for thanking the customer and closing issues.

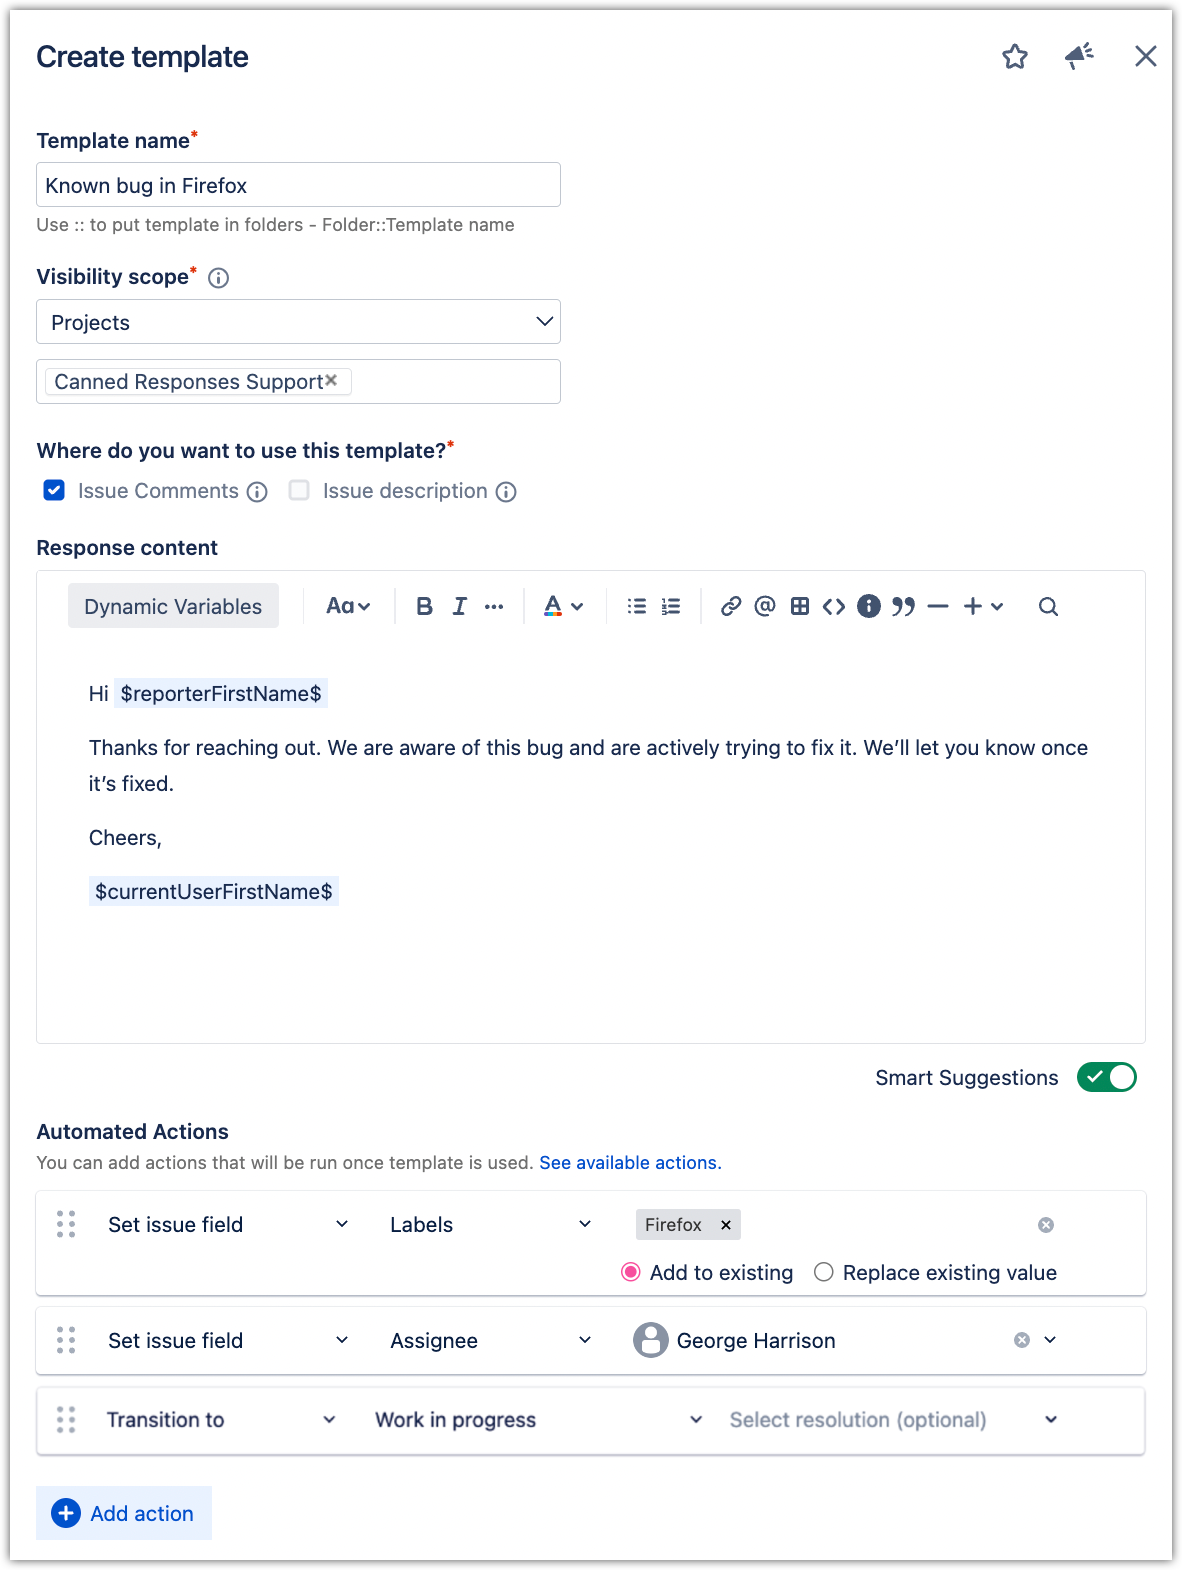
Reacting to known bugs – when the problem is known, agreed to be assigned to a particular person, labeled, and its status set to In Progress.
Creating new bug with Jira Automation – You can't use Canned Responses in Jira Automation since Jira doesn't provide the necessary APIs for this to be feasible. Instead, you can set up Jira automation rules and link them to CR, as described above.
Let’s look at an example to demonstrate how you can pass custom data via an automation webhook. For example, if you were to put this in the body:
{
"data": {
"issueSummary": "$issueSummary$",
"originalTicket": "$issueKey$"
}
}
This data could then be used in Jira automation fields: “Original ticket: {{webhookdata.originalTicket}}”.
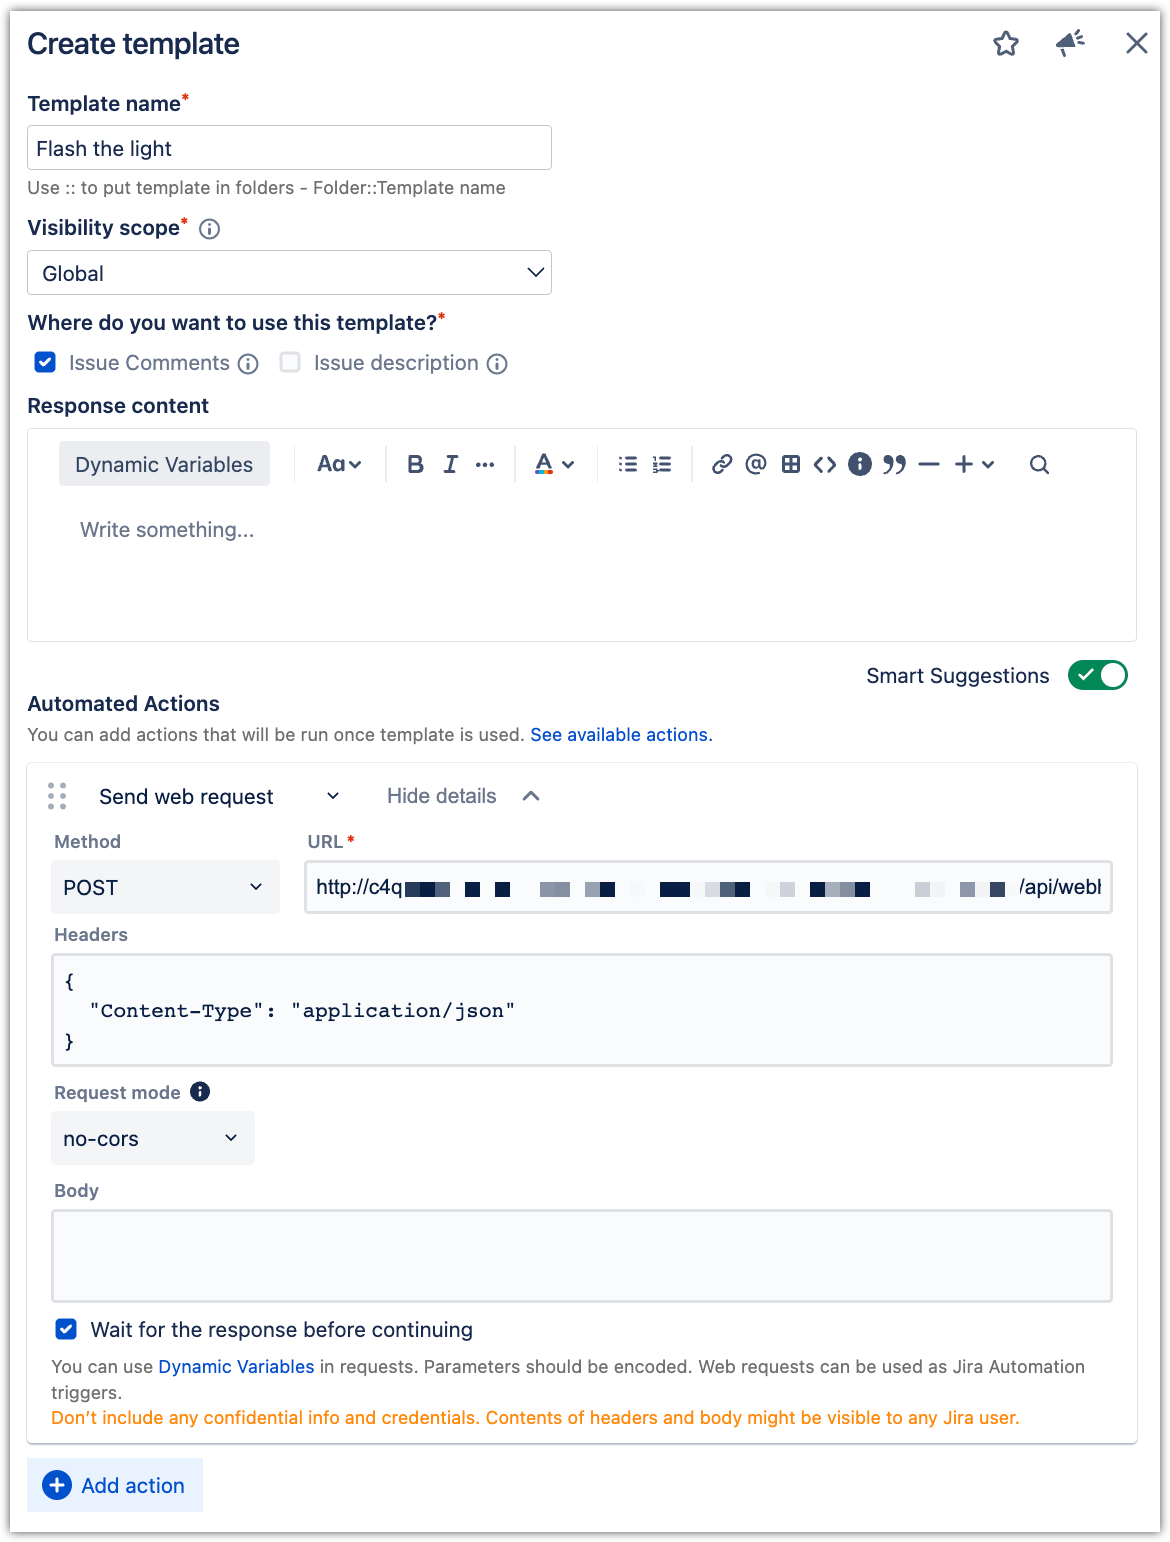
Integrating with smart devices in the office
Sending notifications to Slack

Decide what comes next! In case there is anything that you'd like to do with actions but currently can't – please let us know at the Appfire Support Portal, so we can prioritize accordingly.