7pace Timetracker's "Budgets" Page
Create unlimited budgets, assign them to iterations, work items or individual worklogs, and export the tracked time data to Excel
Getting to know the Budgets page
How to include iterations and work items in a budget
How to exclude iterations and work items from a budget
How to include worklogs in a budget
How to add a budget from the work item form
Exporting worklog details from the Budgets page
Intro
Budgets Add Value
From the economical perspective, the reporting or billing of efforts spent in development doesn't always follow sprints, releases or product backlog items. Your team members create a large number of worklogs every minute of every day, and it can be challenging to manage these worklogs. Additionally, you may want to bill only specific hours to a client or report those internally.
We've created the "Budgets" page to allow you to simply and easily create unlimited budgets, so you can then assign the tracked time you want to those budgets. You can include or exclude items from a budget or assign a budget to an object, such as:
- Releases
- Iterations/sprints
- Items like PBIs, bugs, impediments
- Work Items*
- Single Worklogs
When you assign a budget to any of the above objects, the child objects also inherit that budget. If you assign a different budget to one of the child objects, the parent inheritance is then broken, and the new assignment of this item is inherited to its children.
Therefore, if you assign a budget to a release, all work that is tracked to items in that release will be counted in that budget, automatically and instantly. If you want to set an exception for a child item, for example, a product backlog item in a sprint, just assign a different budget to that child item (like "Do Not Bill").
*You can also assign a specific work item to a budget directly from the work item form, within the 7pace Timetracker tab (for more information, click here).
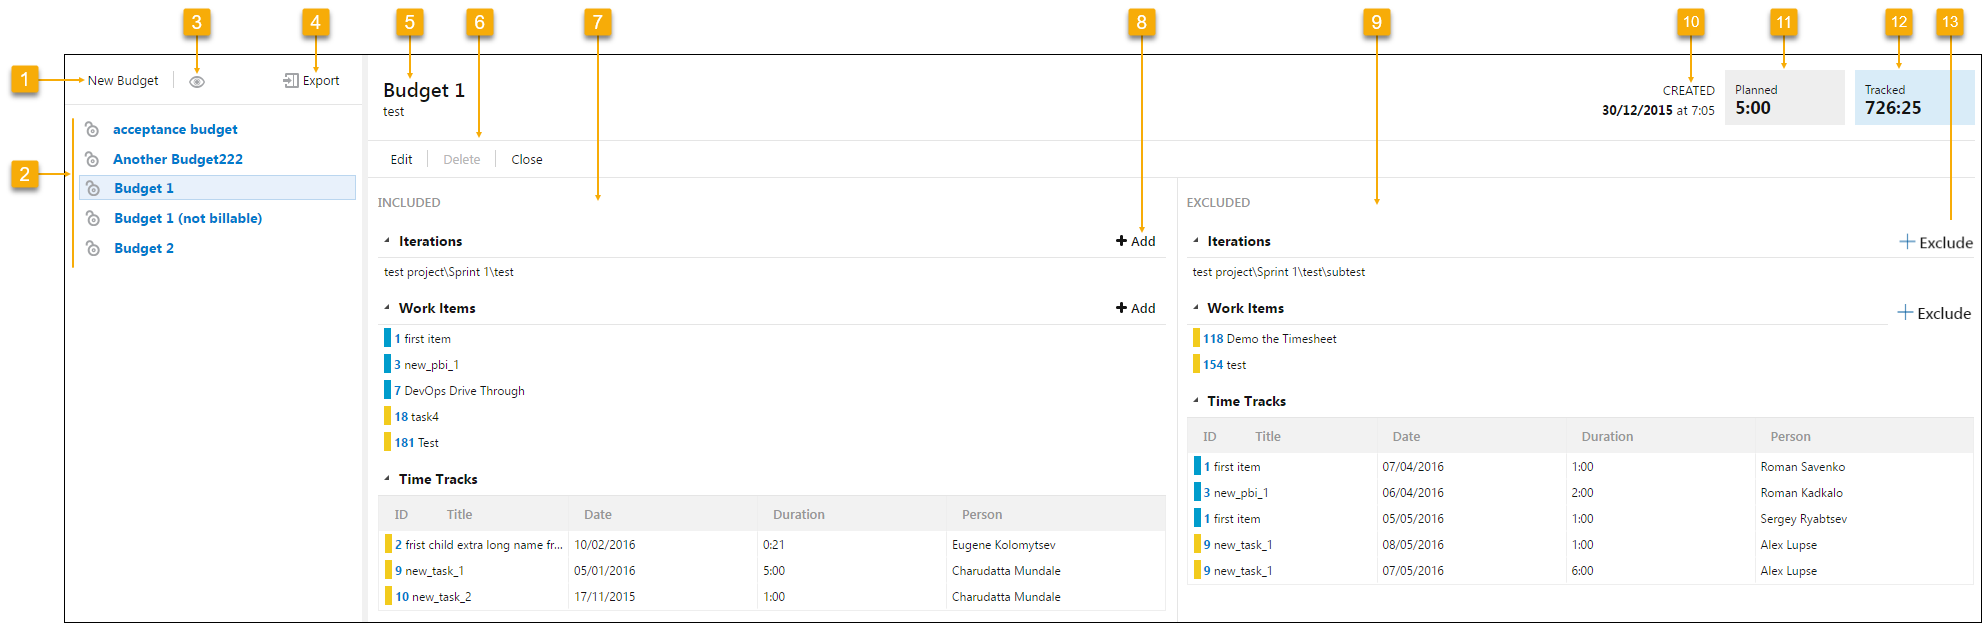
Getting to know the Budgets page
|
No.
|
Description
|
|---|---|
| 1 |
Click here to create a new budget. |
| 2 |
The list of created budgets.The ( |
| 3 |
Click this button to populate and display budgets in the list that once existed but are now closed. |
| 4 |
Click "Export" to export tracked time details for selected projects. |
| 5 |
The name of the budget with a "Comment" added underneath as additional information. |
| 6 |
The toolbar with options to edit, delete, and close a selected budget. |
| 7 |
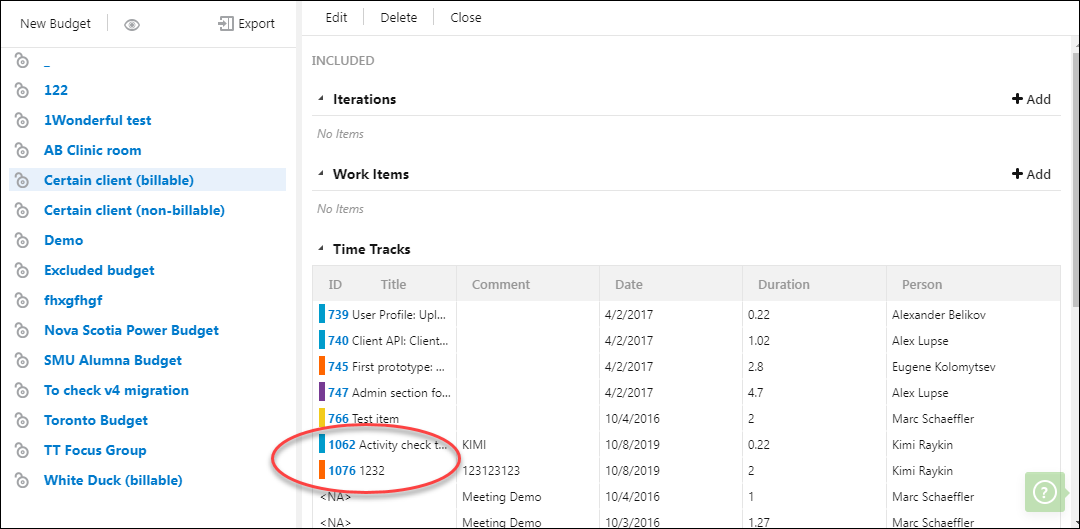
The list of objects included in the selected budget. Objects can be iterations, work items or worklogs. Note: You can assign individual time tracks to any budget from the "Times Explorer" page only and these tracks will be listed in this section of the "Budget" page. You do this by selecting the checkbox(es) of one or more time tracks on "Times Explorer" and then clicking the "Assign Budgets" button. A popup dialog box will display, allowing you to assign the specific tracks of time to the budget of your choice. You will then see these tracks of time display under "Time Tracks" on the "Budgets" page. The Included section displays the worklogs to which the budget is assigned. |
| 8 |
The "Add" button allows you to add objects in the "Included" list of a budget. |
| 9 |
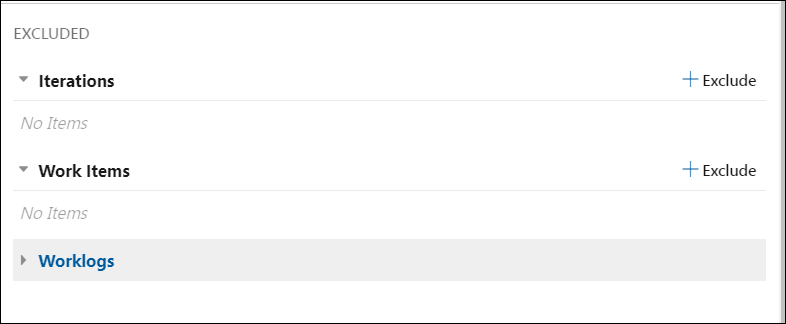
The list of objects excluded from the selected budget. Objects can be iterations, work items, worklogs, etc. Note: You can assign individual worklogs to any budget from the "Times Explorer" page only and these worklogs will be listed in this section of the "Budget" page. You do this by selecting the checkbox(es) of one or more worklogs on "Times Explorer" and then clicking the "Assign Budgets" button. A popup dialog box will display, allowing you to assign the specific worklogs to the budget of your choice. You will then see these worklogs display under "Time Tracks" on the "Budgets" page.The Excluded section displays the worklogs of the work items that are included in the budget but that worklog has a different budget assigned. |
| 10 |
The date and time when the selected budget was created. |
| 11 |
The total hours planned for the selected budget. |
| 12 |
The total hours tracked for work items included in the selected budget. |
| 13 |
The "Exclude" button allows you to add objects to the "Excluded" list of a budget, thus removing them from the budget and adding them to another. |

Adding a new budget
1. On the 7pace Timetracker menu bar, click "Budgets".
2. In the left panel, click the "New Budget" button.
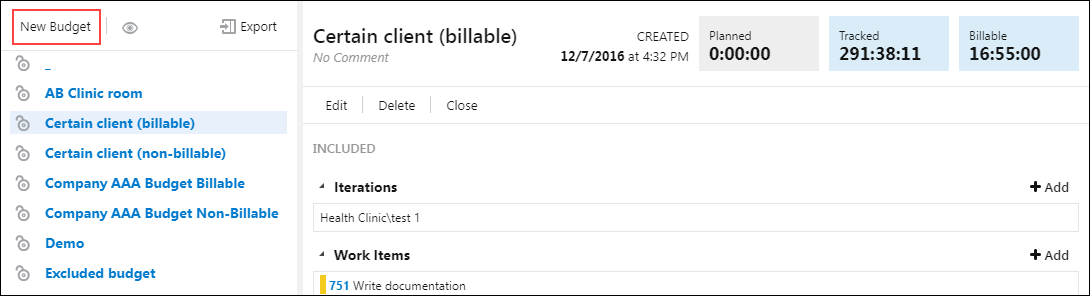
The Budget dialog box displays.
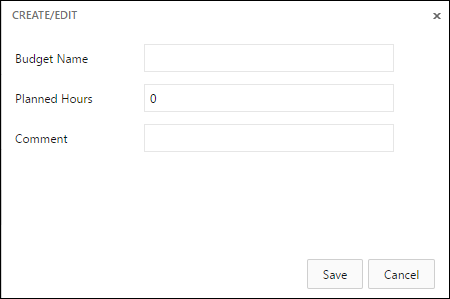
3. In the "Budget Name" field, enter the name of the budget.
4. In the "Planned Hours" field, enter the number of hours planned for the budget.
(Optional) In the "Comment" field, enter any additional information you'd like added to the budget.
5. Click the "Save" button.
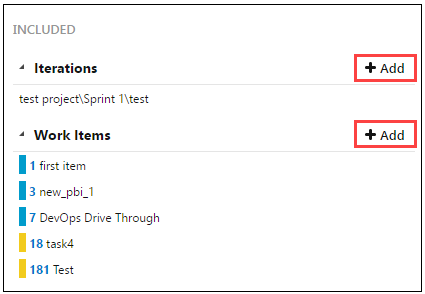
Including iterations or work items in a Budget
Once a budget has been created, you can directly add objects like iterations or work items to the budget in the "Included" section of the page. The items in the :Included" list indicate that for all these items, any tracked time is logged to and included in that budget. The "Tracked" field at the top of the page will then display the total time tracked for all included items in that budget, be it an entire iteration, just specific work items or even single worklogs.
1. In the far left pane, click the budget name to which you want to include specific iterations or work items.

The budget details display in the right pane.
2. In the middle-right "Included" section of the page, click the "Add" button for "Iterations" or "Work Items" that you want to include in the budget.
Include Iteration in Budget dialog:
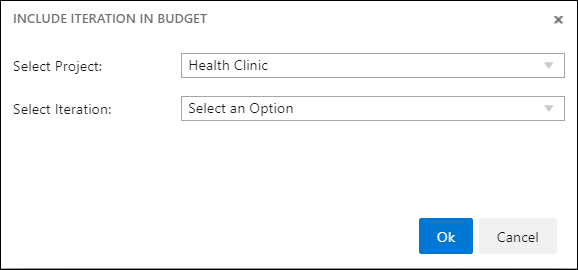
In the "Include Iteration in Budget" dialog box, click the Select Project drop-down list and select a project.
Click the Select Iteration drop-down list and select the iteration / sprint that you want to add.
Include Work Item in the Budget dialog:
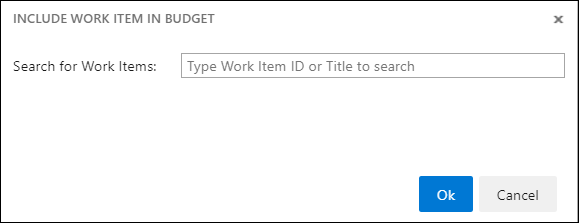
In the "Include Work Item in Budget" dialog box, enter the work item ID or title in the "Search for Work Items" text field/search box.
In the resulting list, select the work item that you want to add.
Click Ok.
Excluding iterations or work items from a Budget
You can also specifically set iterations and work items to be excluded from certain budgets.
The items in the "Excluded" list indicate that for all these items the tracked time is not calculated in that budget. The "Tracked" field at the top of the page will not include the tracked time for any of the excluded items in that budget. Usually, you can use the excluded items list to remove certain items from the budget. For example, you can include a parent iteration or a PBI in the budget but may want to exclude certain iterations or child work items from the budget.
PLEASE NOTE: You must add an iteration to a budget in the "Included" section first, before then excluding certain iterations or child items from the budget.
1. In the left pane of the "Budgets" page, click the budget to which you want to exclude specific iterations or work items.
In the far-right "Excluded" section of the page, click the "Exclude" button for "Iterations" or "Work Items" that you want to exclude from this budget.
Exclude Iteration from Budget dialog: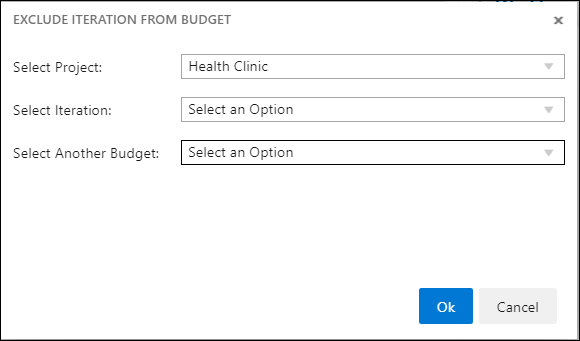
In the "Exclude Iteration From Budget" dialog box, click the "Select Project" drop-down list and select a project.
Click the "Select Iteration" drop-down list and select the iteration that you want to exclude from the budget.
Click the "Select Another Budget" drop-down list and select another budget to which the iteration will be assigned.
Exclude a Work Item from Budget dialog: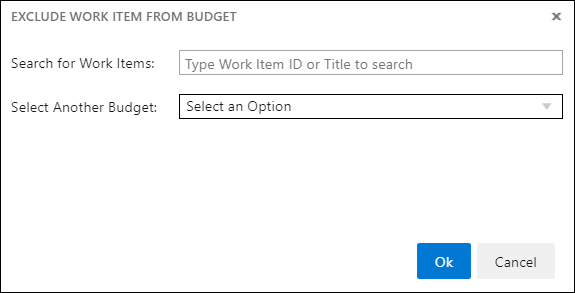
1. In the "Exclude Work Item From Budget" dialog box, enter the work item ID or title in the "Search for Work Items" dropdown.
2. In the resulting list, select the work item that you want to exclude from the budget.
3. Click the "Select Another Budget" drop-down list and select the budget to which you want to exclude the selected work item and click Ok.
Note: From the Iterations page, you can also assign iterations or work items to a budget. See this article for more information.
Adding individual worklogs to a budget
You can assign budgets to one or many worklogs to override the inherited budget. You can only do this on the "Times Explorer" page.
1. On the "Times Explorer" page, check/select every worklog that you want to assign to a specific budget or to a budget that is different from the inherited budget.
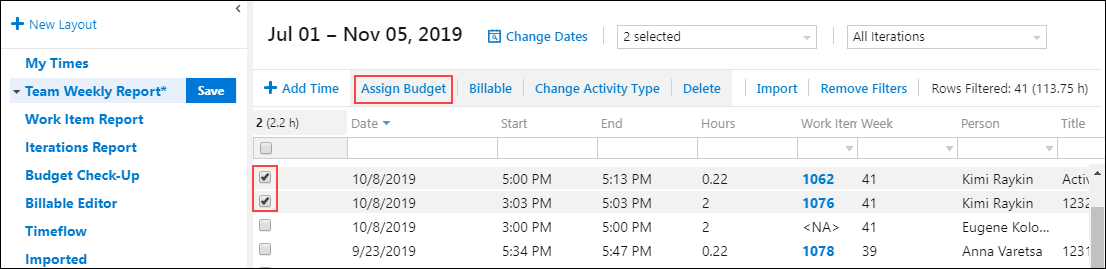
You'll notice that additional menu options display/are enabled, including Assign Budget, Billable, Change Activity Type and Delete.
2. Click on the "Assign Budget" button.
3. On the resulting popup dialog, select the budget to which you want to assign these worklogs and then click the "Assign to selected" button.
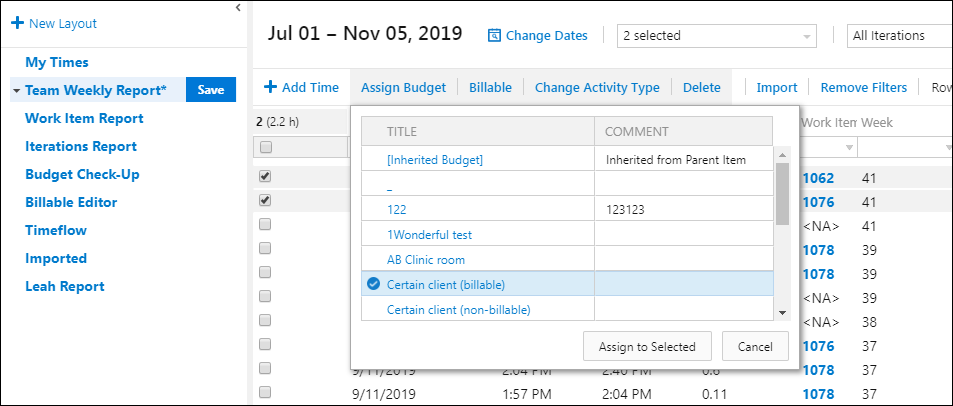
Now when you go to the "Budgets" page, these worklogs will display under the "Included" - "Time Tracks" section.
Note: Similarly, you can also exclude worklogs that have been automatically assigned via an iteration or work item, by moving those specific worklogs on the "Times Explorer" page to a different budget. These worklogs will display in the "Excluded" - "Time Tracks" section of the Budget page.
Adding a budget from the work item form
1. Open the work item form and click on the "7pace Timetracker" tab.
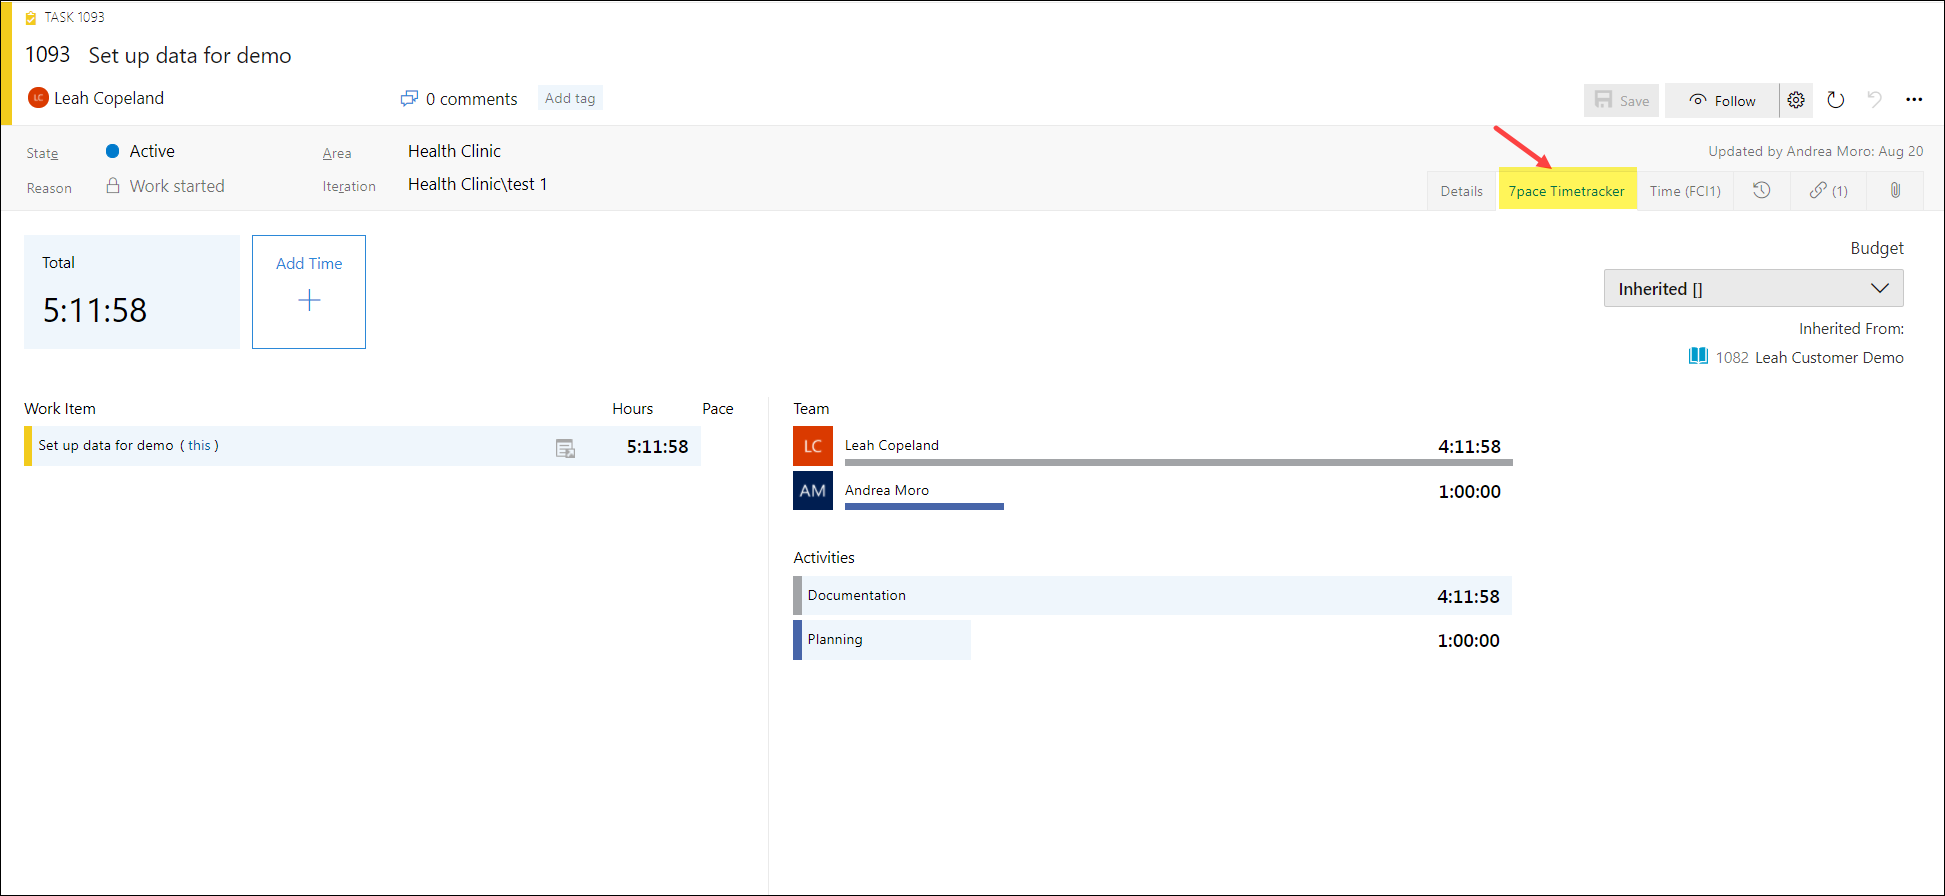
In the upper-right corner, you will see "Budget" information. In this example, this work item task has inherited the budget from its parent user story.
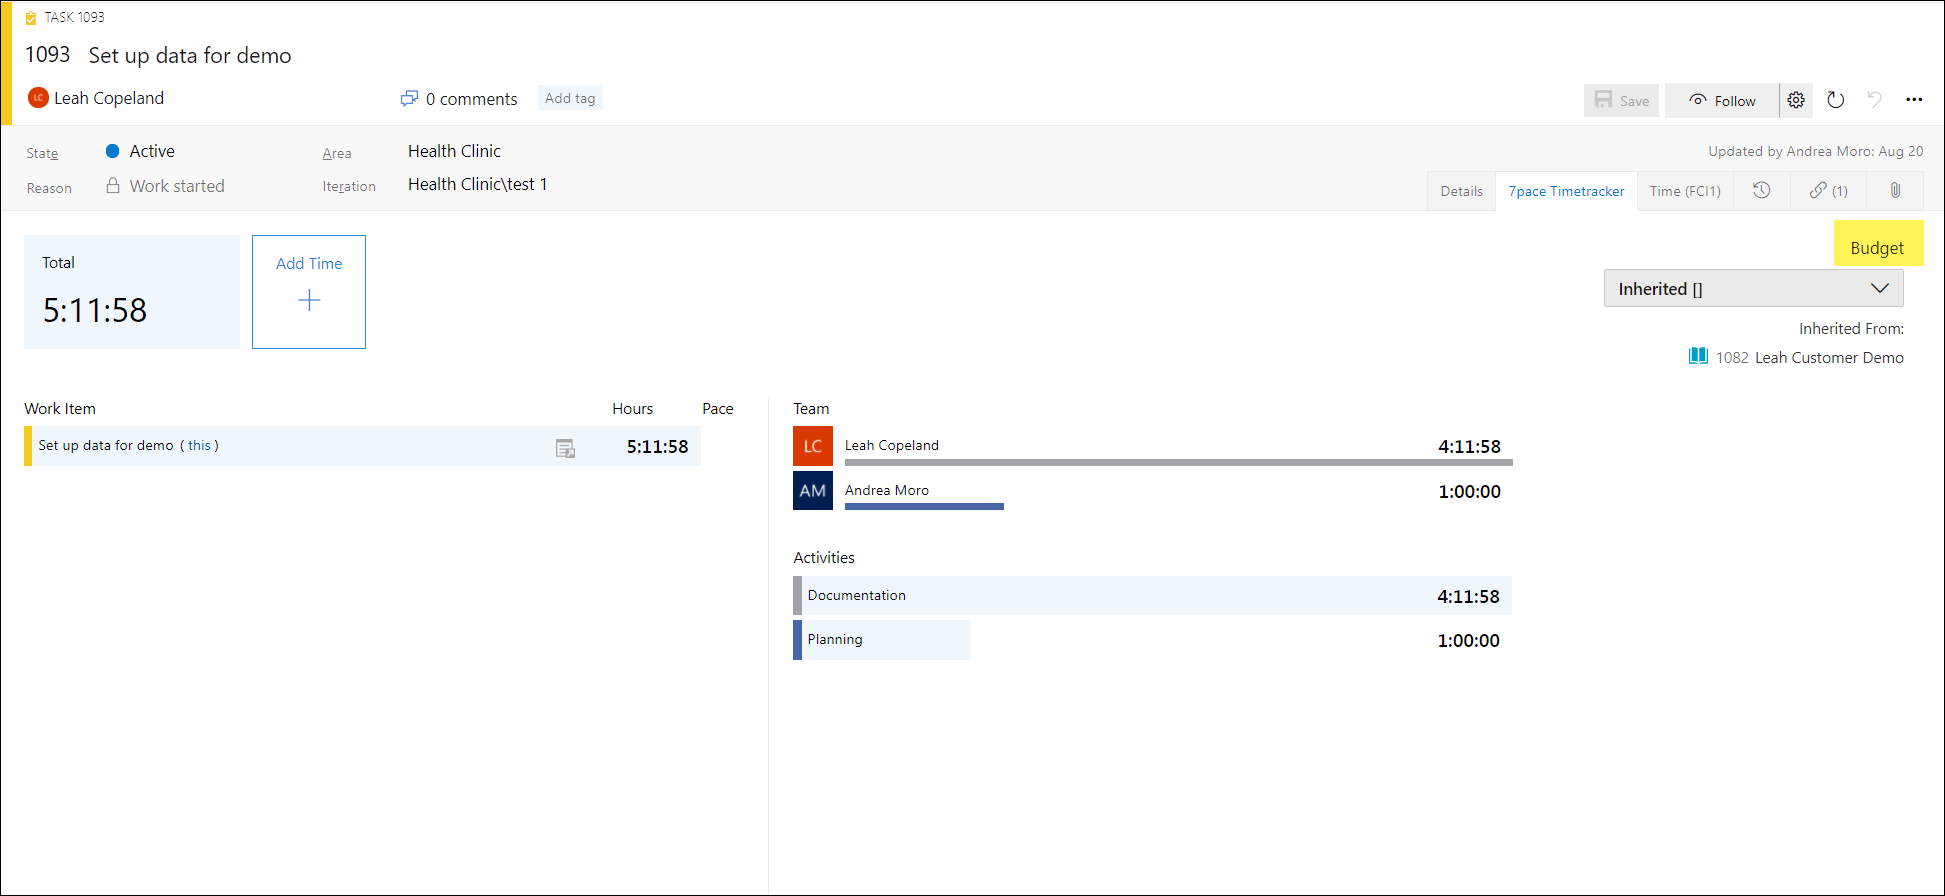
2. Click the "Budget" dropdown.
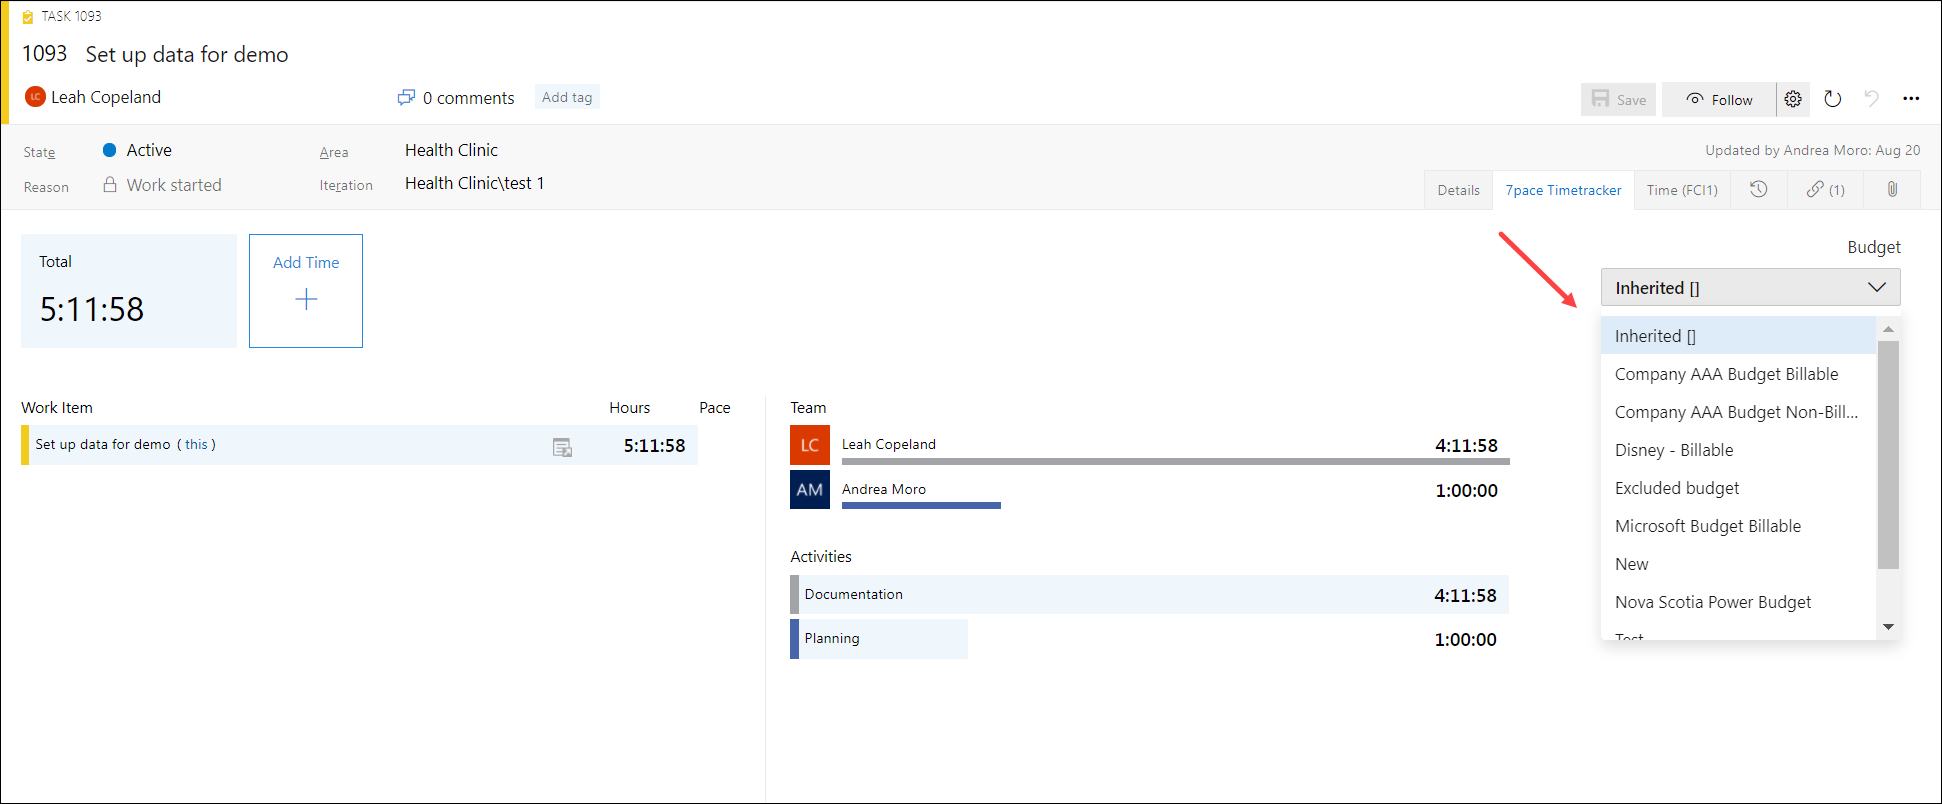
All budgets that have been created from the "Budgets" page will display as options.
3. Click on a different budget.
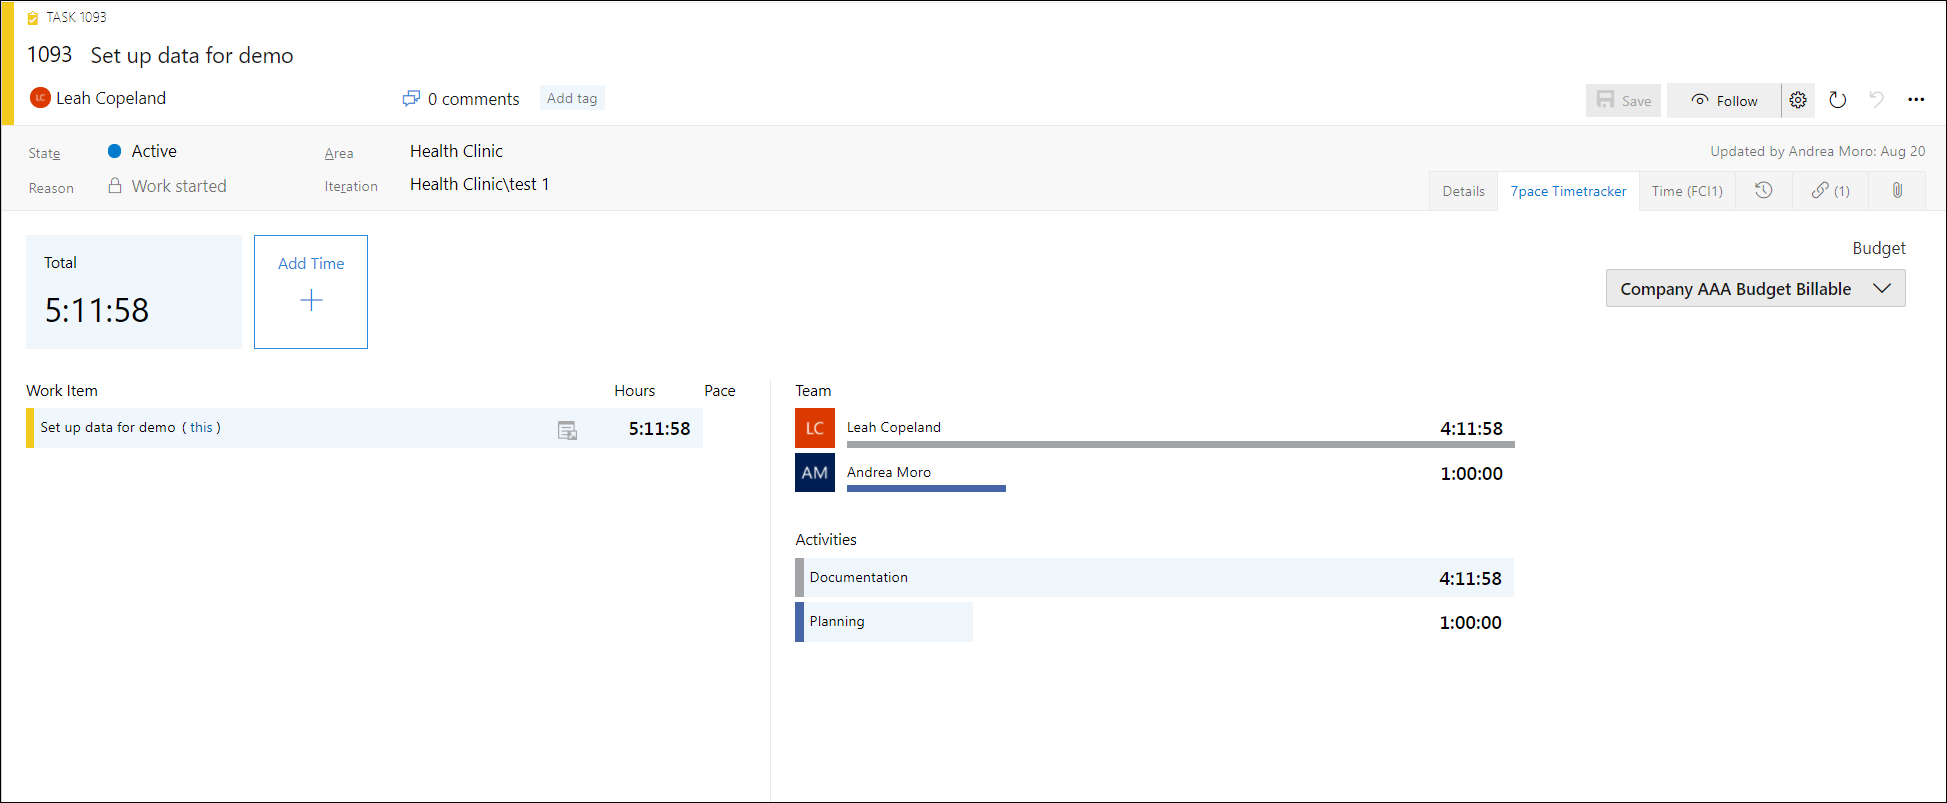
Page refreshes, confirmation message displays and newly-assigned budget displays.
4. Navigate to the "Budgets" page of Timetracker and click on the budget name to which you just assigned the work item.
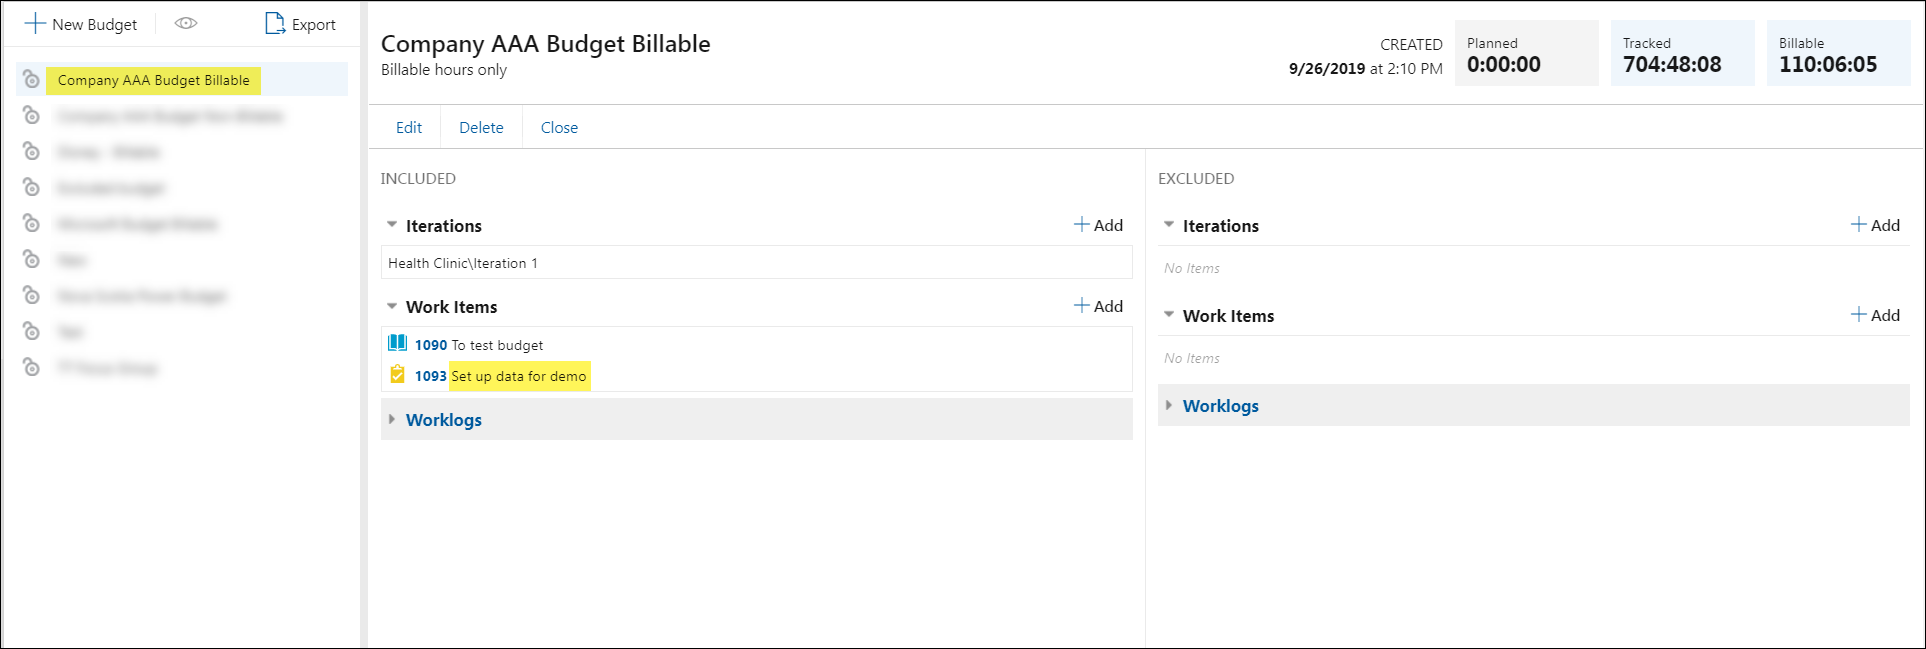
The work item now displays within the budget's "Included" section.
Editing a budget
1. From the list of budgets on the left panel of the "Budgets" page, select the budget that you want to edit.
2. On the toolbar on the right panel of the page, click the "Edit" button.
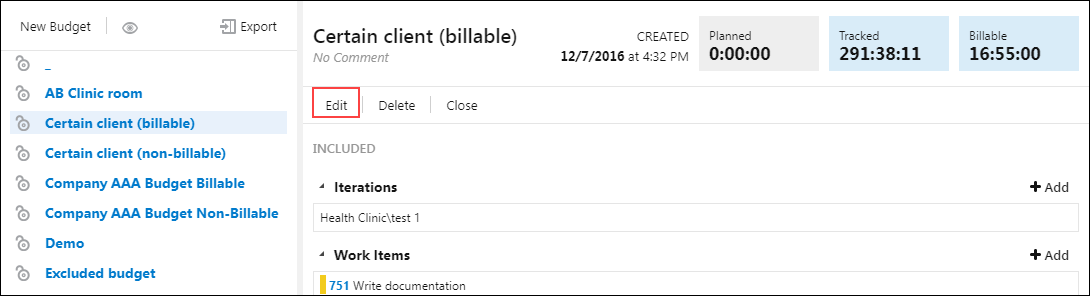
The system displays the budget Create/Edit dialog box.
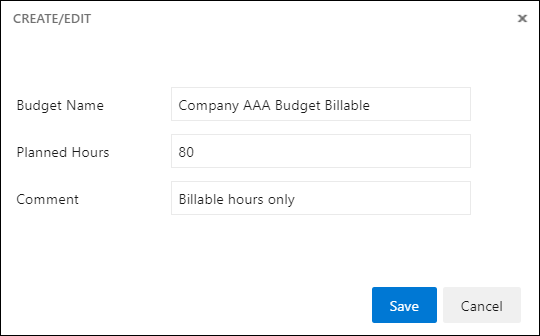
5. Change the values in the required fields.
6. Click the "Save" button.
Opening and closing a budget
On the "Budgets" page, beside each budget in the list, the (
1. If you do not see any closed budgets, click the "Show closed" (
Note: After clicking the "Show Closed" icon, closed budgets will display in the existing list of open budgets.
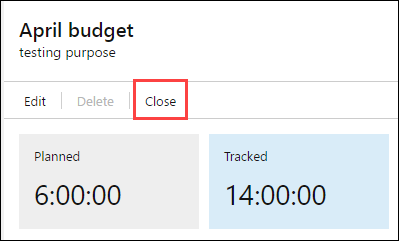
2. On the toolbar:
- Click the "Open" button to open a closed budget.
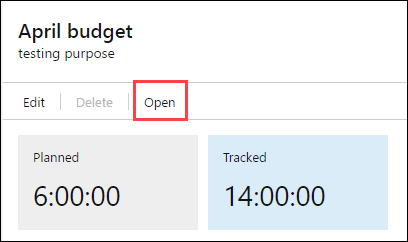
- Click the "Close" button to close an open budget.
The icon and the color of the budget name changes according to the action that you perform.
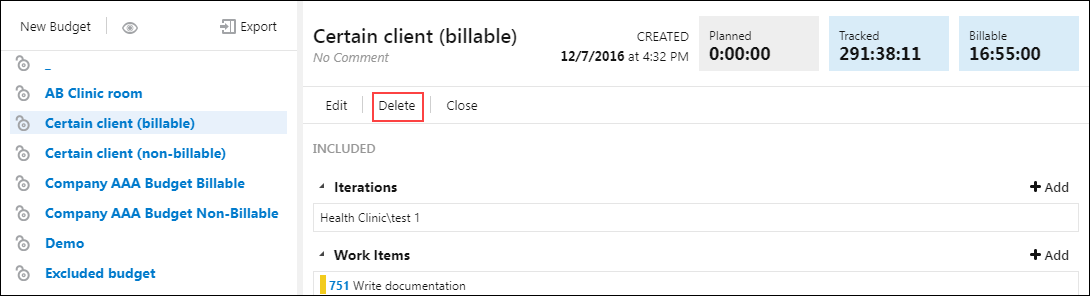
Deleting a budget
Note: You cannot delete a budget that contains tracked worklogs. If this is the case, the "Delete" button will be grayed out.
1. From the list of budgets on the left panel of the "Budgets" page, select the budget you want to delete.
2. Click the Delete button.
A confirmation dialog box displays:
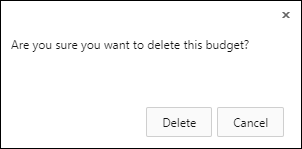
3. Select the "Delete" button again.
The page refreshes and the budget is deleted.
Exporting worklog details from the Budgets page
You can export worklog details from the "Budgets" page. By default, 7pace Timetracker exports these time details in the form of an Excel file.
1. On the 7pace Timetracker menu bar, click "Budgets".
2. In the left pane, click 
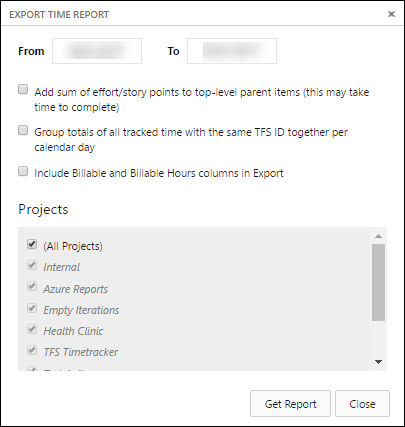
The "Export Time Report" dialog box displays.
3. Click in the "From" field and select the start date from when you want to export the worklogs.
4. Click the "To" field and select the end date up to which you want to export the worklogs.
5. (Optional) Select one of the following options to export your worklog details:
- Add sum of effort/storypoints to topmost parent items
- Group identical data for same work item ID by dates
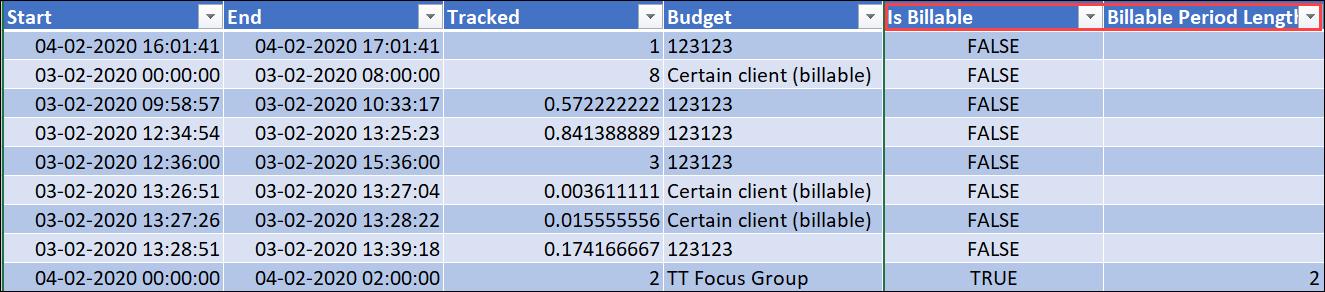
- Include Billable and Billable Hours columns in Export
In the "Projects" list, check the projects for which you want to export the worklogs.
Note: In the projects list, you can only view the projects to which you have access/permissions.
7. Click the "Get Report" button.
The system downloads the report as an Excel file with extension .xlsx.
Add Sum of Effort/Story Points to Top-Most Parent Items
When you select this option, 7pace Timetracker first adds the effort/story points of all child work items to the effort/story points of the respective parent work item and then exports the work items. With this calculation, the exported Excel file displays the effort/story point details as the total of the effort/story points of the parent work item and all corresponding child work items.
Timetracker also adds a new column - Top Work Item Story Point - in the exported Excel file. The Top Work Item Story Point column displays the total number of effort/story points of all child work items and their parent work item.
If you don't choose this option, Timetracker separately exports the worklog details of the parent and and child work items.
Warning: Selecting this option might take additional time to populate results, as 7pace Timetracker needs to calculate the efforts/story points of all child work items and their parent items.
Exported Excel File Without Selecting This Option
The exported excel file only contains the Parent Work Item Story Point column and not the Top Work Item Story Point column. The Parent Work Item Story Point column displays the efforts/story points of all work items.

Exported File With This Option
The exported Excel file contains the additional Top Work Item Story Point column. This column displays the total of the efforts/story points of the parent work item and all corresponding child work items.

Group Totals of All Worklogs with Same Work Item ID Together Per Calendar Day
If, on a particular date, you work on the same work item at different times during the day, 7pace Timetracker separately records each time you work on that work item and for how long.
When you select this option, 7pace Timetracker exports your worklogs by grouping the time of the work item that you tracked on a particular date, but at different times on that date, together. The exported file displays the work item only once, with the date and time details grouped into the "Record Date" column. In the Excel file, the "Tracked" column displays the total time tracked for the same work item at different times.
When you export your worklogs without selecting this option, the Excel file separately displays the date and time details of the same work item, tracked at different times during that date, in separate rows.
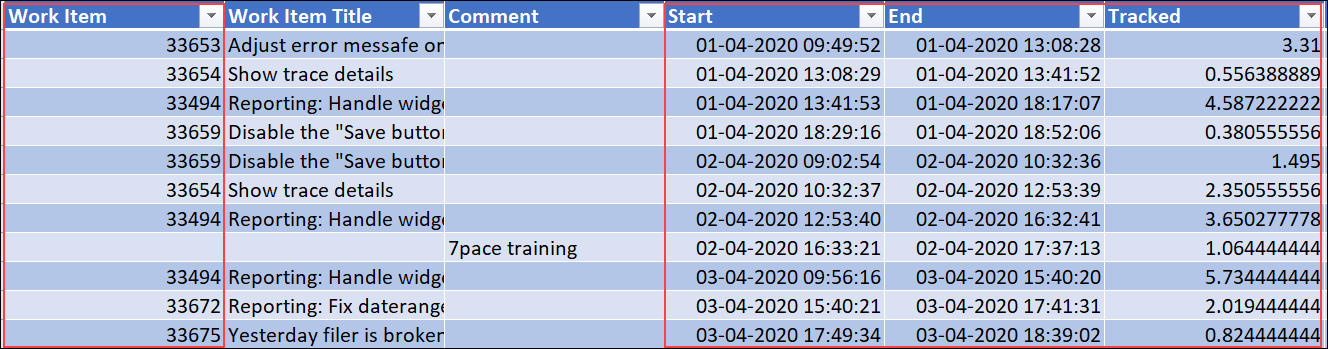
Exported File Without Selecting This Option
The exported Excel file contains separate entries for the same work item. The "Start" and "End" columns and the "Tracked" column display the worklog details separately for the same work item.
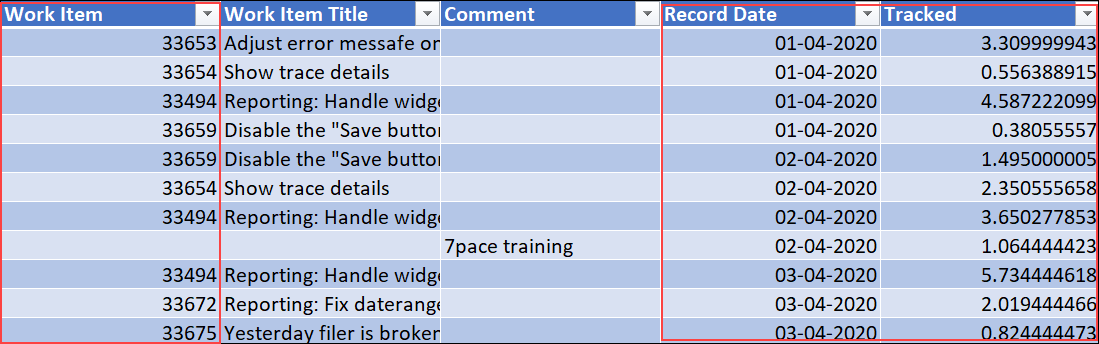
Exported File with This Option
When you select this option, the exported Excel file contains the "Record Date" column instead of the "Start" and "End" columns.
Related Articles