...
Assess your apps - you will need to select which apps you want to include in your migration. All apps must have a decision status selected before you can proceed to the next step.
Find JSU in the list of apps and select Needed in Cloud from the Status dropdown.
When you’re happy to proceed, select Done.
Prepare your apps - next, you need to link your Jira Cloud instance to the JCMA tool via the prompts. Select Choose cloud site to link your chosen cloud instance and navigate through the remaining preparatory steps, then click Done.
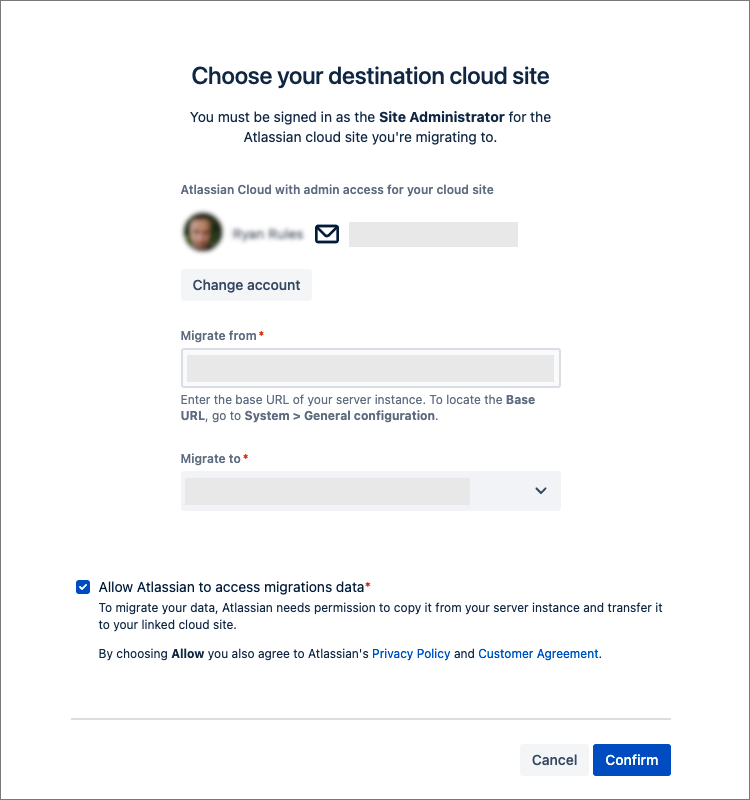

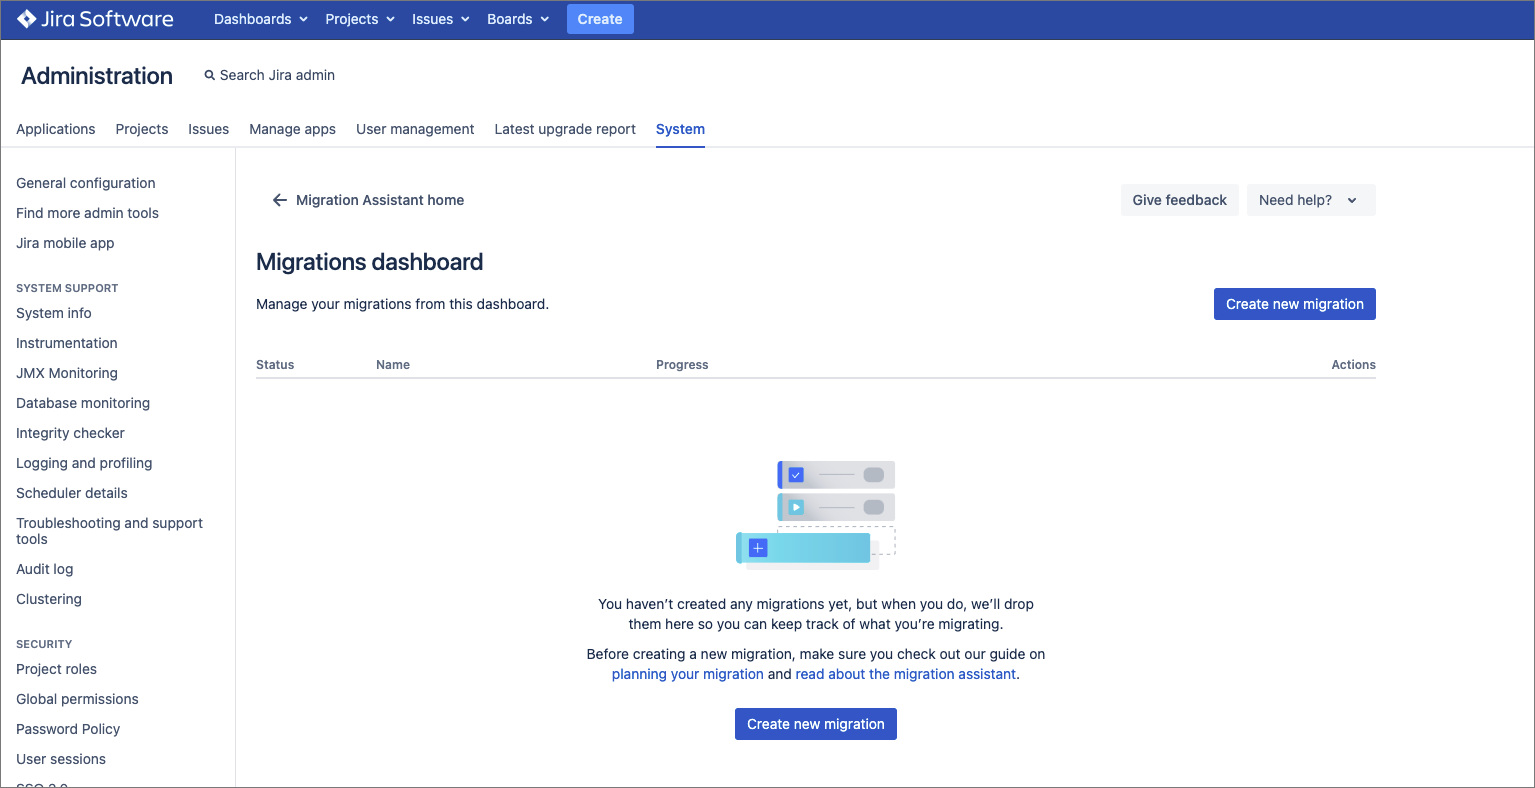
Migrate your data - when you are ready, on the Migrations dashboard, select Create new migration to begin your migration activity. Proceed through the corresponding prompts until you are ready to commence the migration.
On the step “Would you like to migrate your Apps?” - Select All to ensure JSU is included in your migration activity.
Review any possible errors relating to your migration before proceeding. Click Runto commence your Cloud migration which includes your JSU app data.
...