The installation process of Chat Widget is very easy. You can install it by inserting the Javascript into your website's code.
1. Copy your installation code to the clipboard
It can be find on Chat Settings > Website Live Chat

2. Open your website’s backend
Access the server on which your website is hosted with the tool allowing you to modify the files or log in to your respective platform Dashboard.
3. Locate the file that contains the </body> tag
While it might differ depending on how your website is built, the rule of thumb would be to
search for the files with .html or .php extension.
Usually, it will be either index.html or index.php,
but there might also be some additional subpages files.
4. Find the </body> tag & add the copied javascript code before it
Paste the copied JavaScript code snippet above the closing </body> tag of your website's source code.
If you need to add the logic that needs to be called only after the Chat initialisation, you can use initCallback from spartezSupportChat object:
| Code Block | ||||
|---|---|---|---|---|
| ||||
<script type="text/javascript">
  var spartezSupportChat = {
    portal: 1,
    cloud: {
      jiraId: '...',
      jiraUrl: '...',
      urls: {
        rest: 'https://chat-api.spartez-software.com',
        ws: 'https://chat-ws.spartez-software.com'
      },
    },
    initCallback: (async (chatLoader) => {
      console.log('Initializing Chat...');
      await chatLoader();
      // do something after Chat is fully loaded
    }),
}; |
5. Remember to save the changes
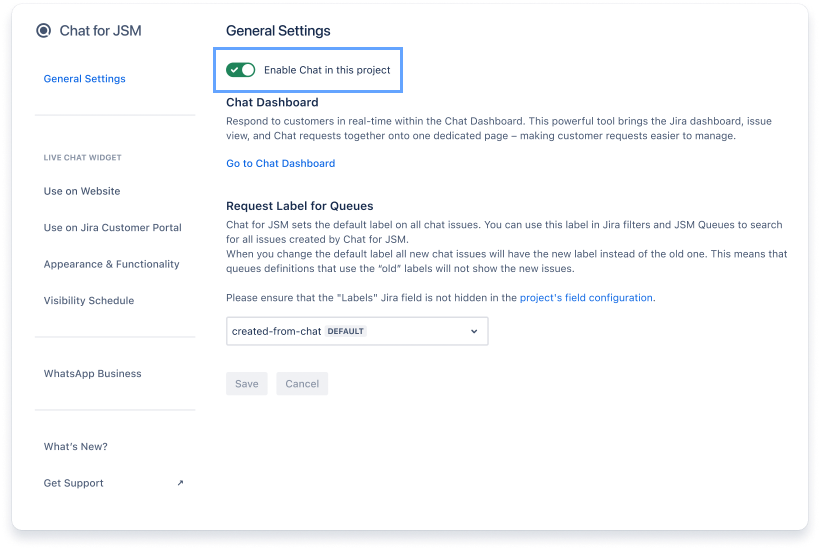
6. Make sure “Enable Chat in this project” toggle in Chat Settings is ON
It can be find on Chat Settings > General Settings
7. Check your website 🎉
Hooray! You have successfully integrated Chat Widget with your website! :)