...
| Table of Contents | ||||||
|---|---|---|---|---|---|---|
|
How to configure this rule
In this example, we are using an Approvals workflow that we configured for this use case. You can re-create this workflow in your instance in a few minutes. The main feature of the workflow is that from the
| Status | ||||
|---|---|---|---|---|
|
| Status | ||||
|---|---|---|---|---|
|
| Status | ||||
|---|---|---|---|---|
|
...
First, we want to set the criteria we'll use for determining what requires approvaland what can be streamlined to be automatically approved.
Part 1: Add the conditions
Create a draft of your project workflow. If you're unsure how to get to this page, follow the onboarding steps in Edit a Jira Workflow. You can then view your workflow in Text or Diagram mode. The steps in this use case represent Diagram mode. If you haven't already, switch the workflow viewer to Diagram mode.
Select the transition (arrow) connecting the
andStatus colour Blue title SUBMIT
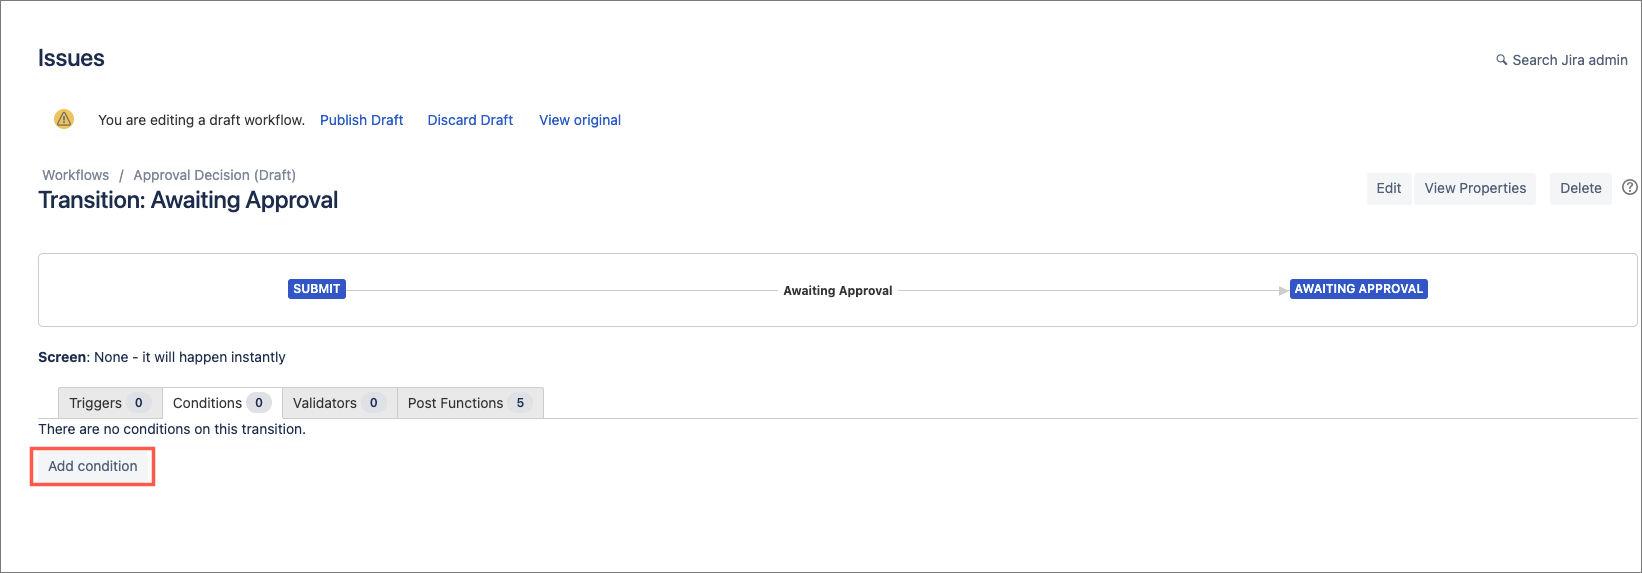
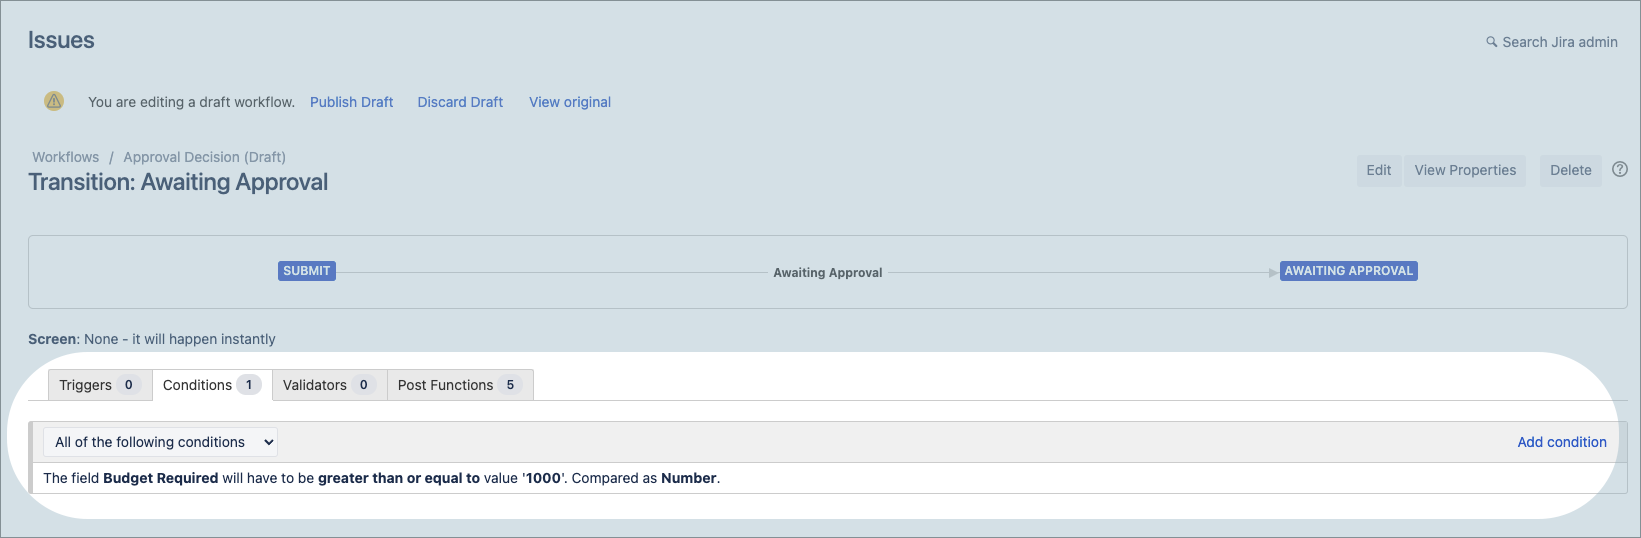
statuses to display the transition rule options menu.Status colour Blue title AWAITING APPROVAL Select Conditions from the options list to display the Conditions tab.
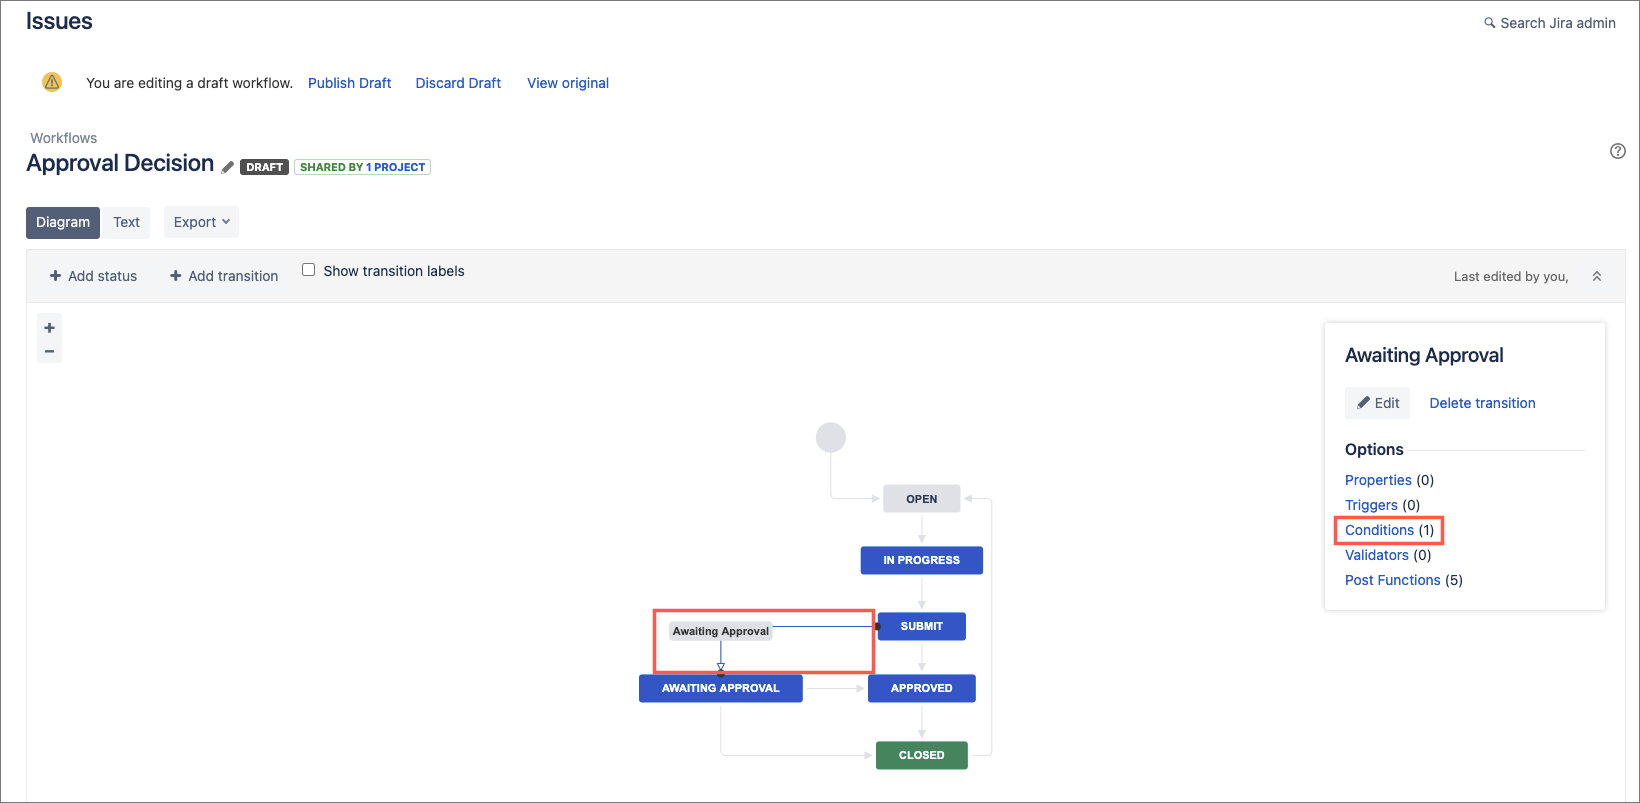
Select Add Condition.
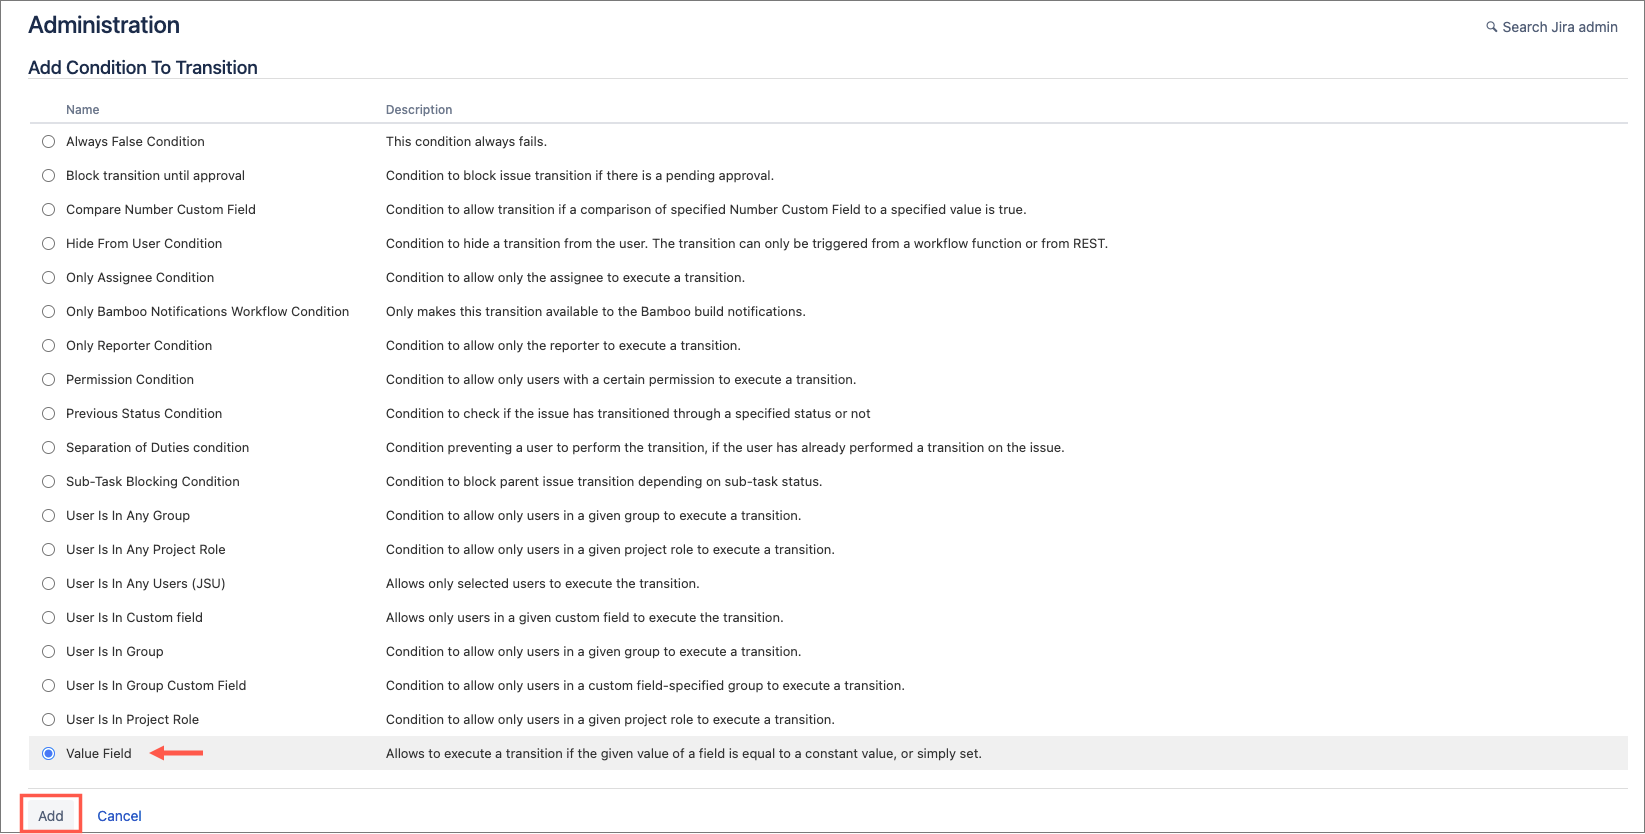
Select the Value Field condition then select Add at the bottom of the page.
Now, let's configure the condition to ensure that only the desired issues can transition to
.Status colour Blue title awaiting approval Field: Choose the field that you want to inspect to determine whether an approval can be streamlined for it. In our case, we have a field called
Budget Requiredthat we've chosen.Condition - Choose the type of comparison you will use when comparing with the value. In our case, we want to require approval when the Budget Required is greater than (or equal to) 1,000. So we need to choose
greater-than-or-equal-to / >=.Value: Type in the value you want to compare the field against. In our example, our chosen value is
1,000.Comparison Type: To ensure that the value (a number) can be compared against the field (also a number), we need to tell Jira that in this scenario that value is a
Number.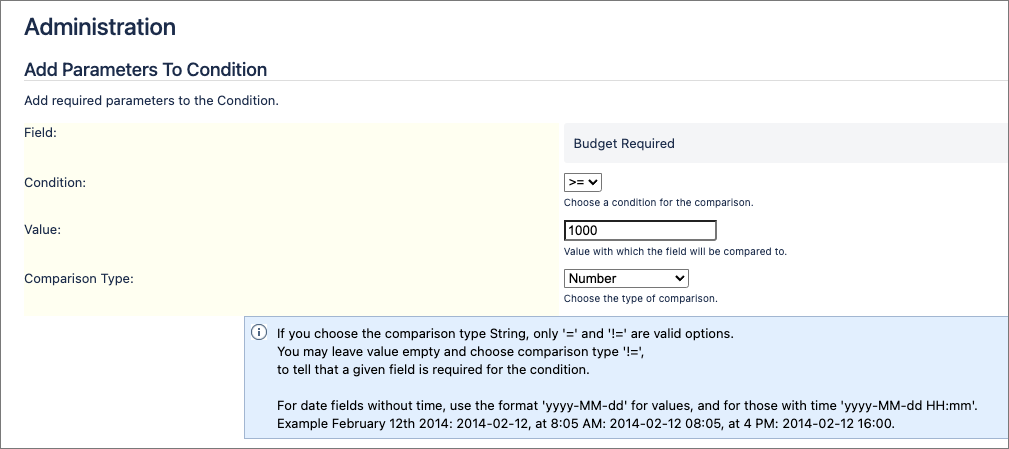
Select Add. A preview of the condition we've just configured displays.
Publish the draft workflow. Now let’s configure a rule for the other transition.
Return to the Approvals workflow and create a draft again.
Select the transition (arrow) connecting the
andStatus colour Blue title submit
statuses to display the transition rule Options menu.Status colour Blue title approved Repeat steps 3-7, only in the case, we set the Conditionfieldto less-than
<to ensure that issues with a Budget Required of less than 1,000 can be moved to
instead ofStatus colour Blue title Approved
.Status colour Blue title awaiting approval 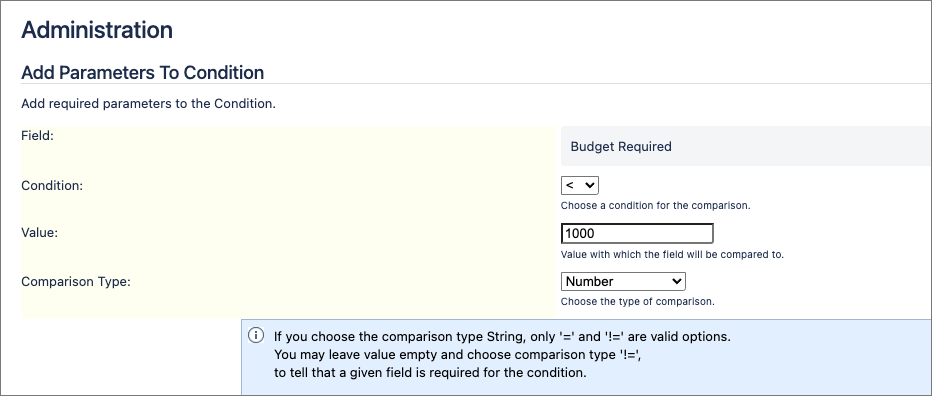
Select Add. A preview of the condition we've just configured displays as with the previous condition.
Publish the draft workflow then move to Part 2.
Part 2: Add JSU’s Followup Transition post function
Create another draft of the Approvals workflow.
In Diagram mode, select the transition (arrow) connecting
andStatus colour Blue title In progress
.Status colour Blue title submit Select Post Functionsfrom the Options menu.
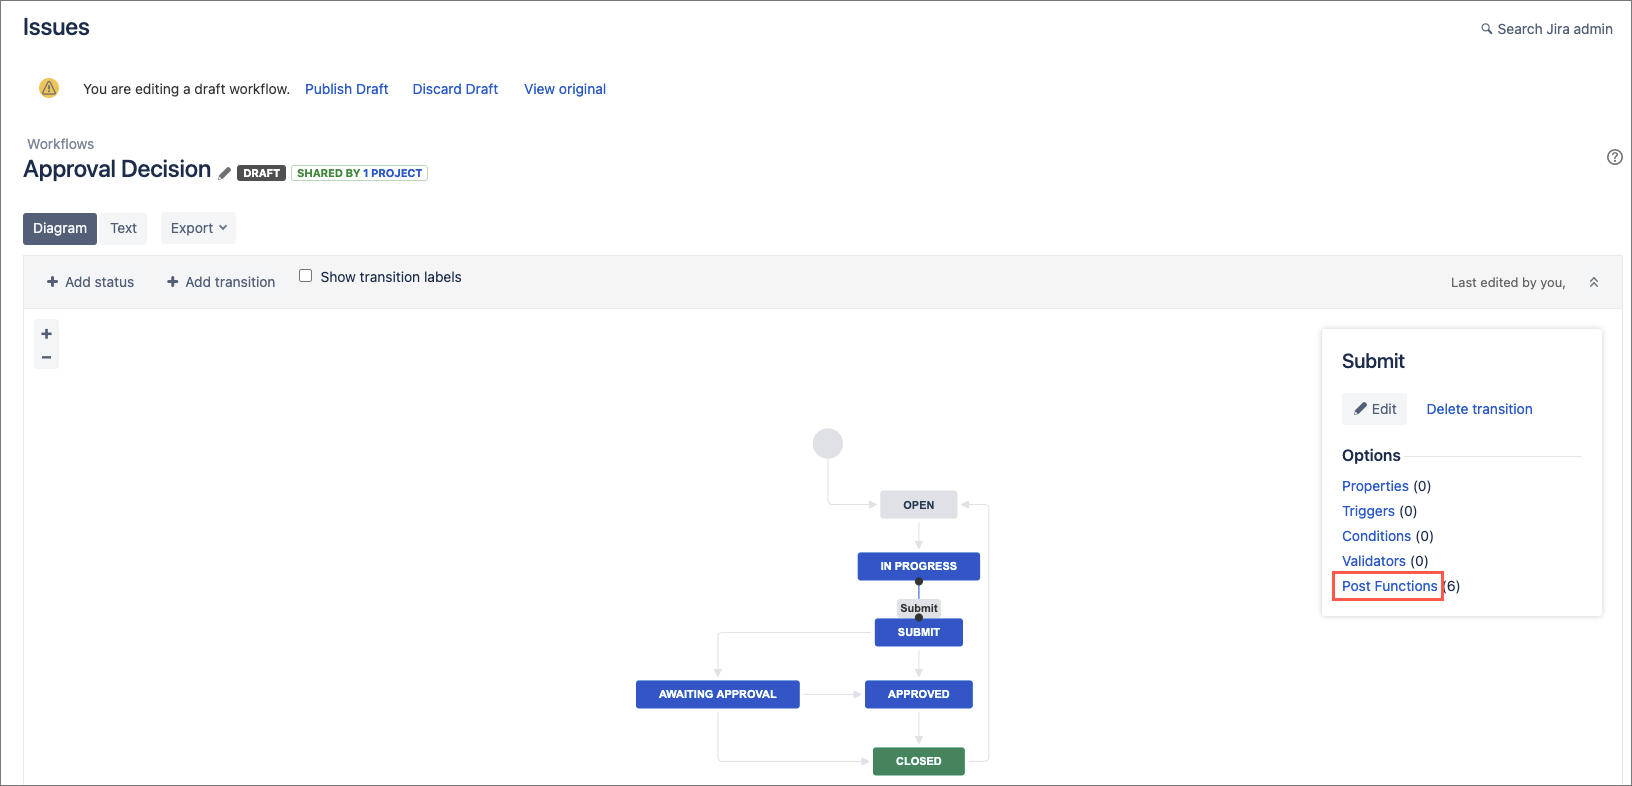
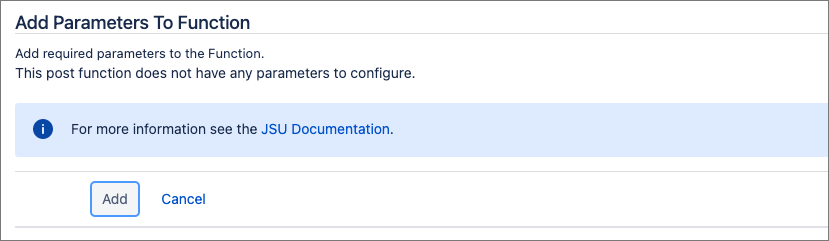
Select Add post function on the Post Functions tab.
Select Follow Up Transition (JSU) then select Add at the bottom of the page.
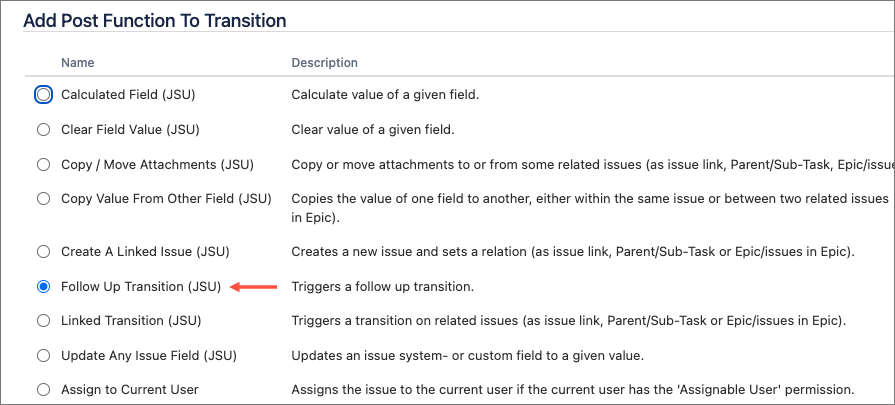
You do not need to configure the post function. Select Add again.
Publish the workflow.
Test the rule and see the automation in action
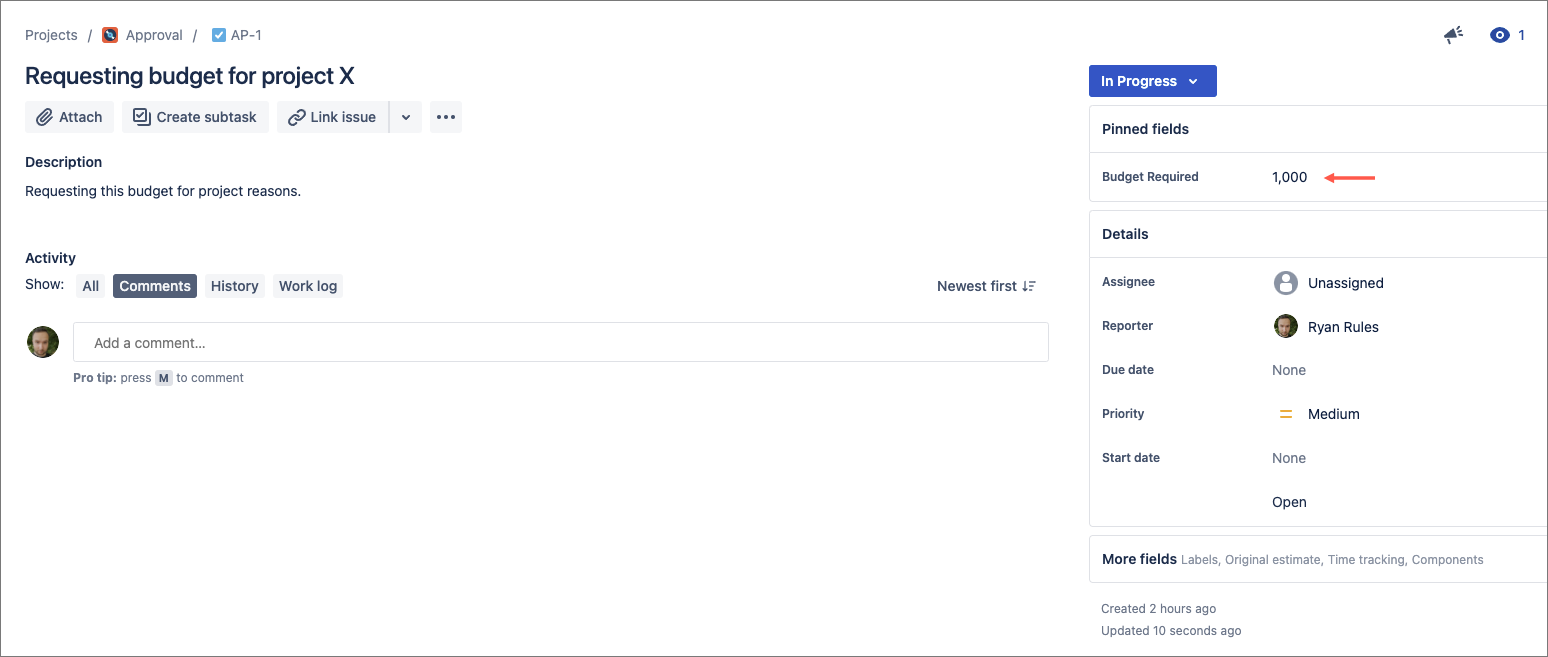
Go to an open issue in your Approvals project. In our case, we have an issue currently in
and with a Budget Requiredof 500.Status colour Blue title In progress 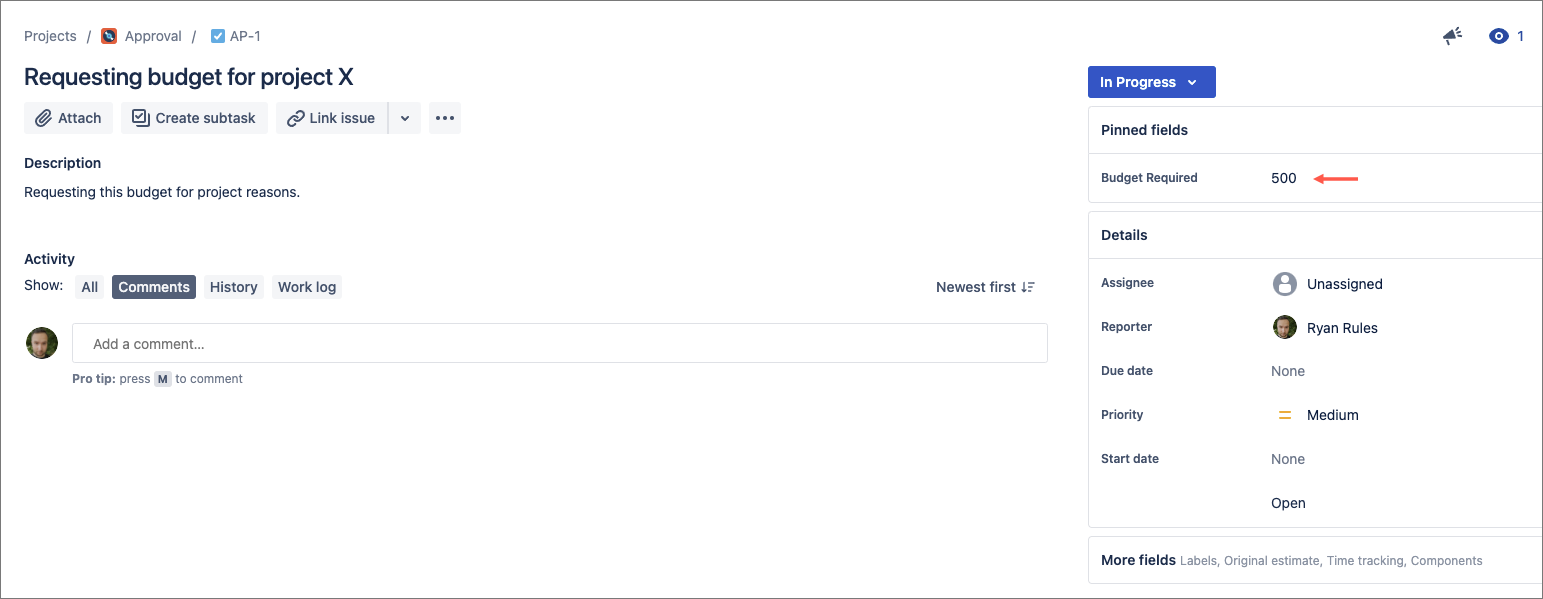
Let's move the status to
and watch the magic happen!Status colour Blue title submit 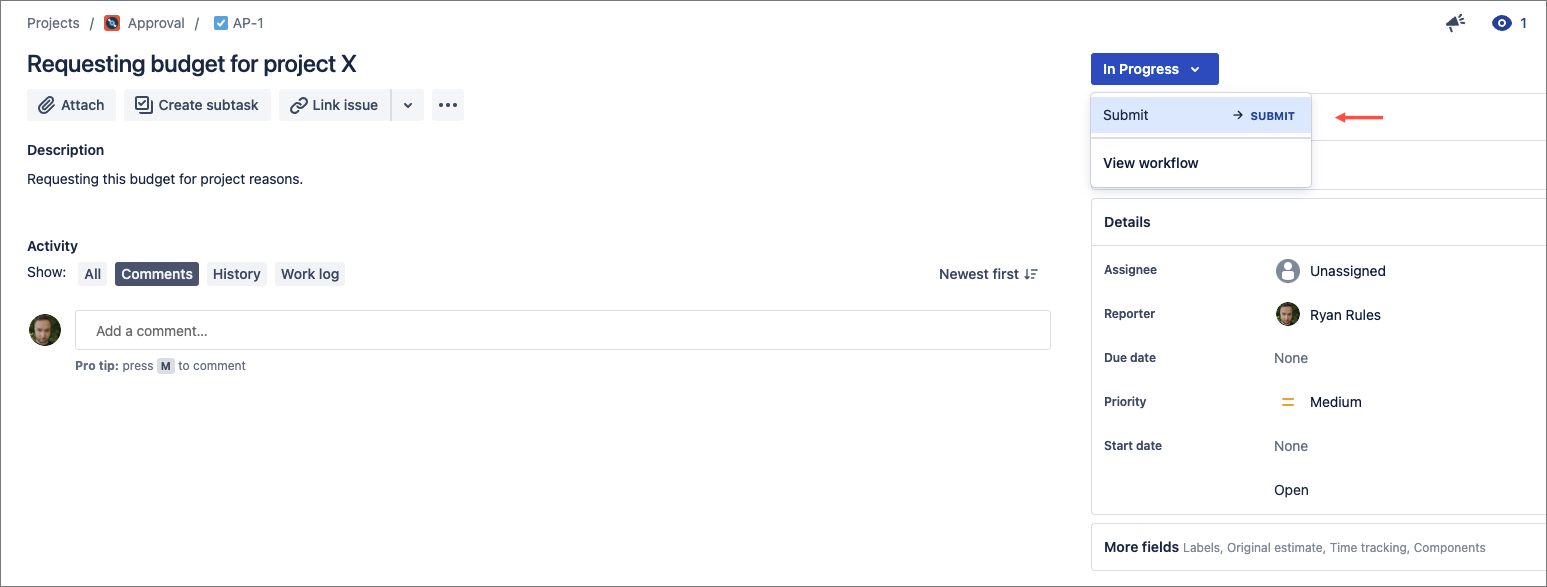
The issue moves to the
status, then a second (or two) later, automatically to theStatus colour Blue title submit
status!Status colour Blue title approved 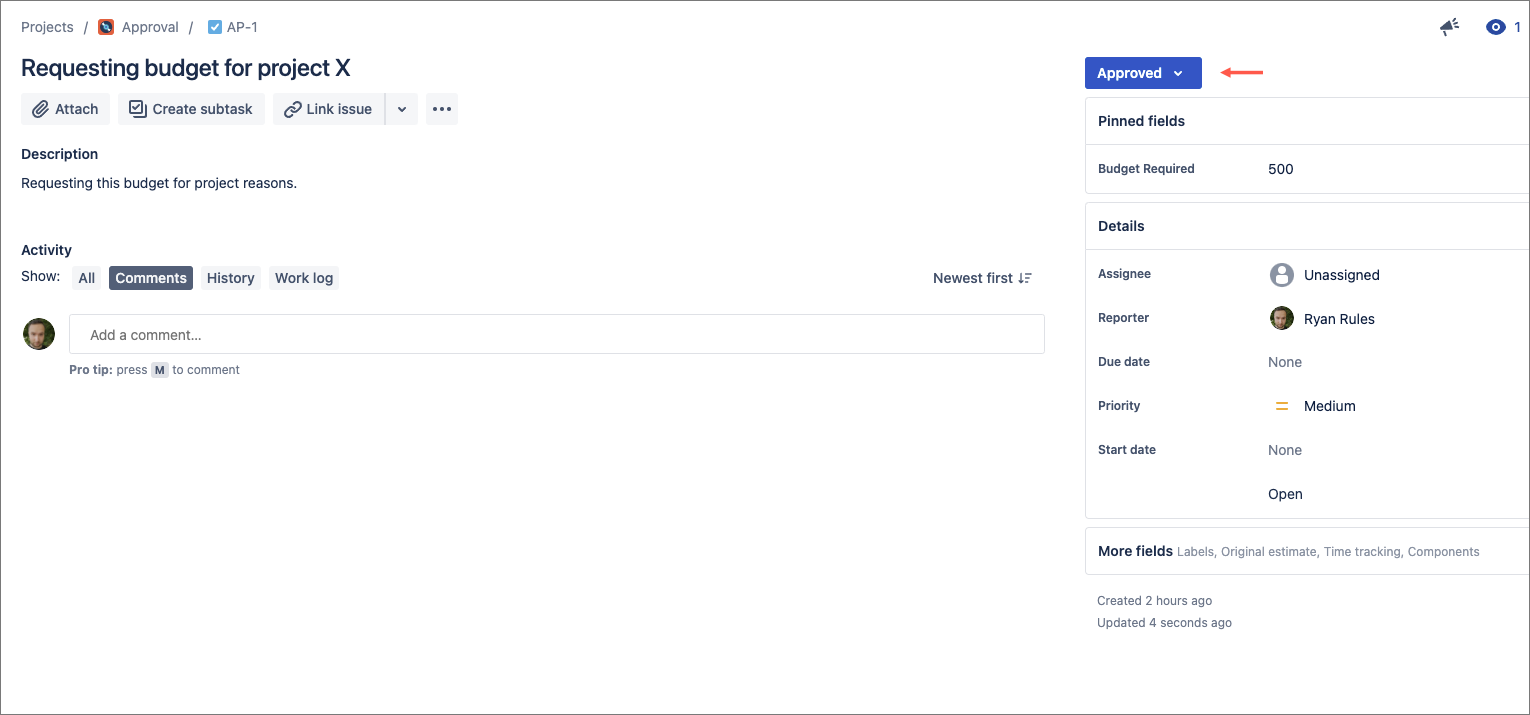
HINT: The issue history confirms this streamlined transition occurred.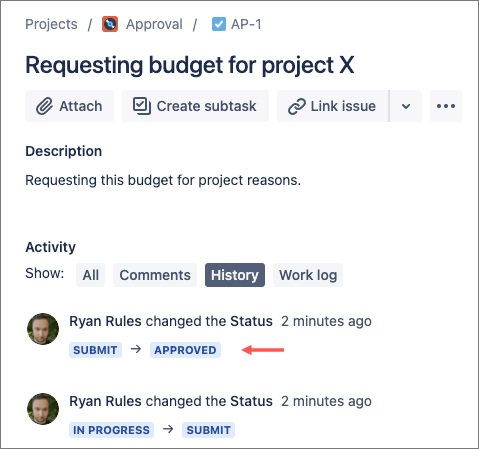
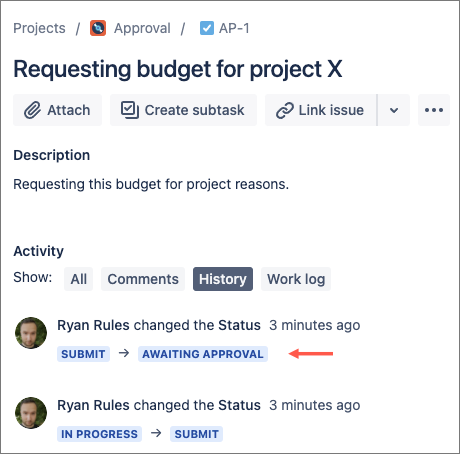
Now try the same scenario, but where the Budget Required is 1,000, or more.
Let's move this issue to
just like we did before.Status colour Blue title submit 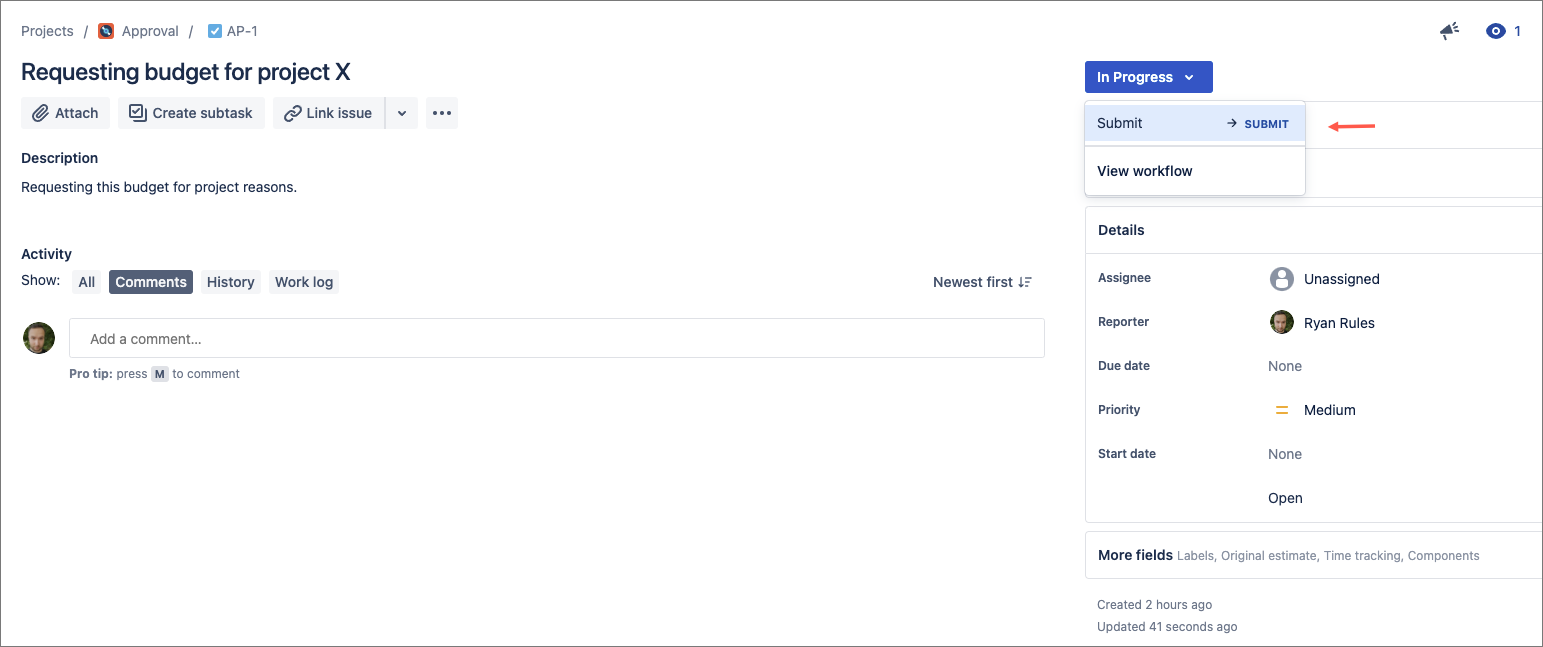
Again, the issue is forwarded to its appropriate next transition; in this case, as the Budget Required valueis greater-than-or-equal-to 1,000, it's moved to
.Status colour Blue title awaiting approval 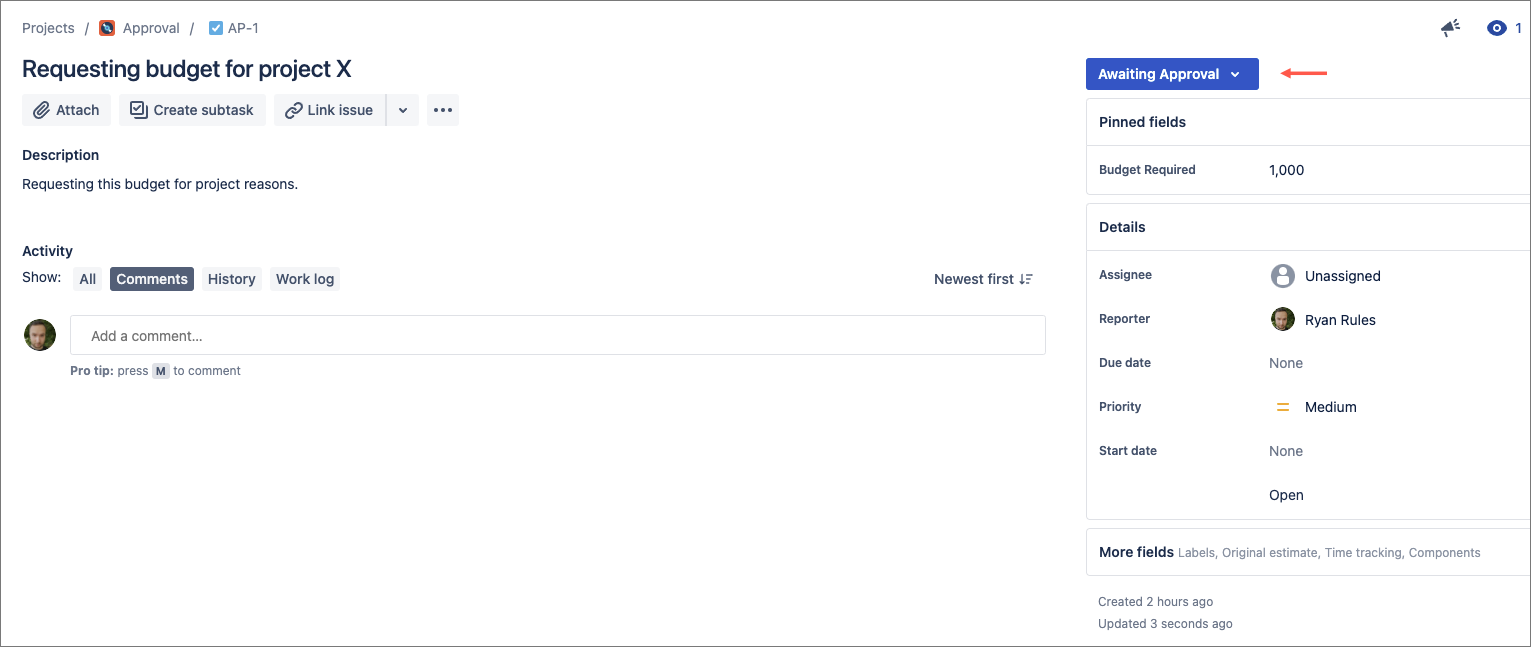
The issue history confirms that JSU helped us streamline the approvals here.
There you have it; streamlining your approval processes in Jira just got a lot easier thanks to the power of JSU.
...