Creating support requests in HelpDesk+ for Teams can be done through various methods. Here's a step-by-step guide on how to initiate a support request using different approaches:
| Table of Contents |
|---|
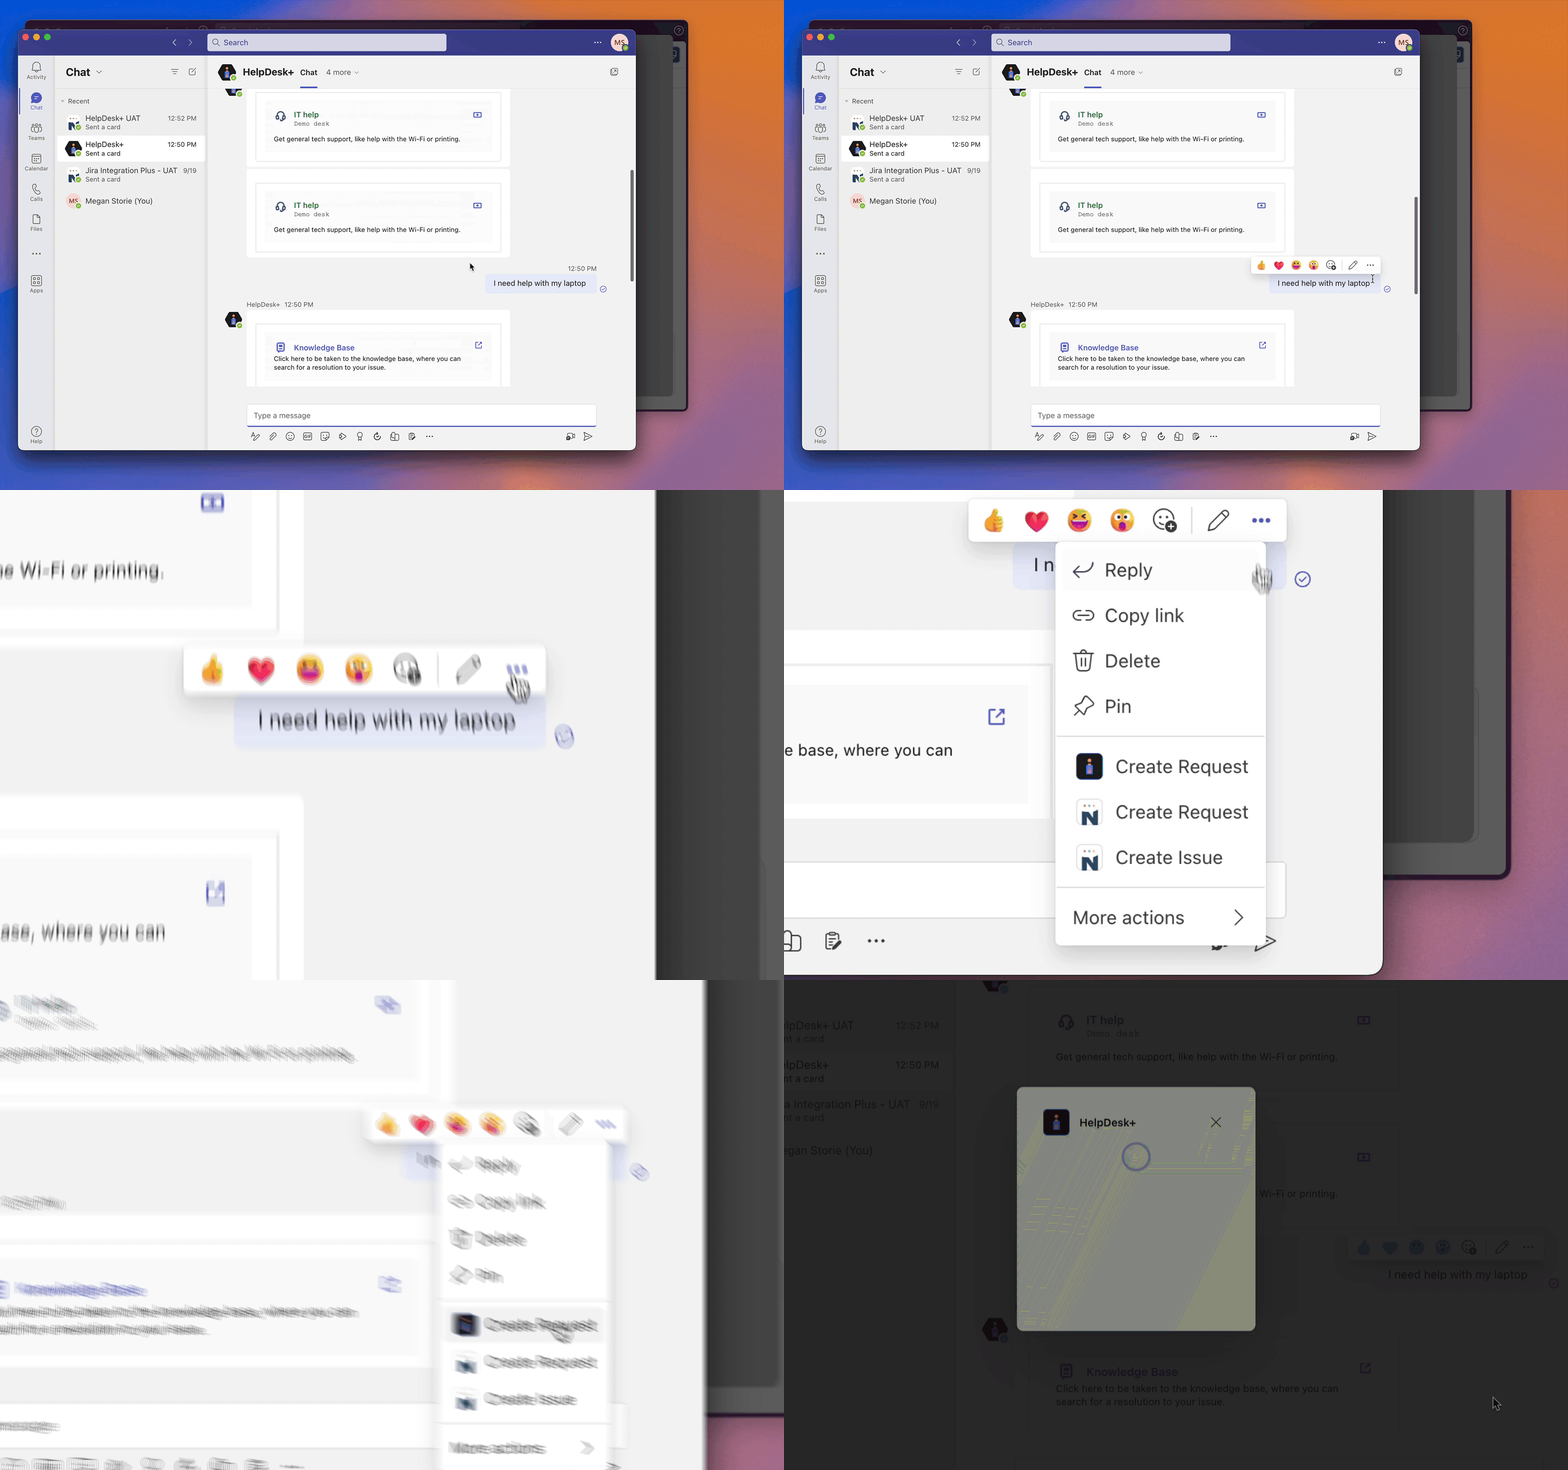
Use the “Create Request" message action
In the Chat or Channel select a message you want to turn into a support request
Select the three dots button
Click on the "Create Request" button
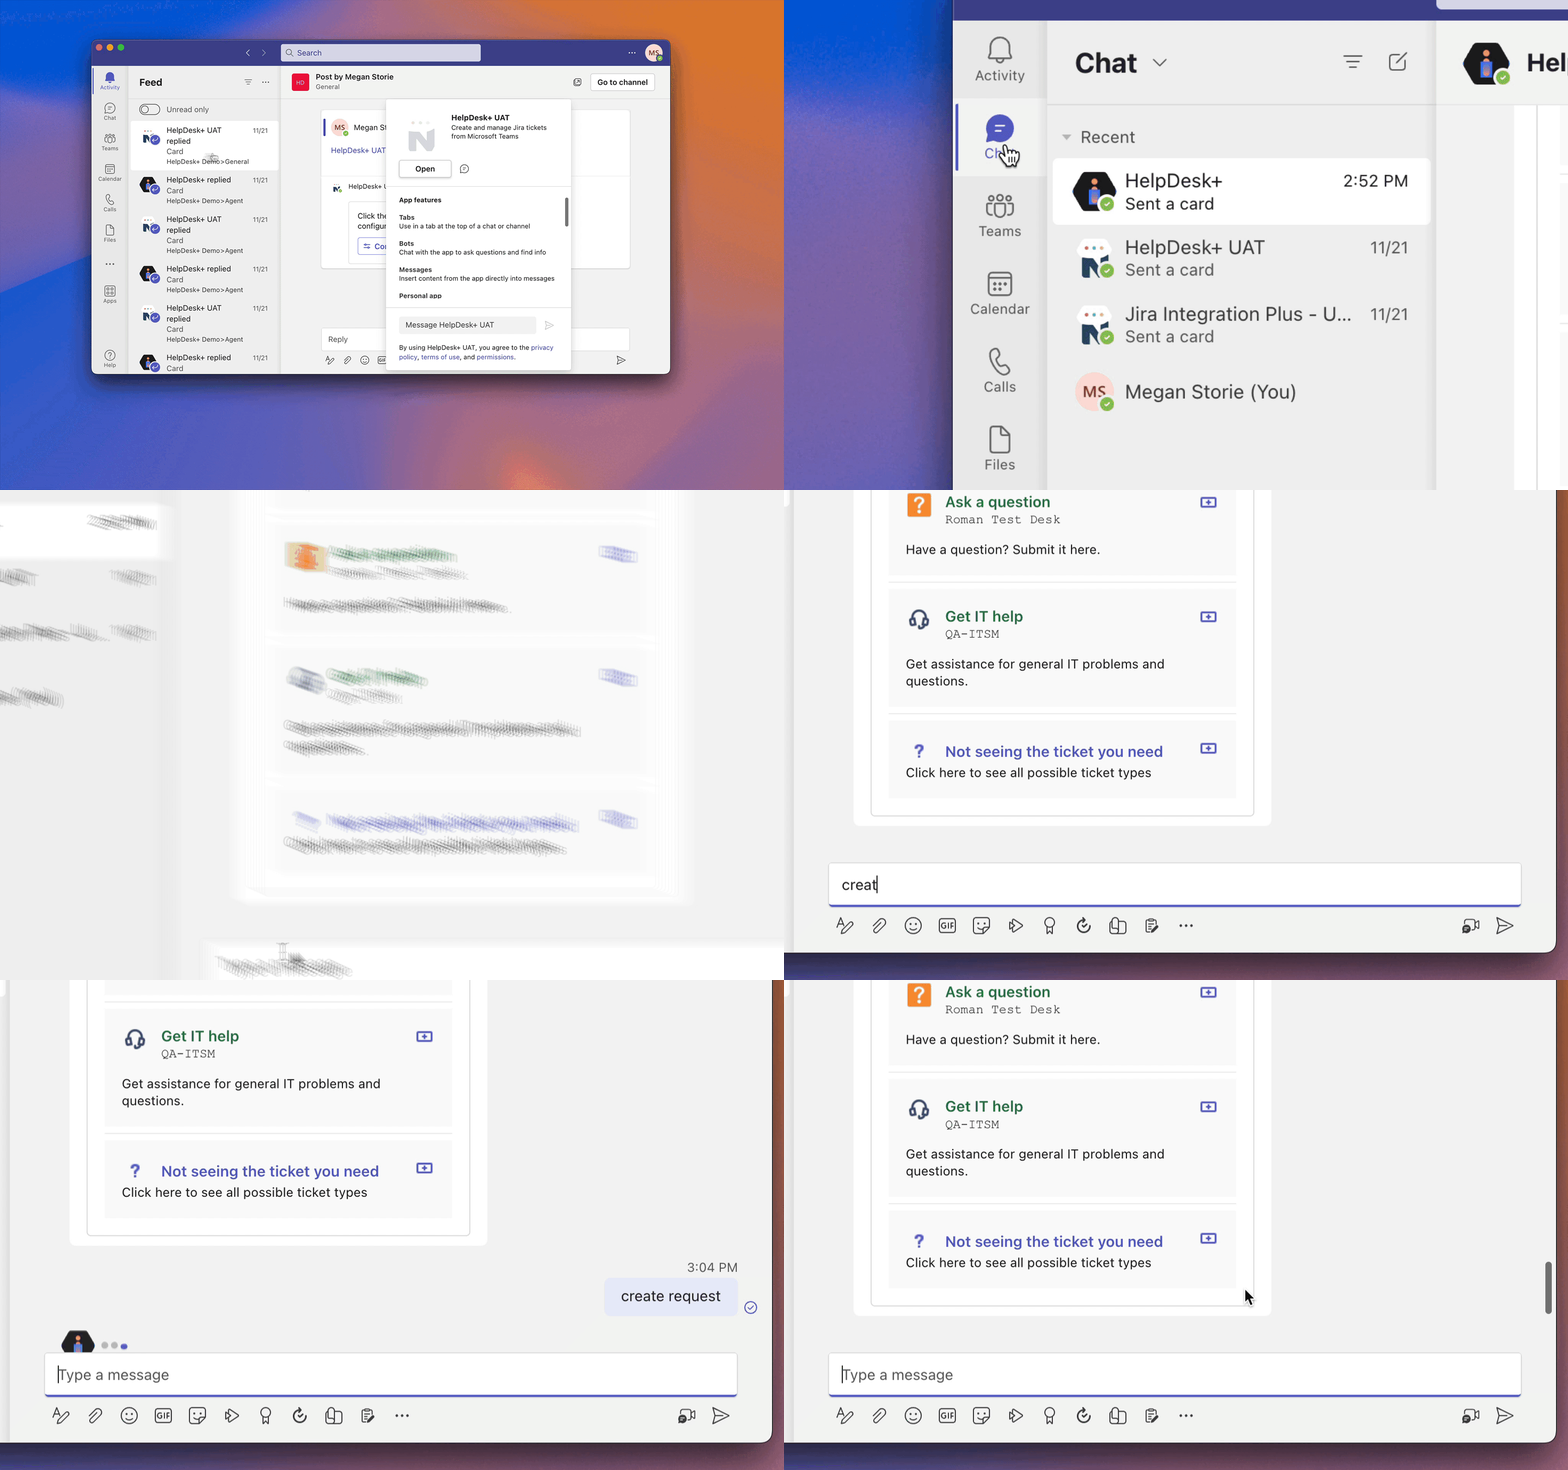
Chat with the Bot
Navigate to the chat icon
Type "create request"
Select from the following suggested support requests or select "Not seeing the ticket you need?"
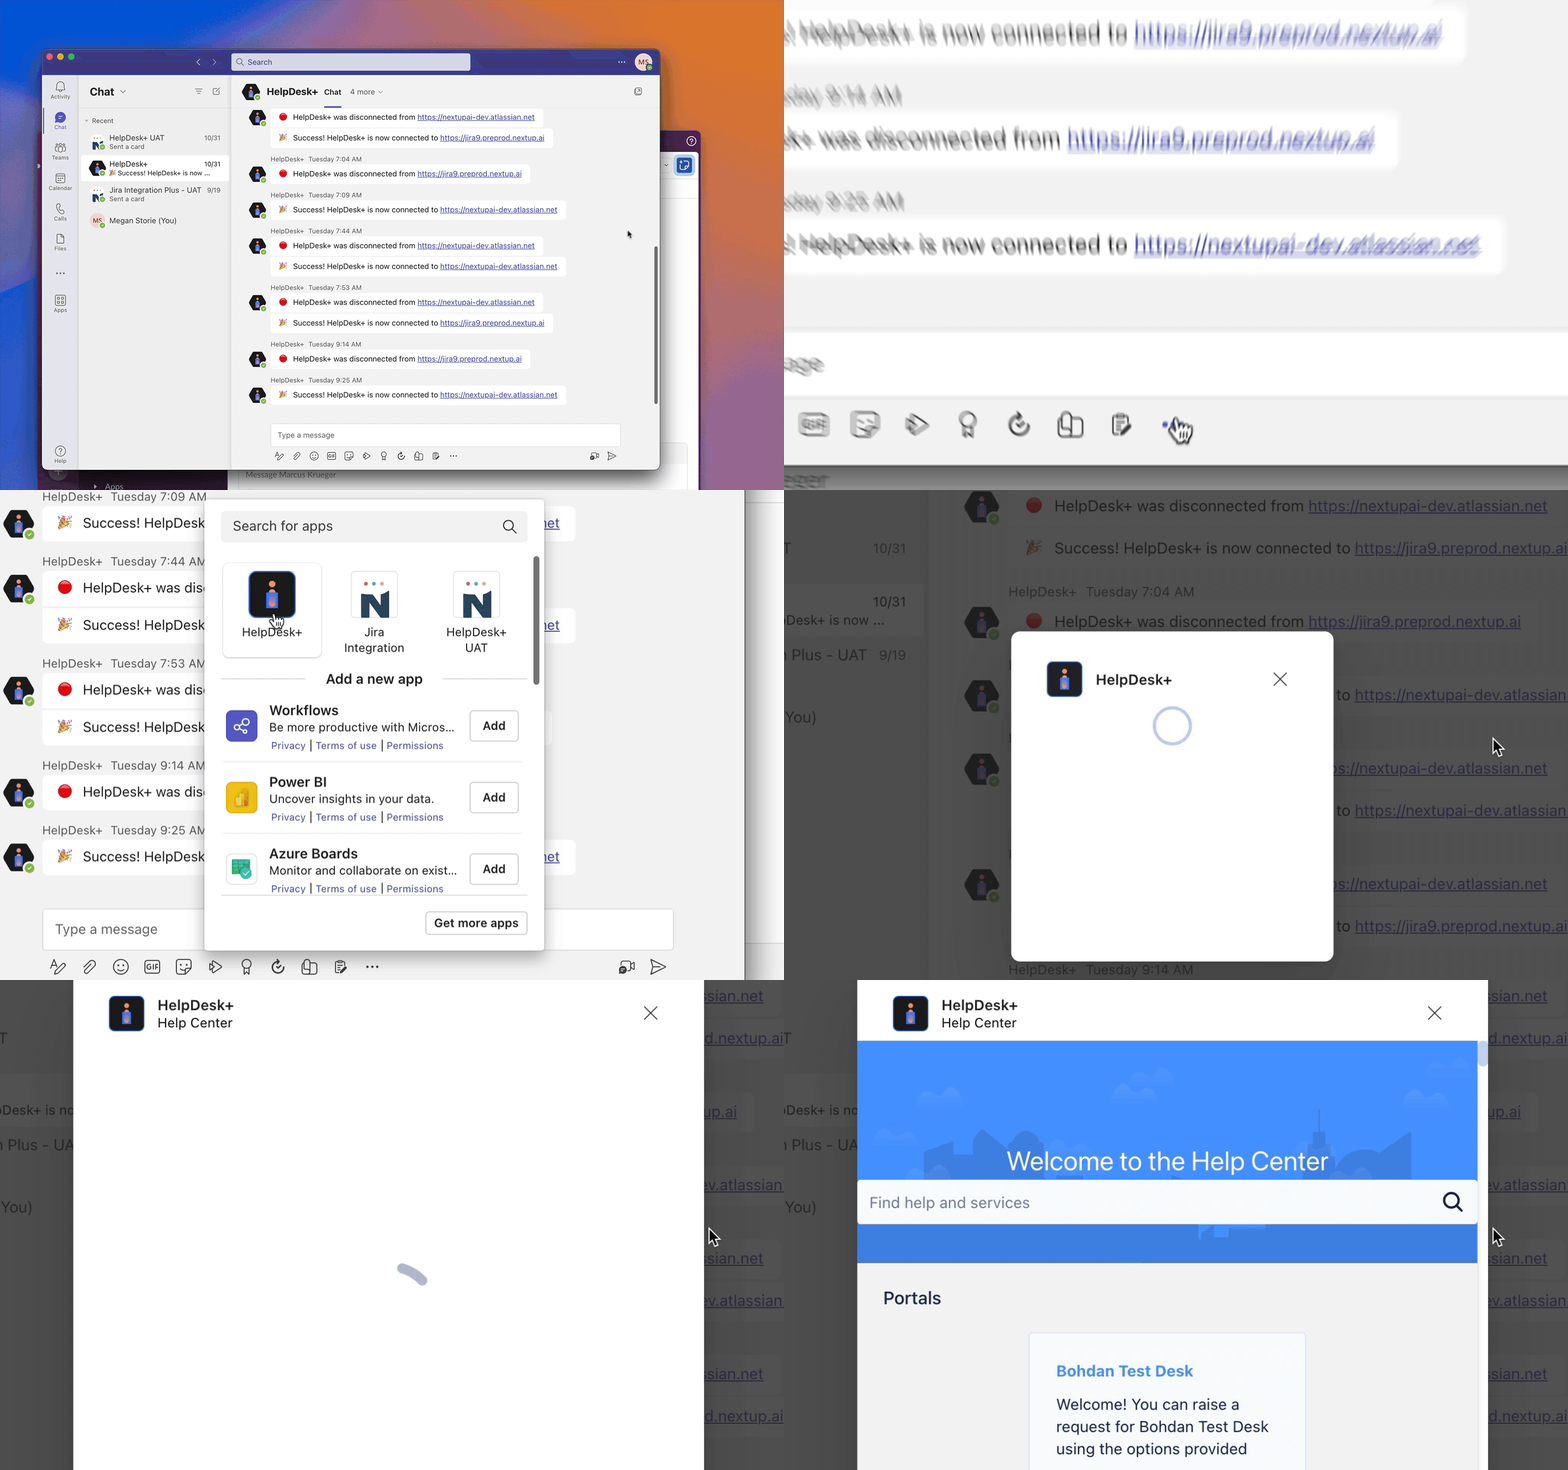
Use the “Create Request” button in the app’s compose action
Navigate to the chat
Click on the three dots button located below the message input field
Select the HelpDesk+ Icon
Select the “create request” button
Search for an Issue Type from message compose
Navigate to the chat
Click on the three dots button located below the message input field
Click on the Helpdesk+ Icon
Search for specific issue type or write “support”
Once the correct issue type is displayed, click on the issue type card
Fill out the required fields and then click “submit”
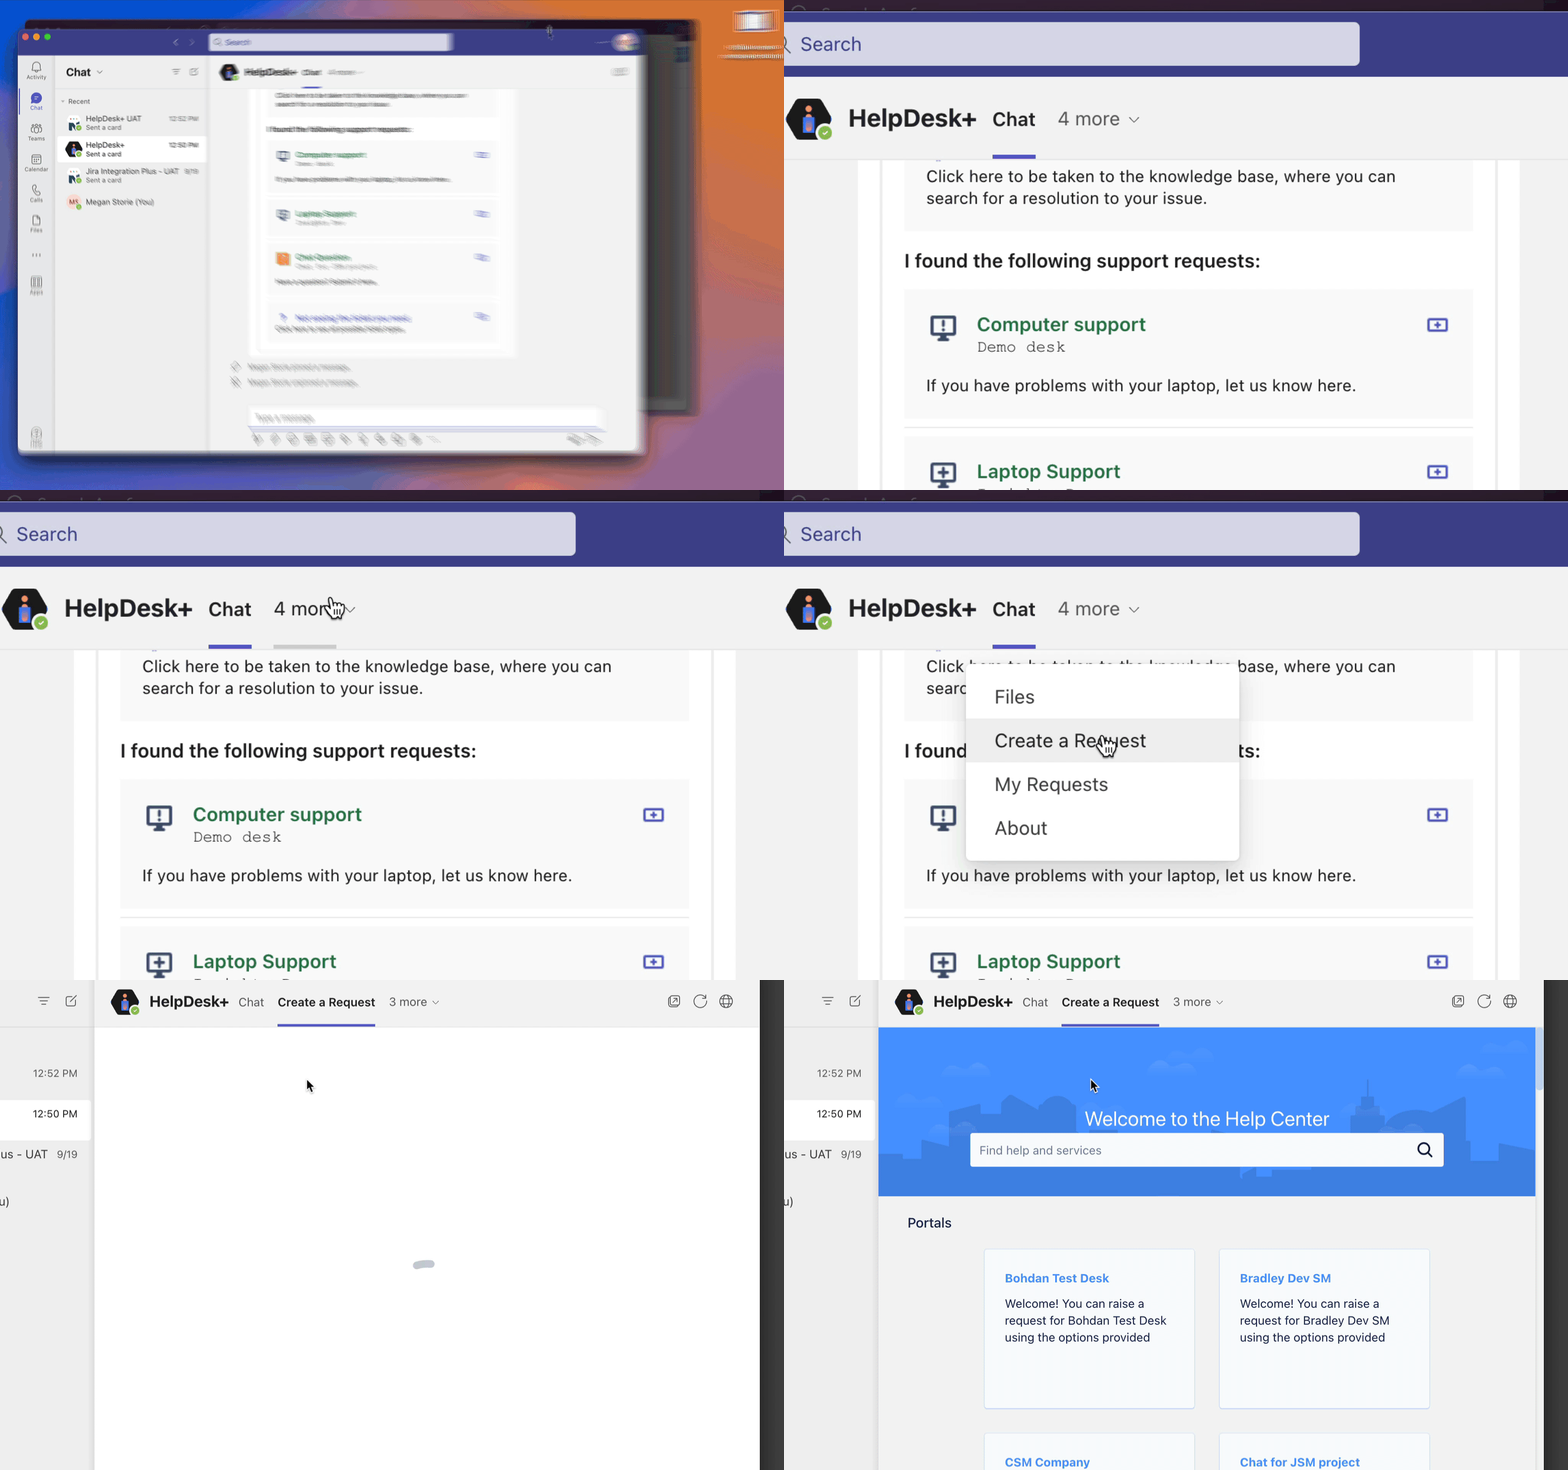
Use the “Create a Request” tab in the app
Switch to the HelpDesk+ Chat or open the App
Click on the Create a Request tab at the top of the application
You will be presented with the same issue types you have access to in the Jira Help Center
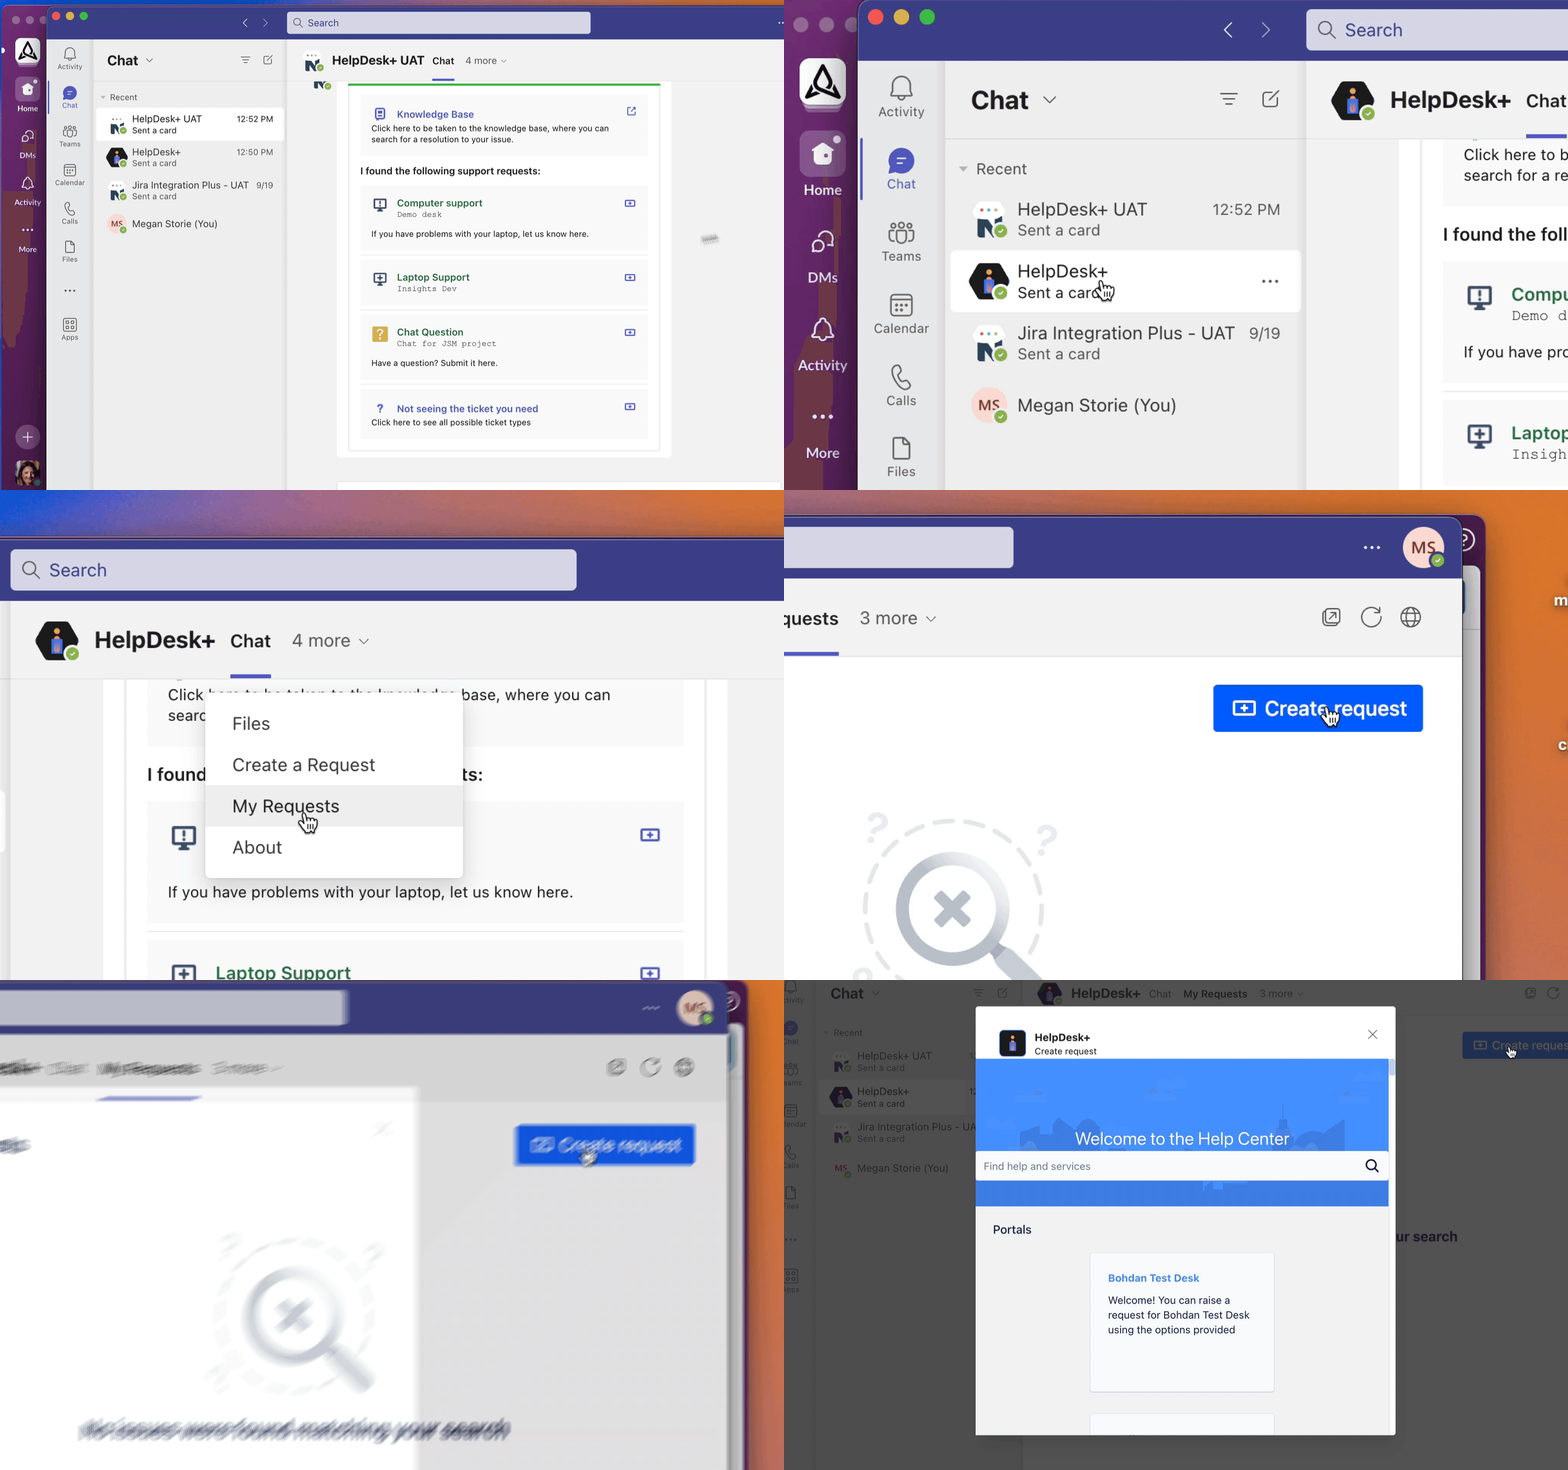
Find the “Create request” button in the app’s “My Requests” screen
When viewing the “My Requests” tab in the app, find the “Create request” button in the upper-right
You can access this tab to view your requests by simply locating the app and selecting the “My Requests” tab
